Manufacturing procedures are frequently changed because each product variation has unique qualities. Odoo 19's new capabilities have made it possible to route the production of different variations to many work centers with ease and accuracy. This capability makes production processes more flexible, especially for businesses that sell products that can be modified or customized. Instead of depending on a single, static routing for all versions, businesses can now design bespoke procedures to meet the unique requirements of each version. This ensures reduced shop floor bottlenecks, improved resource allocation, and improved production scheduling. In this article, we'll take a closer look at how Odoo 19 enables variant-based routing and how to configure it.
We'll also examine practical uses and the benefits this provides in complex production environments. By the end, you'll understand how to maximize your manufacturing process with this powerful Odoo 19 feature.
Let's use the manufacturing of a Shirt as a very simple example. Here, the company sells a few variations of the table. The first one is a White Shirt, though there are other Colors as well.
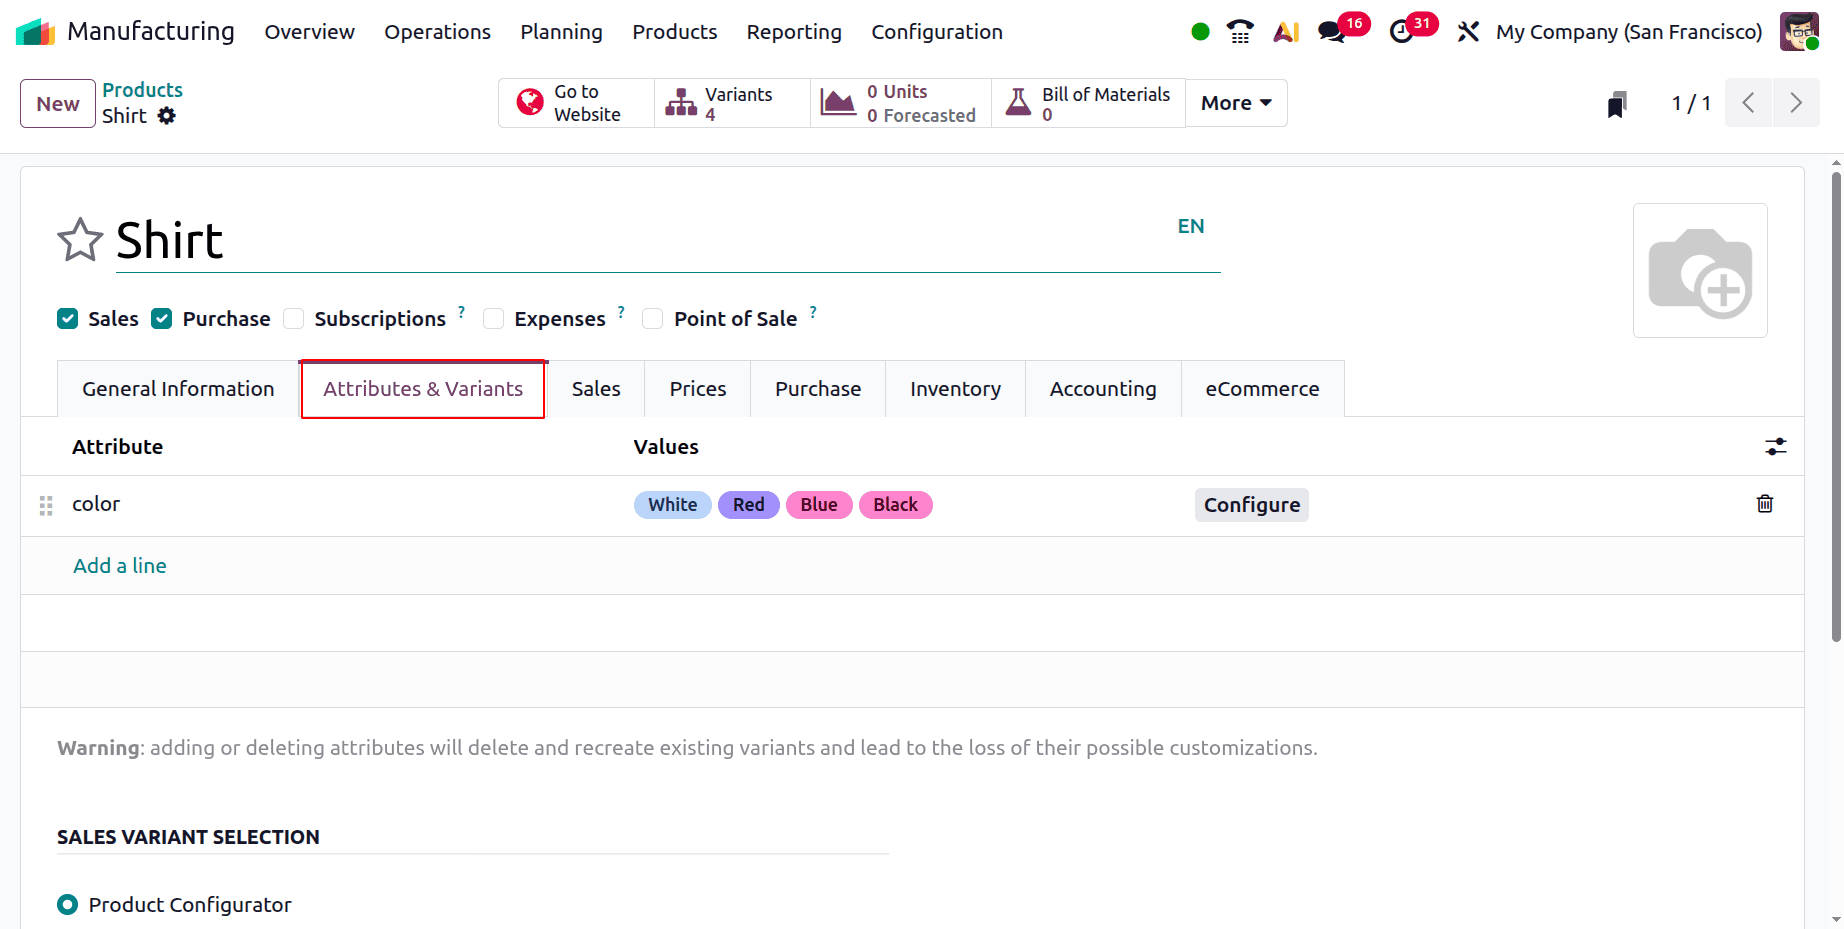
Cloth and buttons are the components in this case. Additionally, the procedure is merely stitching. However, another procedure coloring is required for the other variations except white.
So let's draft a fresh Bill of Materials for the shirt. In this case, the user generates a single bill of materials that is utilized for each of the several shirt variations.
From the product menu, select the Bill of Material. Next, press the "New" button.
First, include the product name. Since the bill of materials is prepared for both versions and the number stated here is one, neither variant is selected. Manufacturing this product should be the BoM type. Add the Cloth, Colours and Buttons under the components tab.
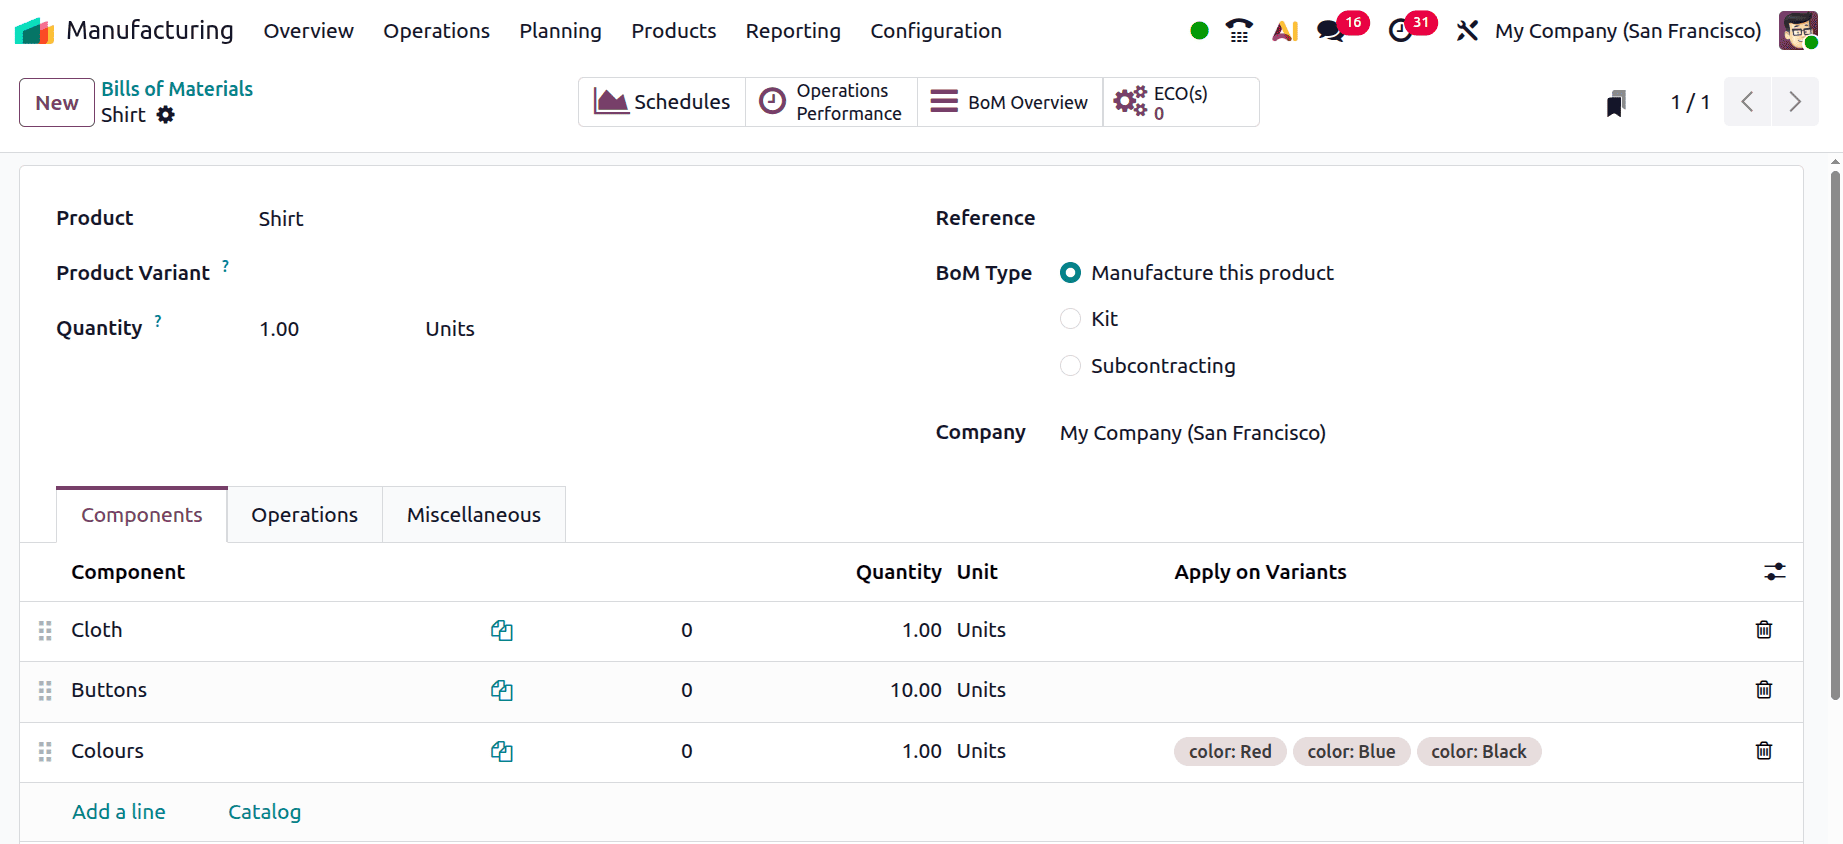
However, in this case, only white shirts are employed in the manufacturing process. Therefore, the user ought to include that in the bill of materials. As seen in the screenshot above, there is a field called Apply on Variants that mentions the Shirt variant and the components used there.
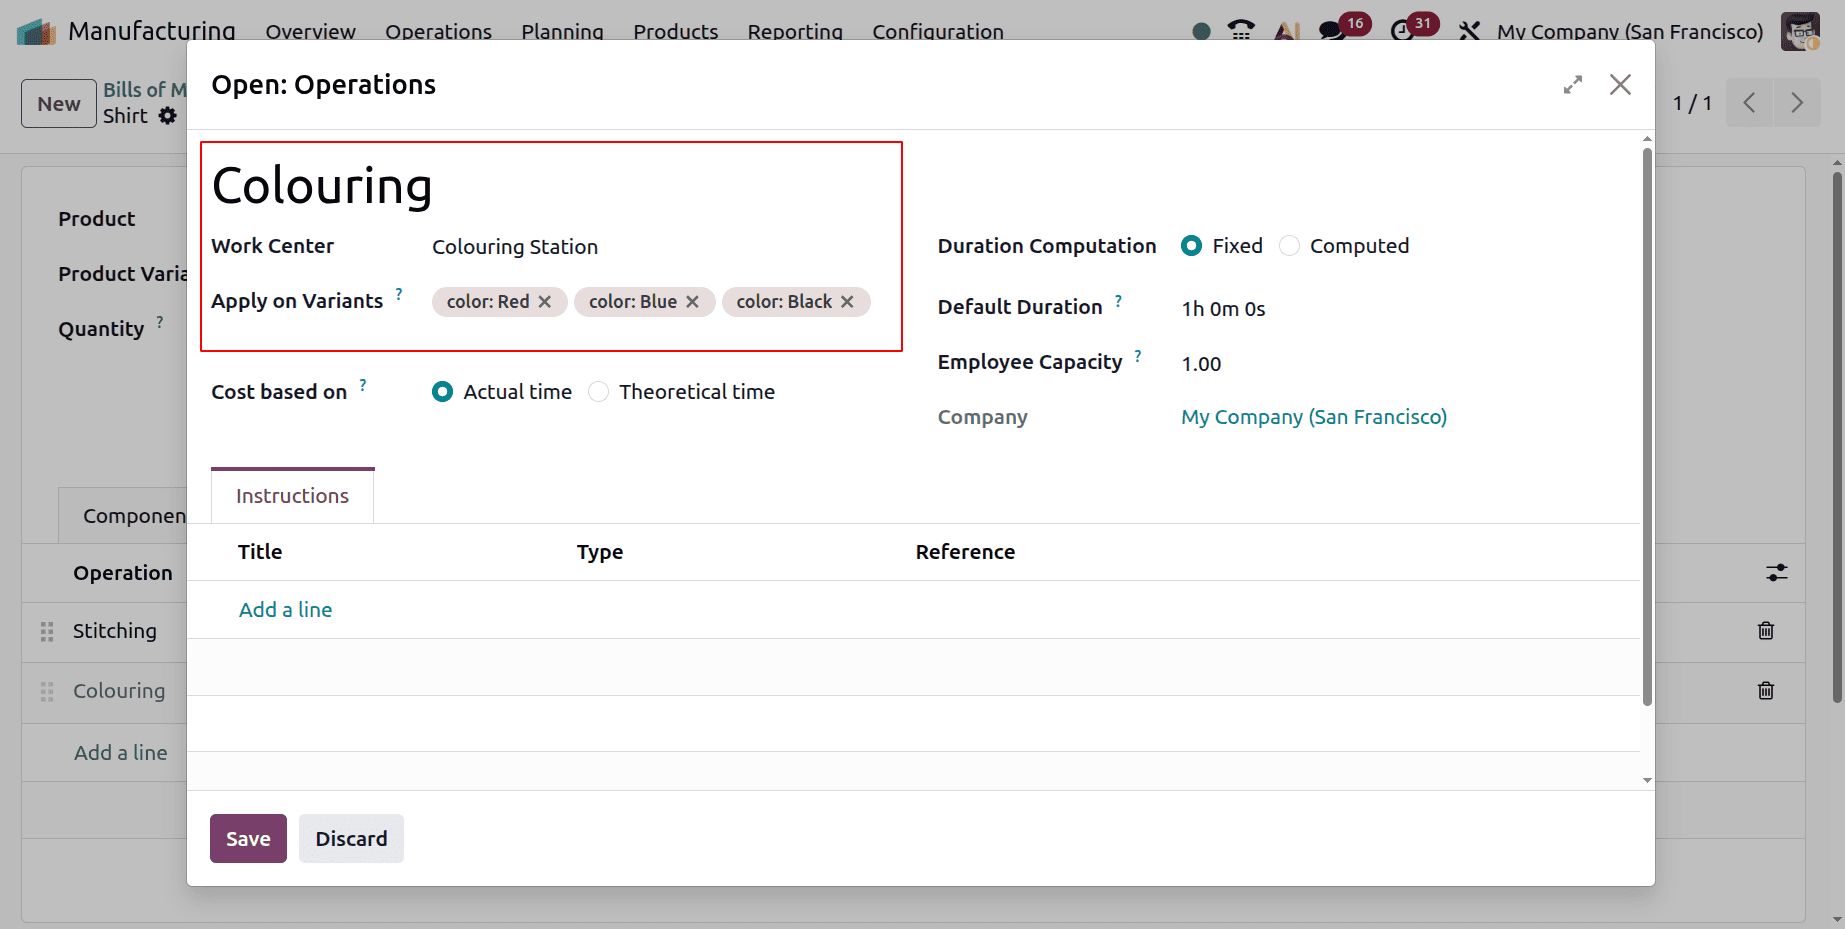
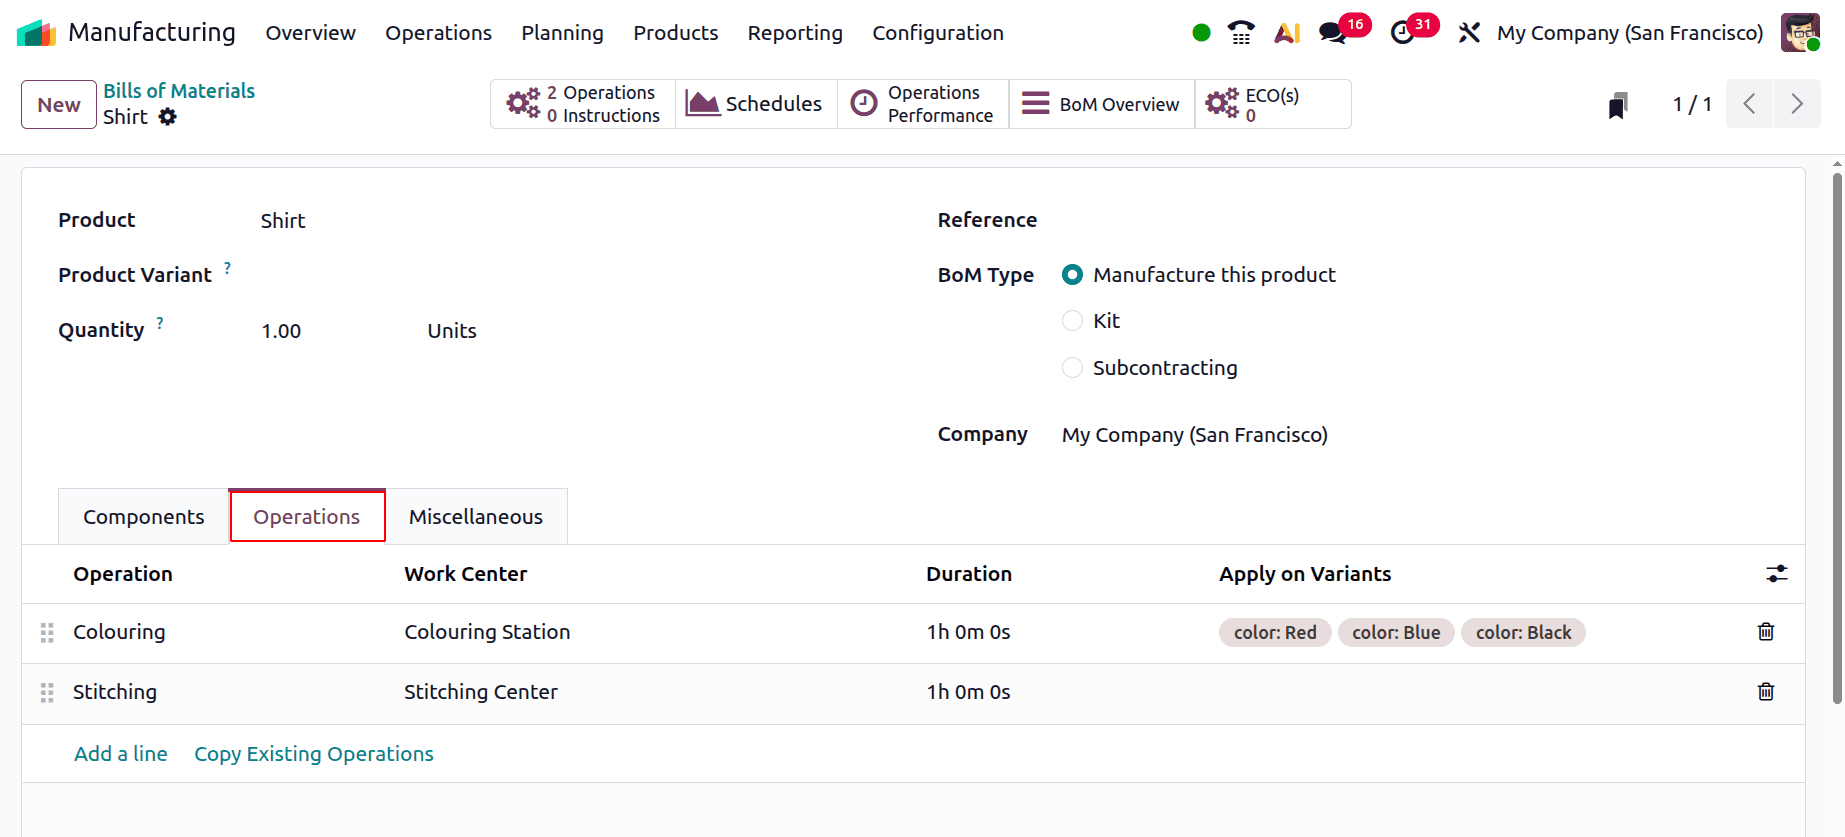
The steps required to produce the shirt are listed on the next tab, Operations. Mention the processes such as Stitching and colouring.
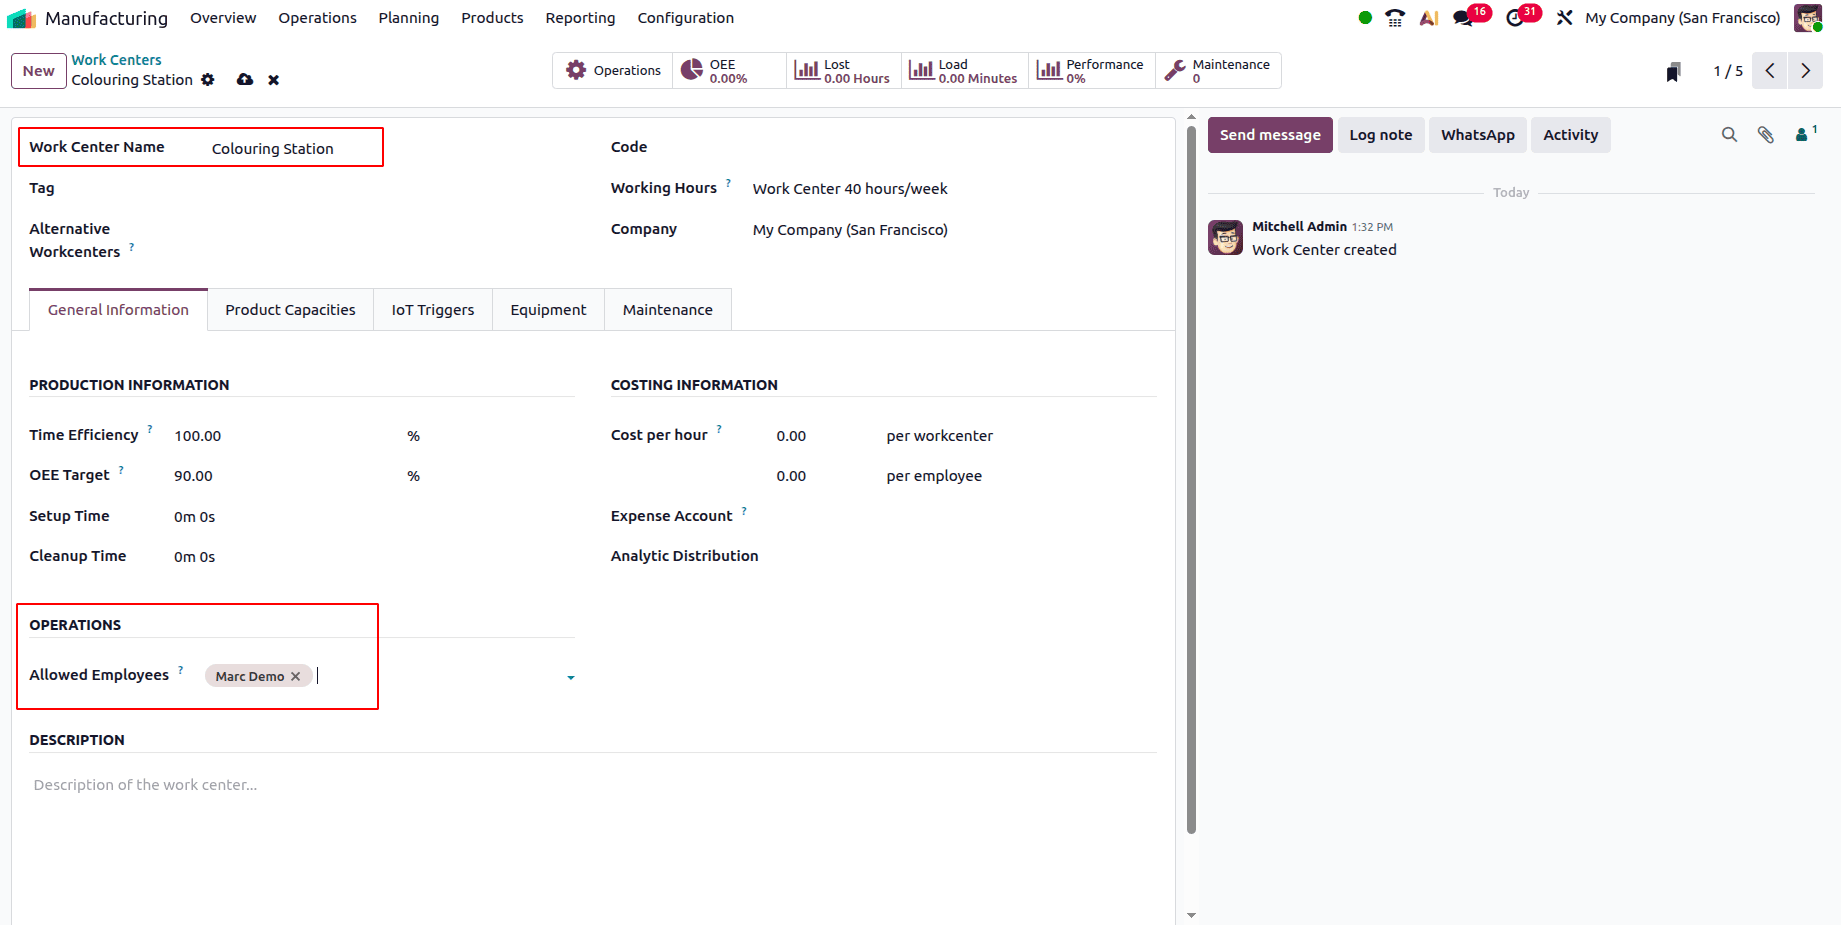
Here, the Colouring Station workcenter is where the colouring takes place. Additionally, stitching is a common process for all kinds. So add the Product Variants there as shown below.
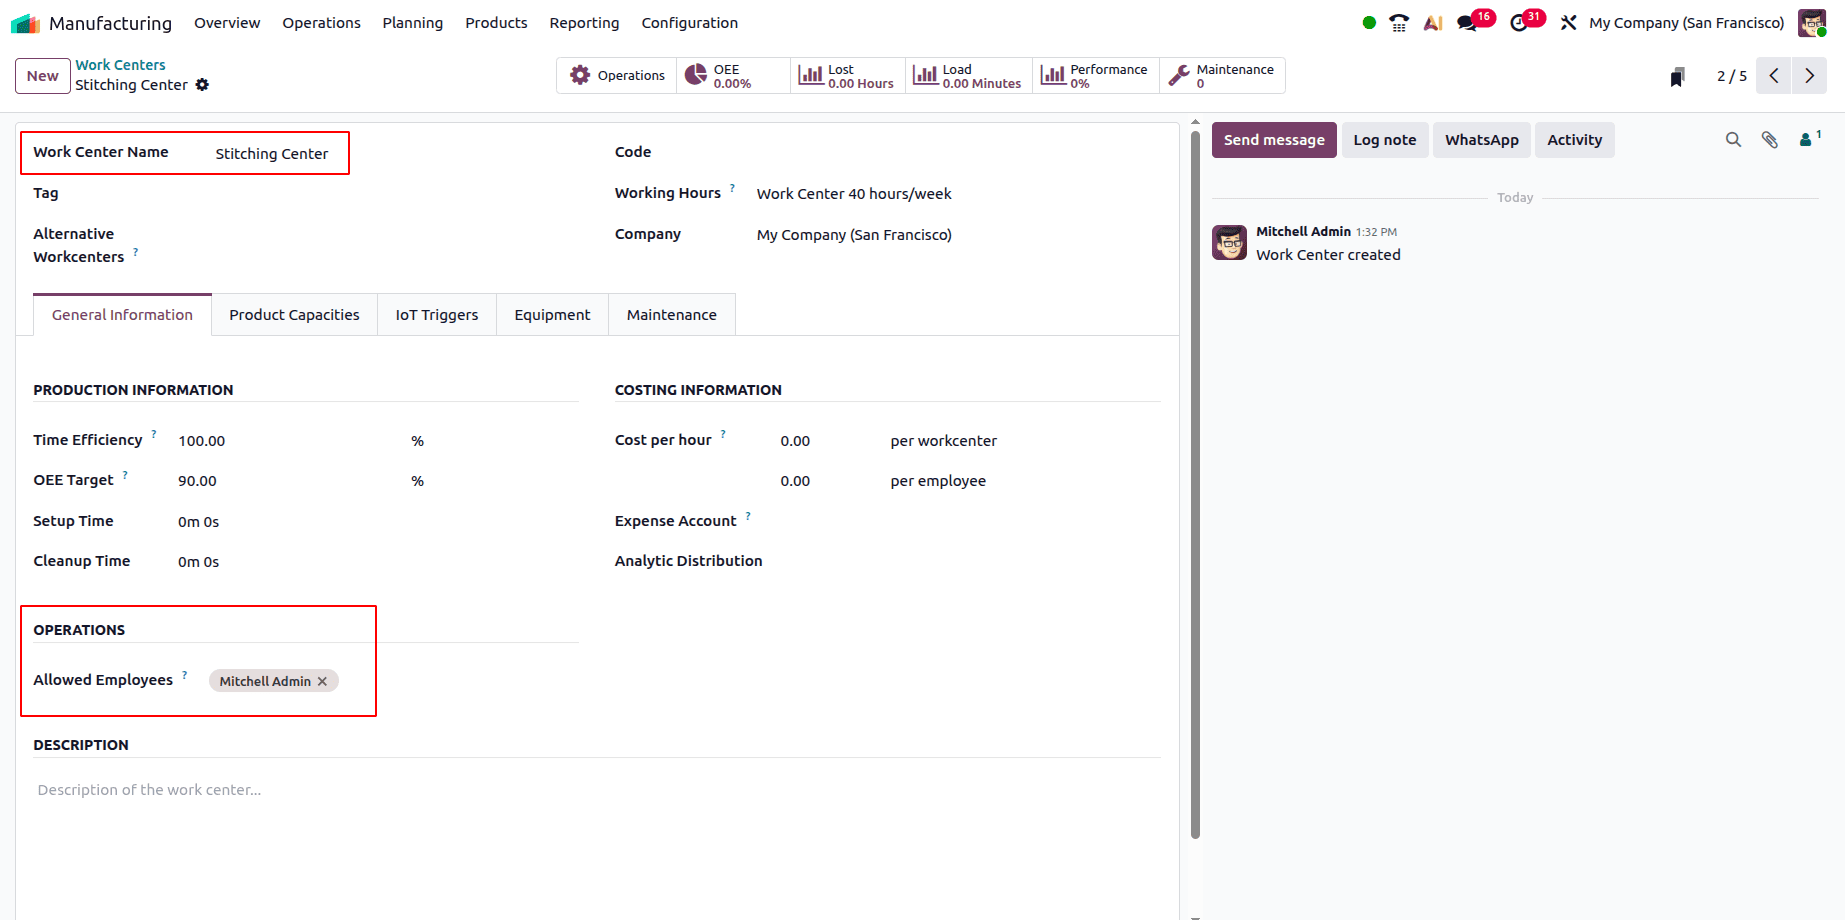
The Stitching Center is the work center where the stitching will take place. The bill of materials should be saved.
According to the bill of materials, Colouring will take place inside Colouring Station. Let's examine the workcenter's settings. Marc Demo, the authorized employee, is the one who finishes the procedure.
Next, the stitching process for every variation. The Stitching Center is where stitching is done. Mitchell Admin is designated as the Stitching Center's permitted employee. This implies that he is in charge of the procedure.
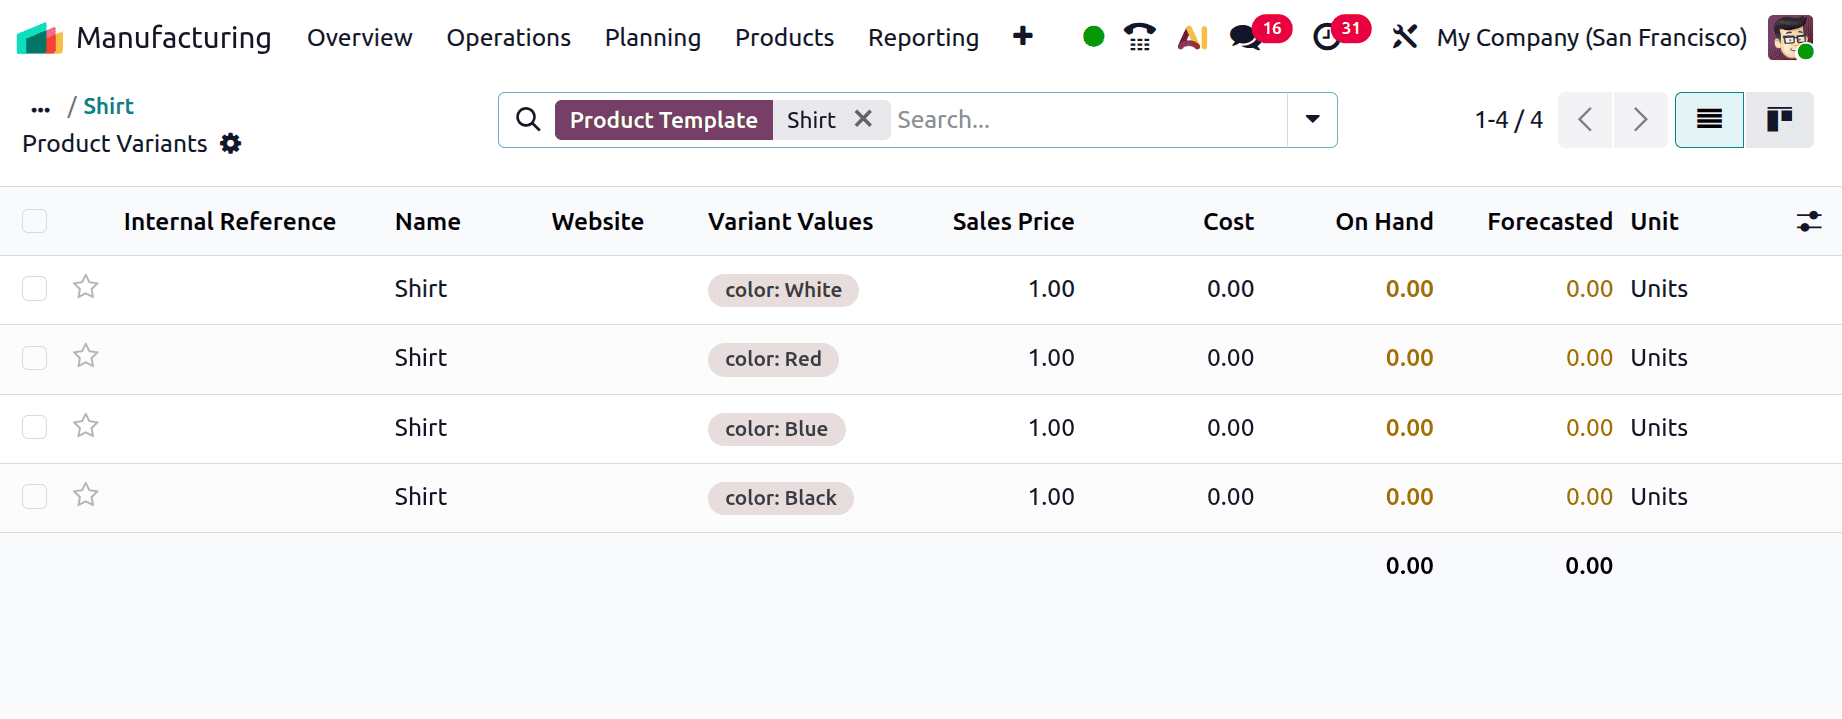
The BoM configuration has now been established. Next, let's see how many Shirts are available. All the Shirt Variants are now out of stock, as the screenshot illustrates below.
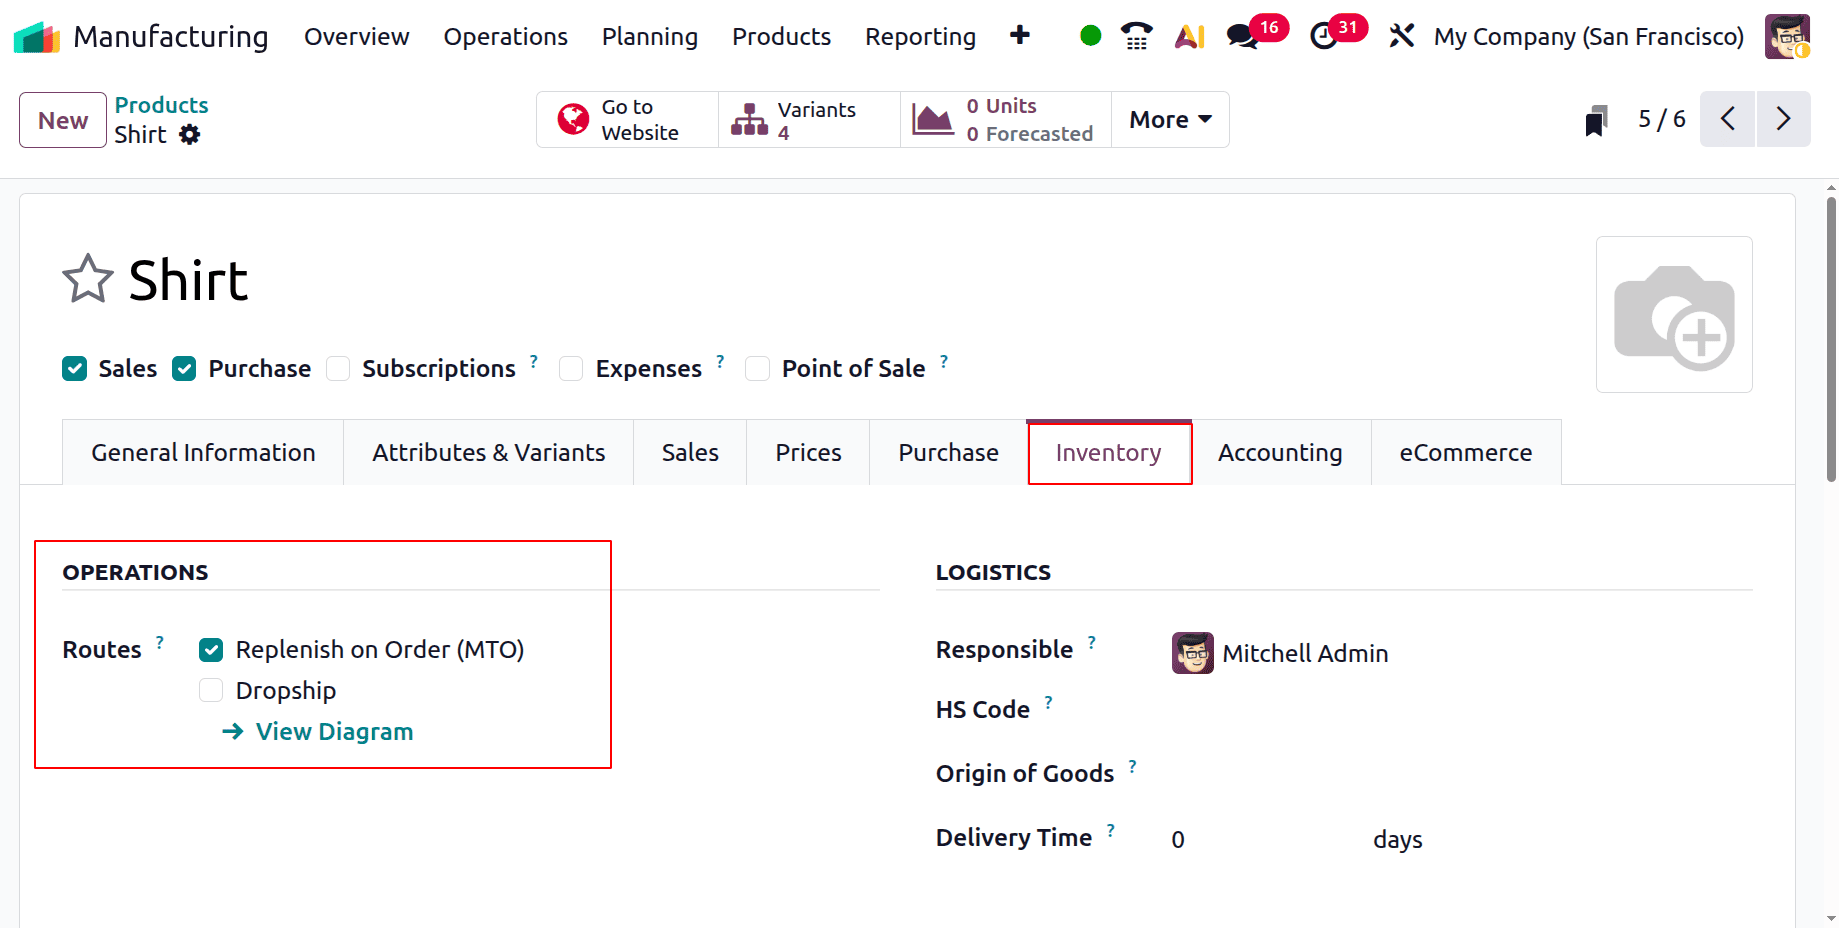
Let's consider a situation where the user should produce the product Shirt first if the organization receives a request for it from a client.
In order to do this, the user must activate the Replenish on order (MTO) route inside the product's inventory tab.
Assume that Azure Interior, a customer, asked for one White Shirt. Make a fresh quote for the client. Next, click the Add a Product button beneath the Orderline to add the Shirt.
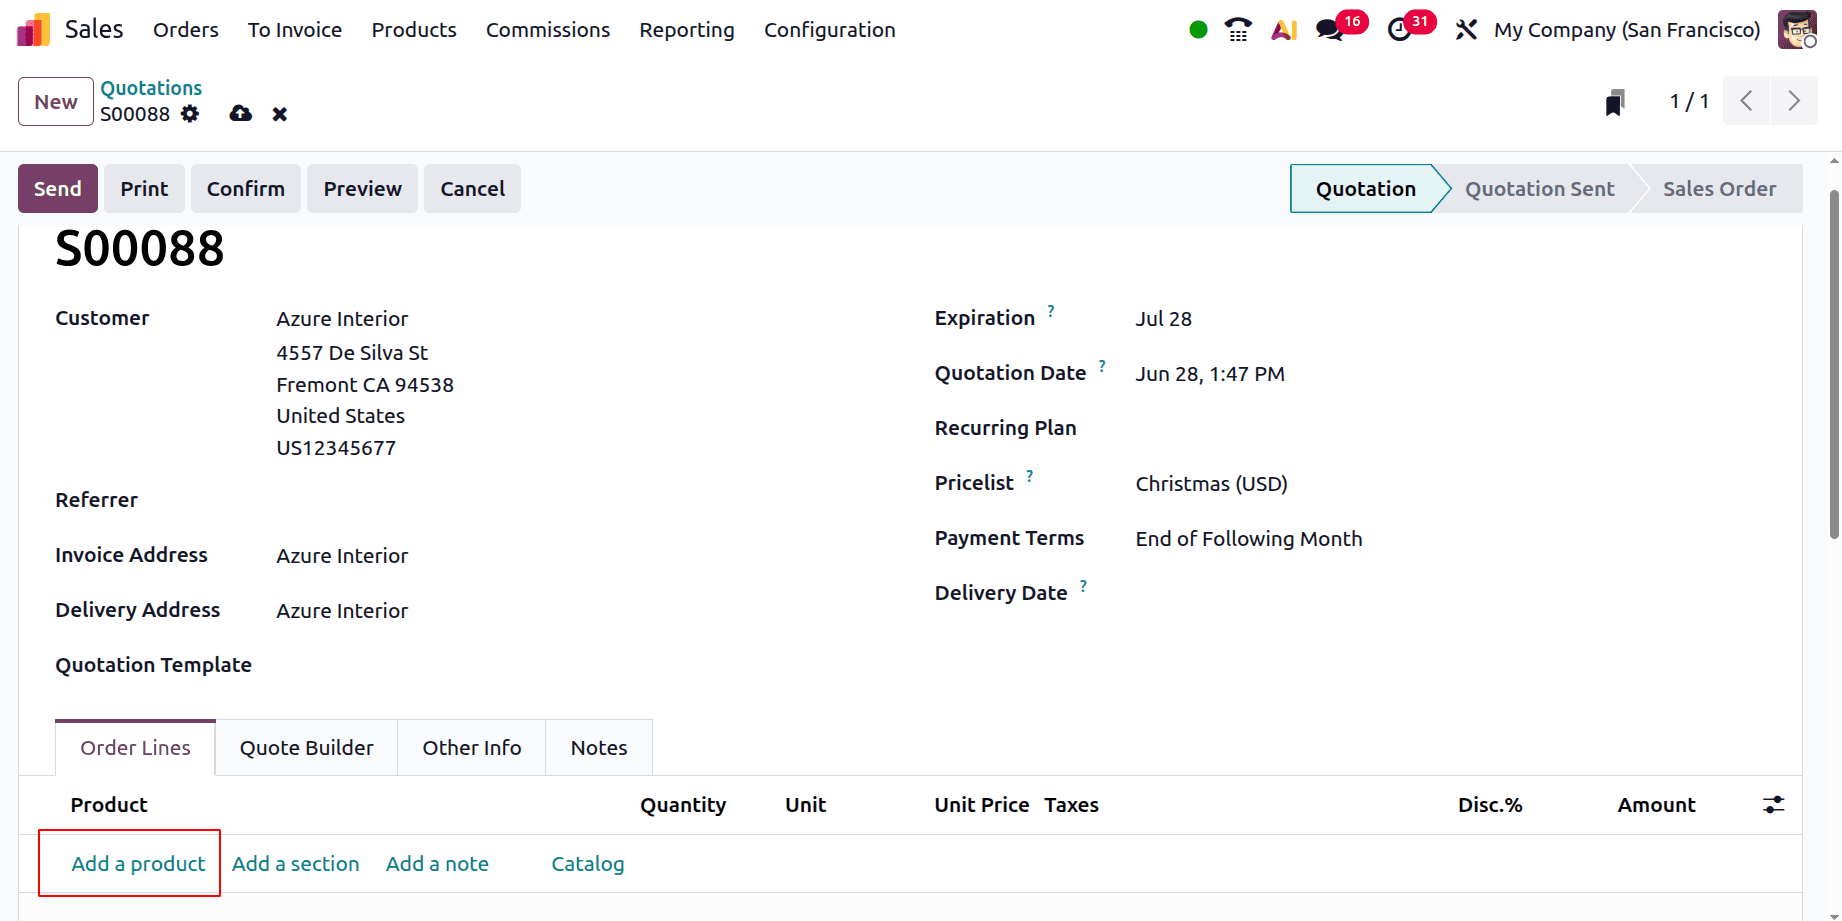
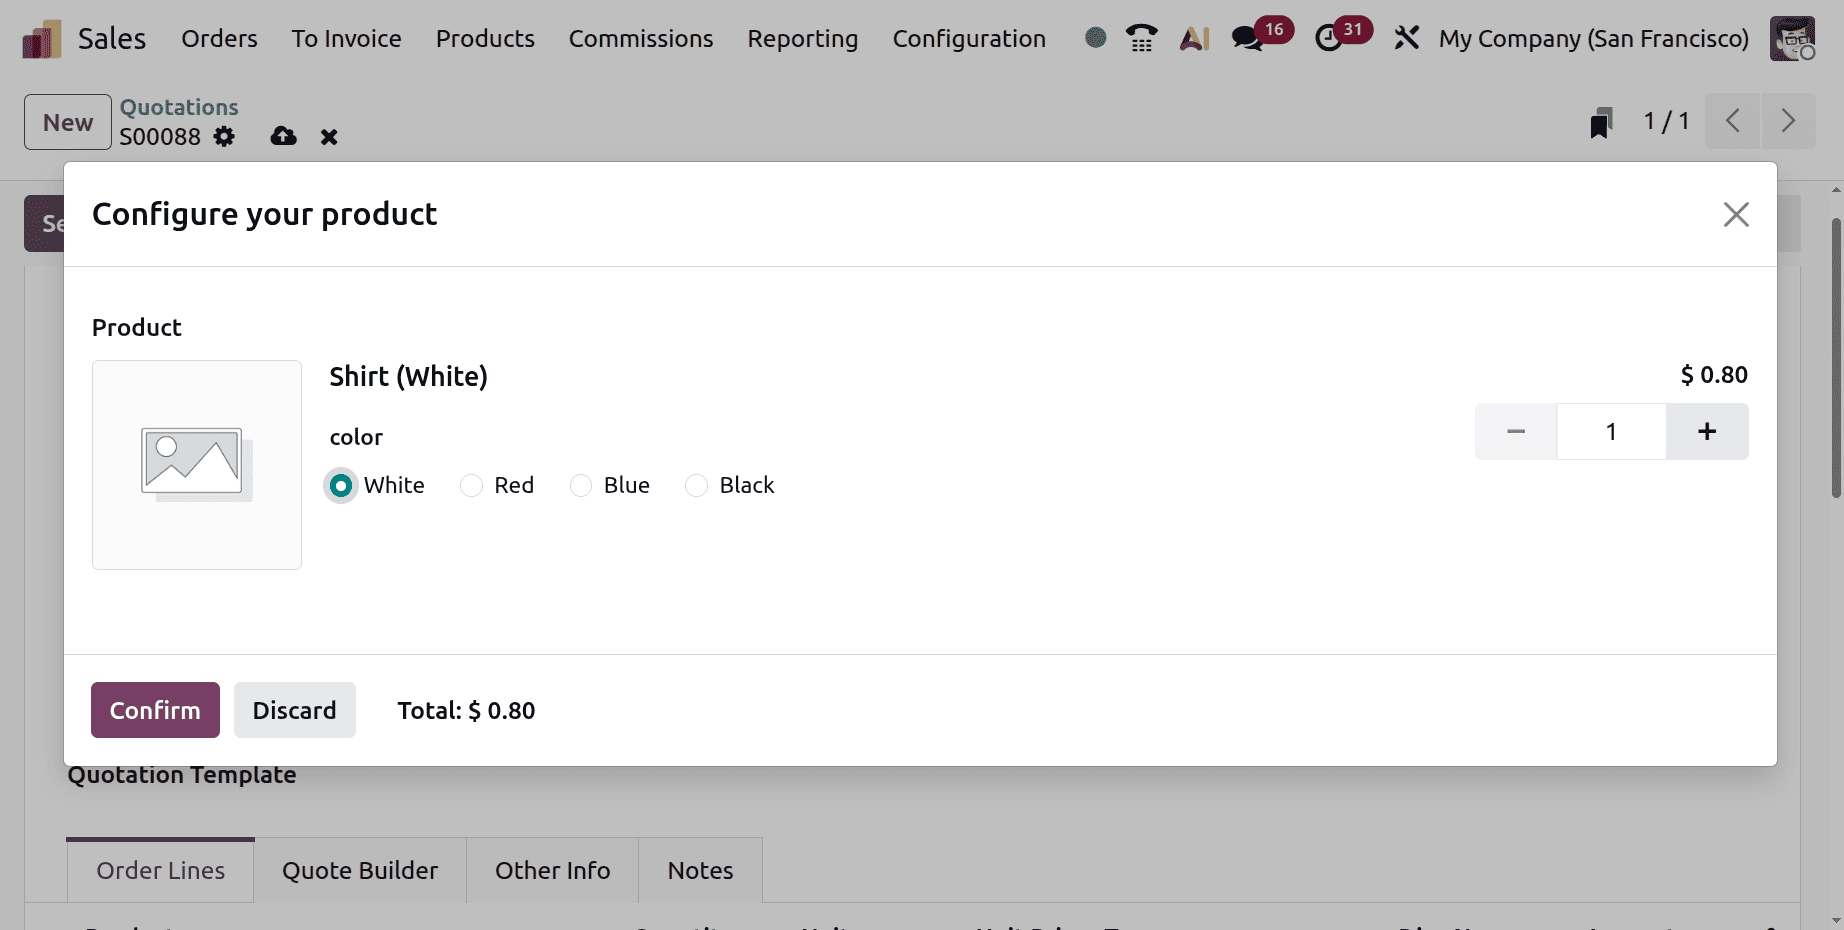
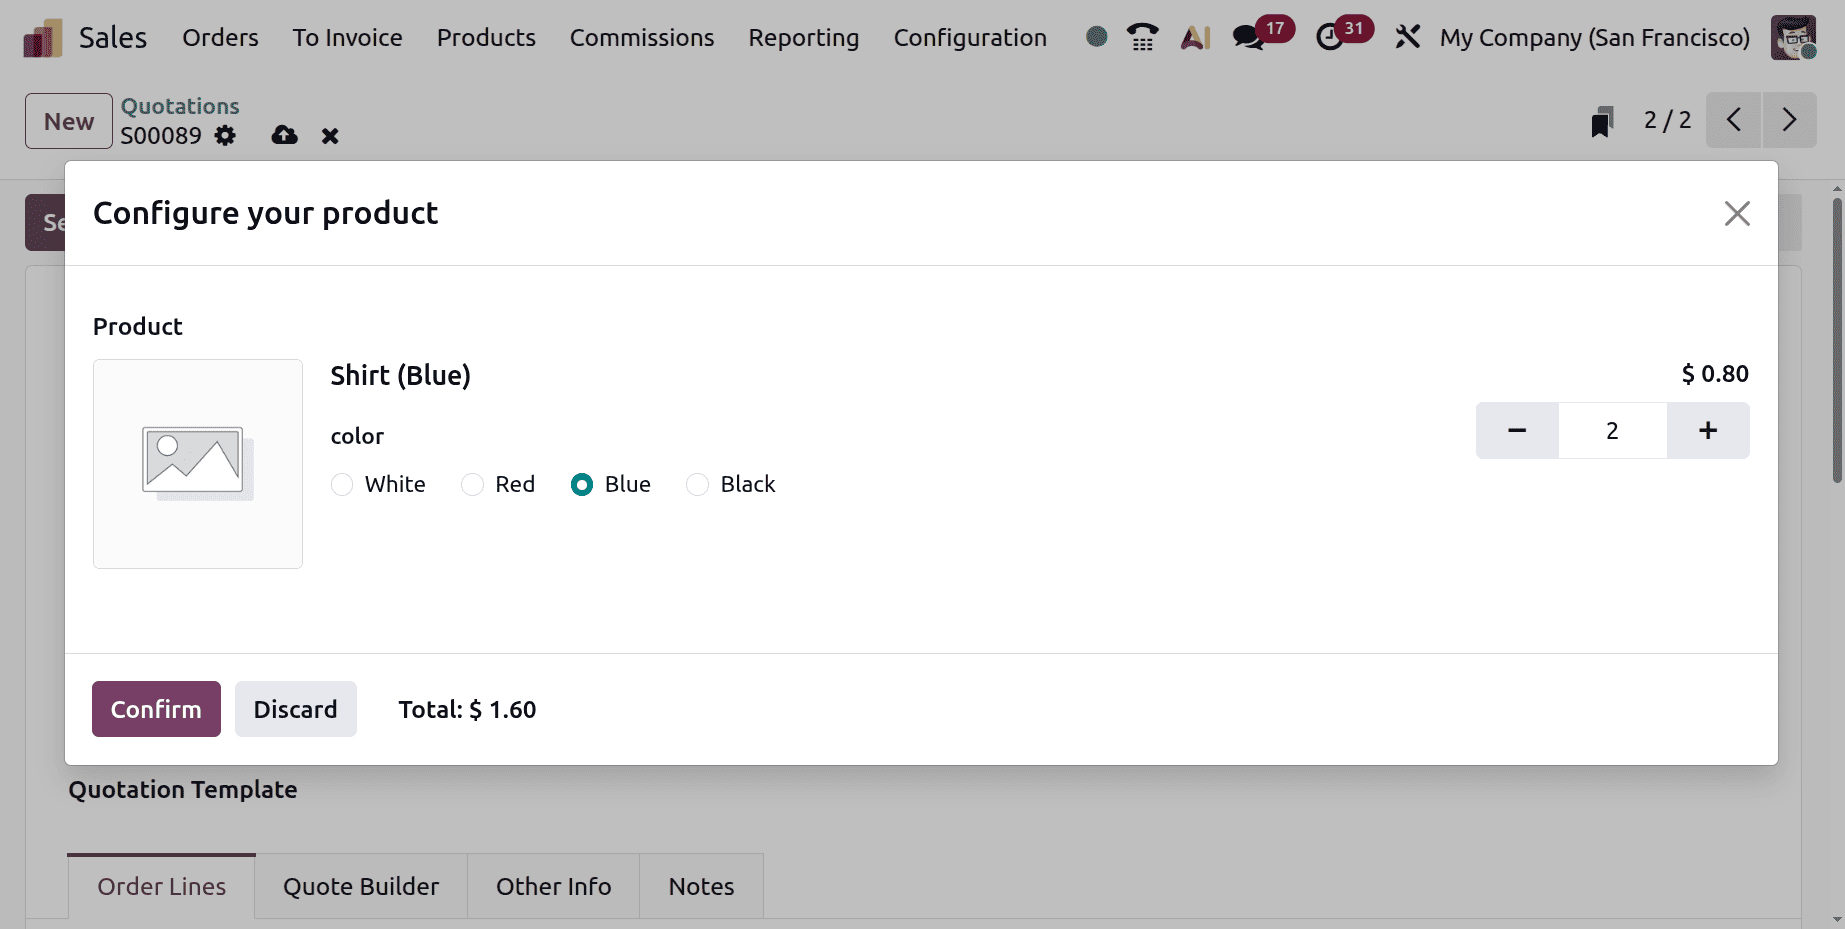
The Product Configurator window will then appear, as seen below. The sales price can be displayed there if you select the product variant with quantity. Click the Confirm button once the product has been selected.
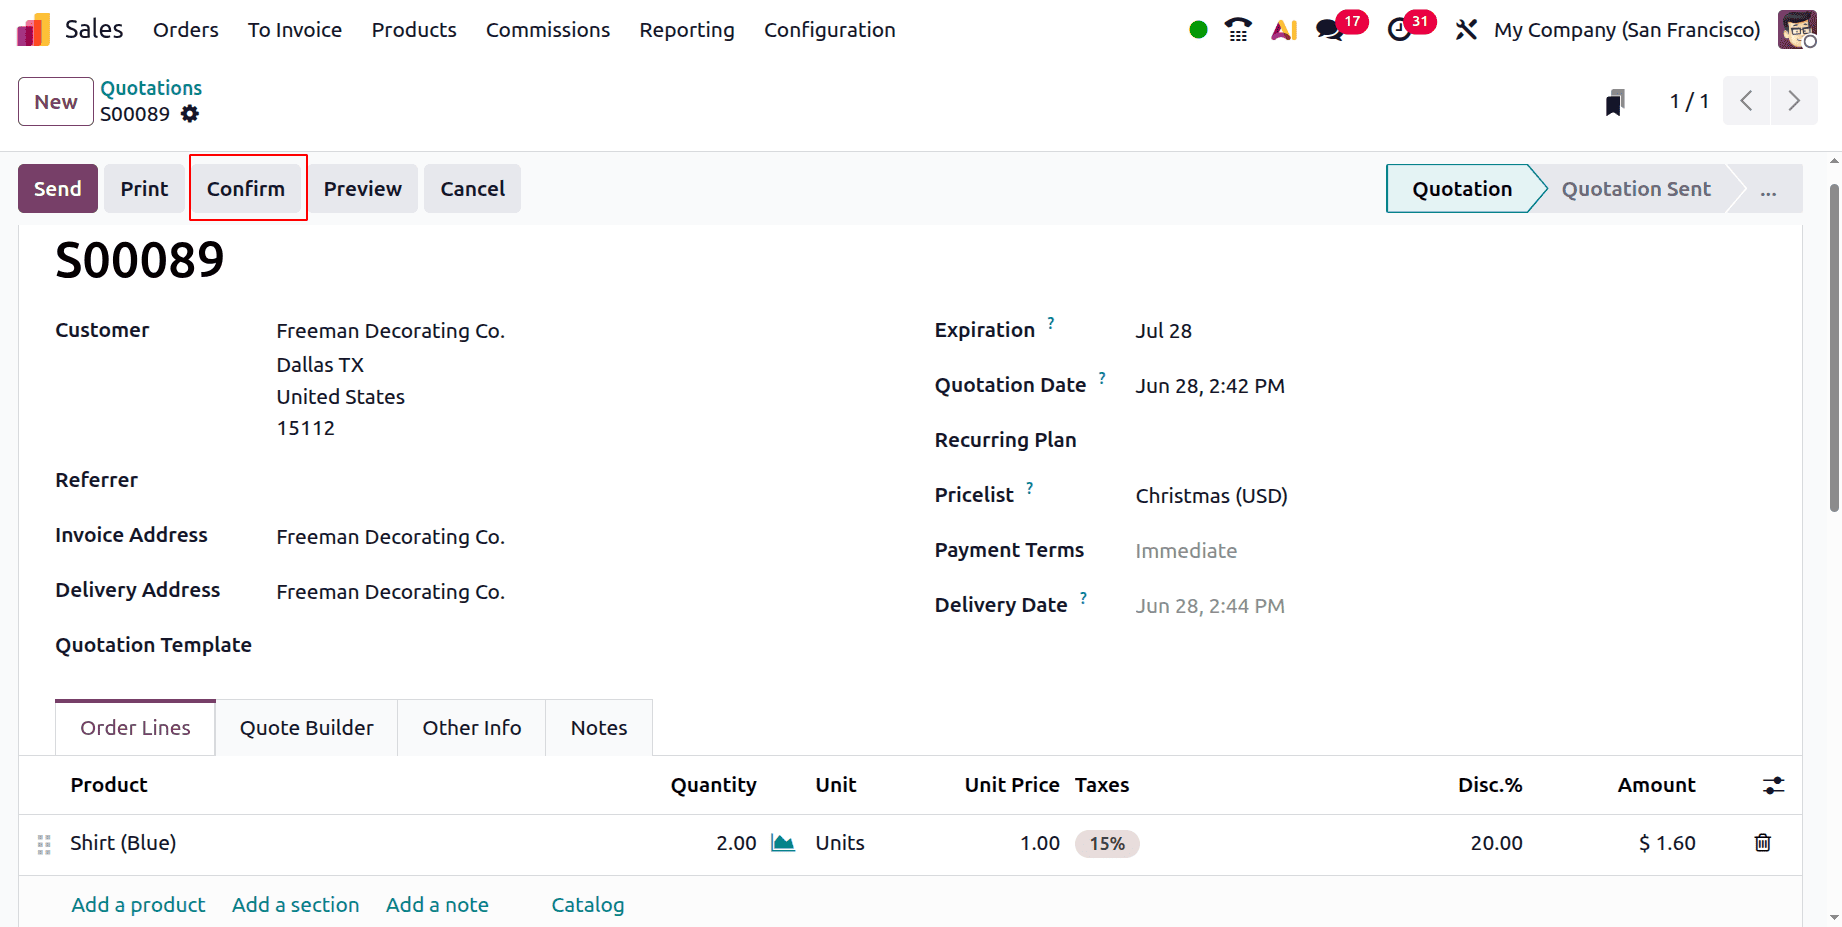
The product and quantity will then be added to the order line as indicated below. In this case, a white shirt is the requested item, and there is just one. Verify the order.

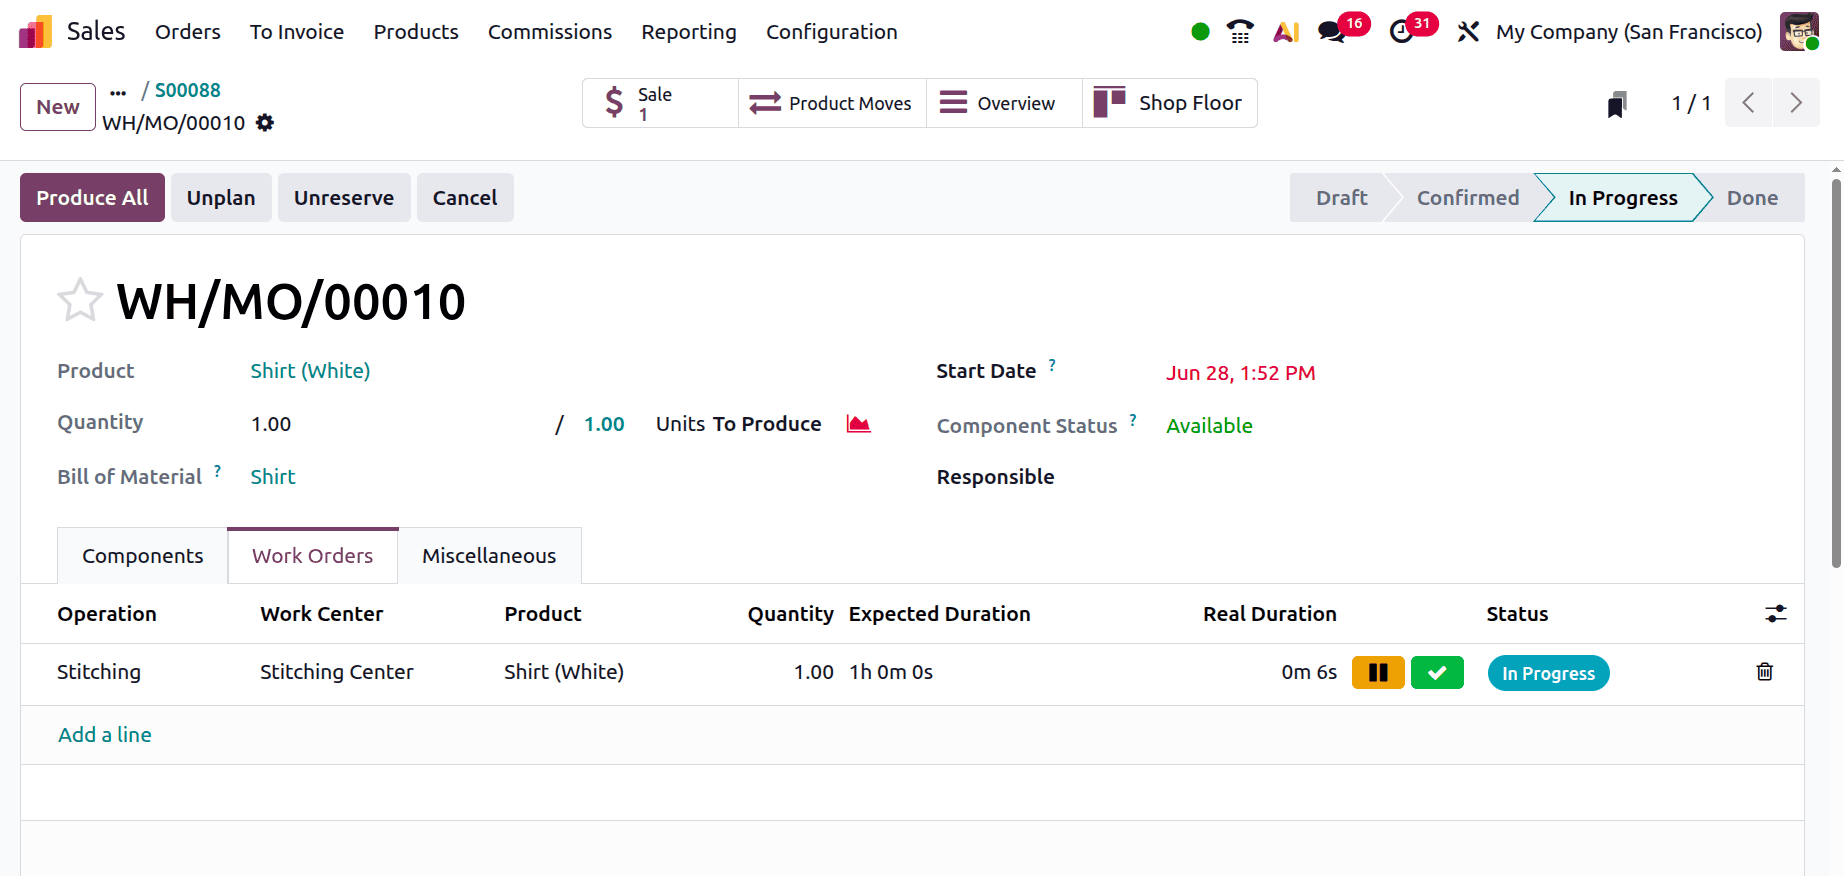
There were two smart tabs that showed up: Delivery and Manufacturing. Right now, the product is being produced initially.
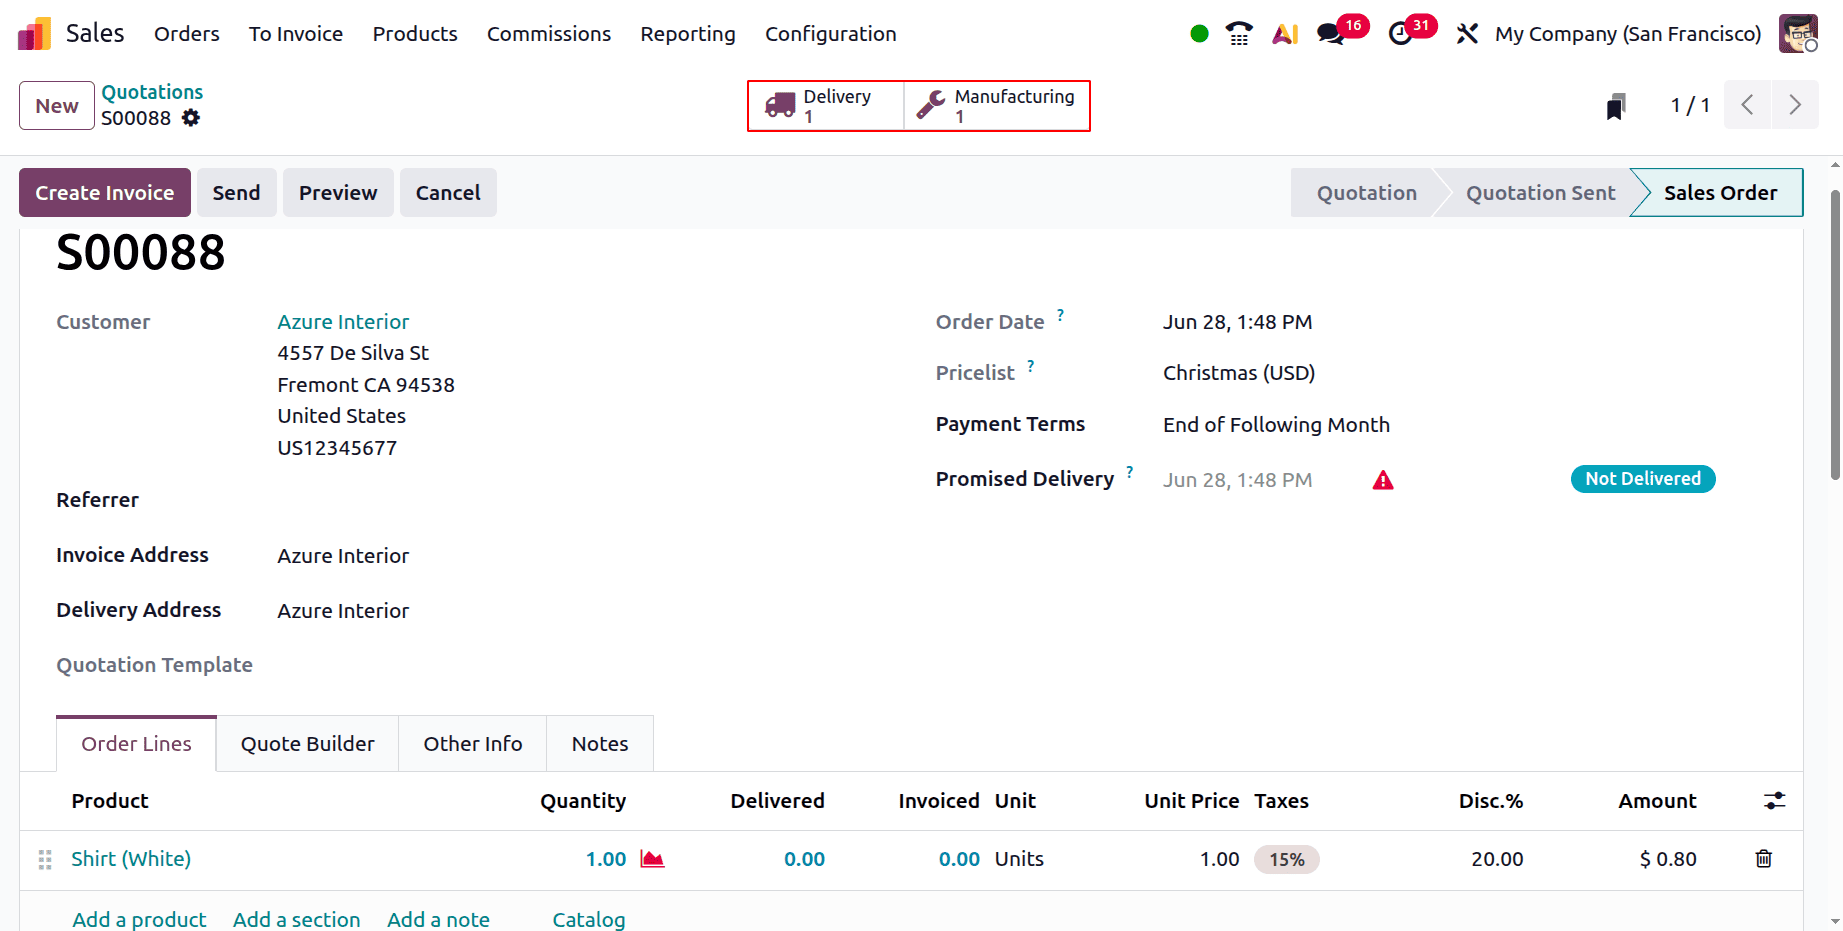
First, open Smart Tab Manufacturing. The components and activities are selected according to the specified product variety, but the bill of materials is the same.
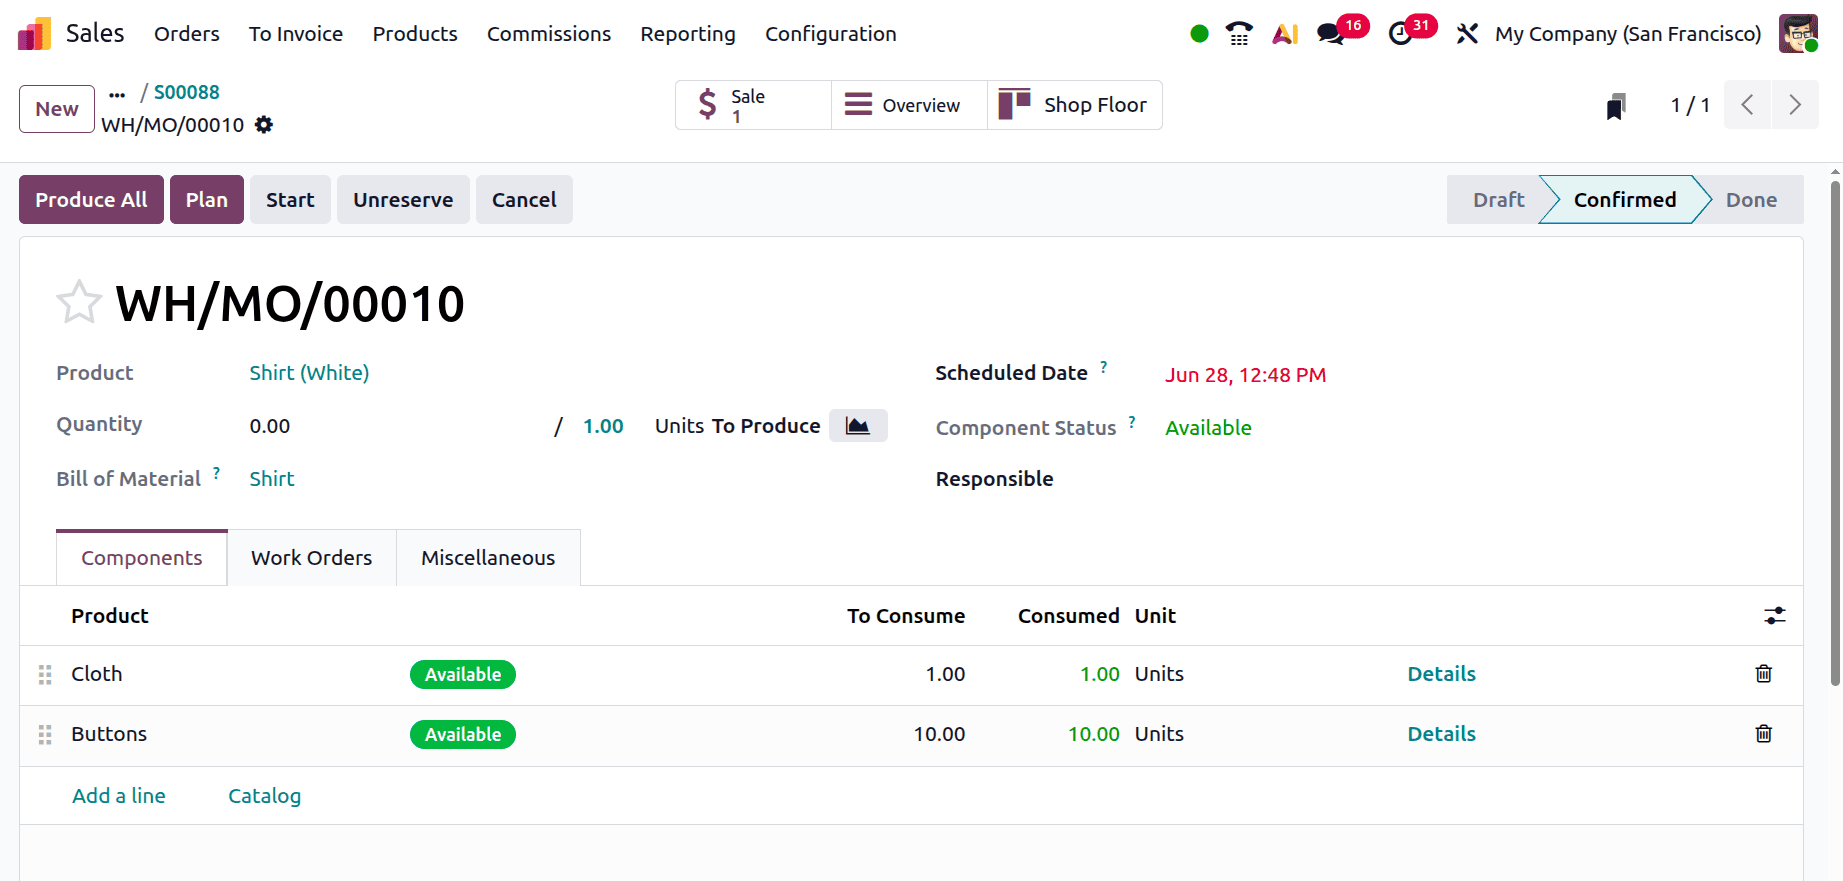
In this case, the product is called Shirt (White). Cloth and buttons are the components that are listed when examining the components.
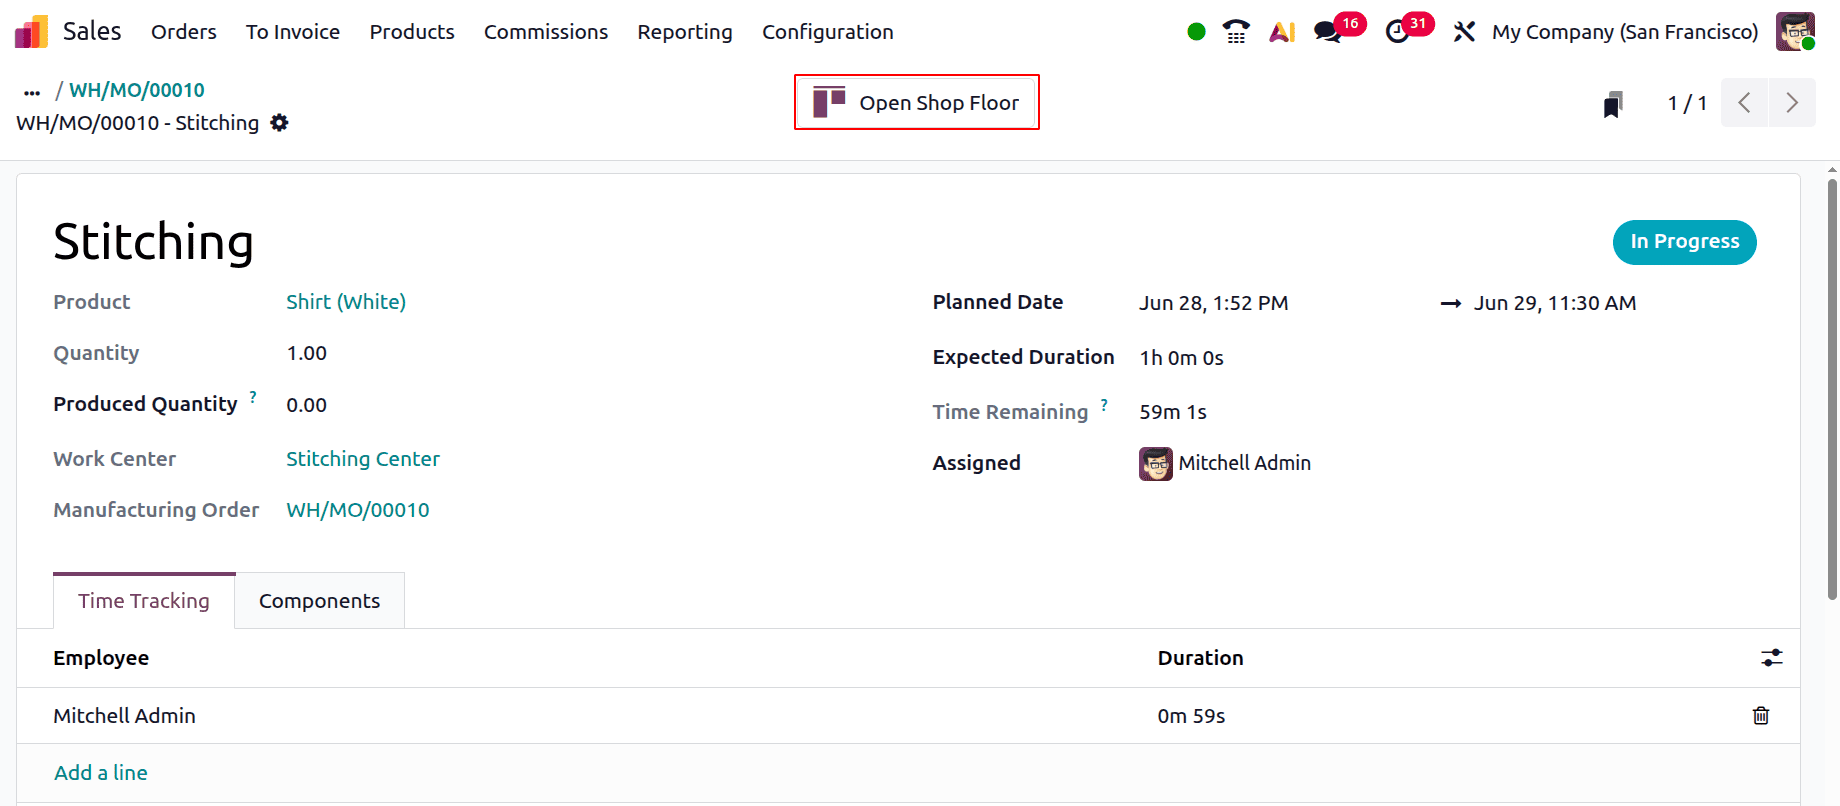
After selecting the Plan button, select the Work Orders tab, which has the Stitching activities. Stitching is the first operation in this case, and the workcenter is called Stitching Center.
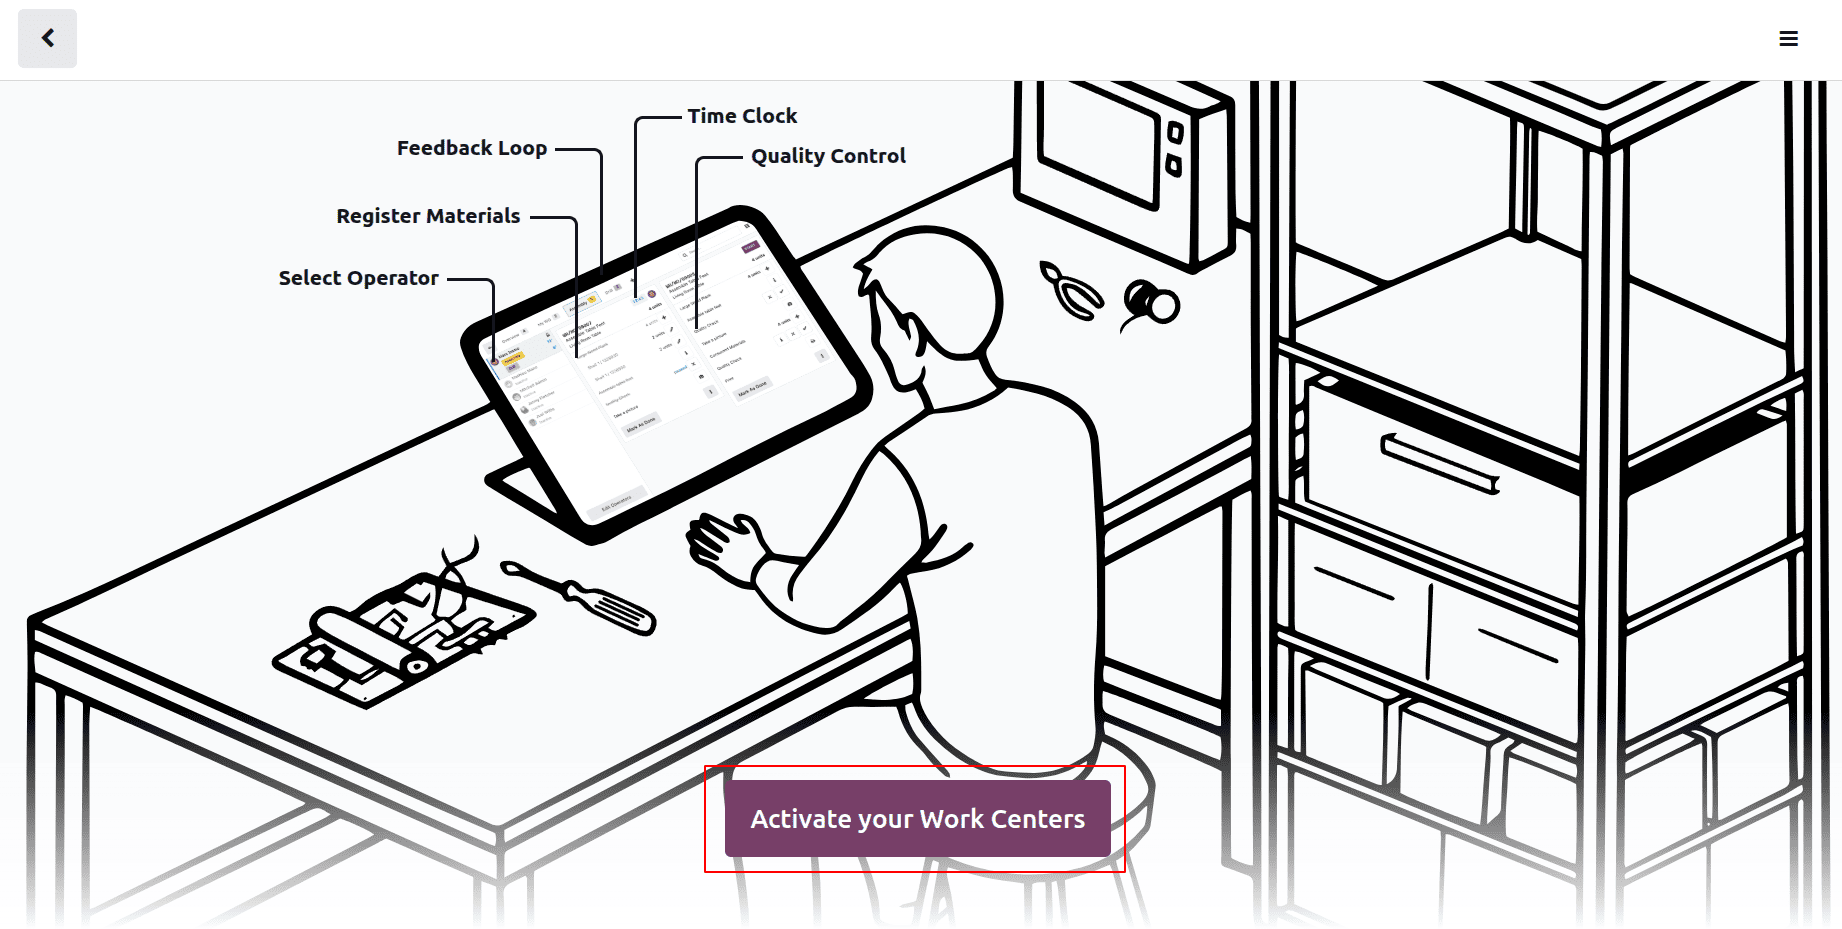
Select the Shop Floor app from the Work order menu, as indicated below.
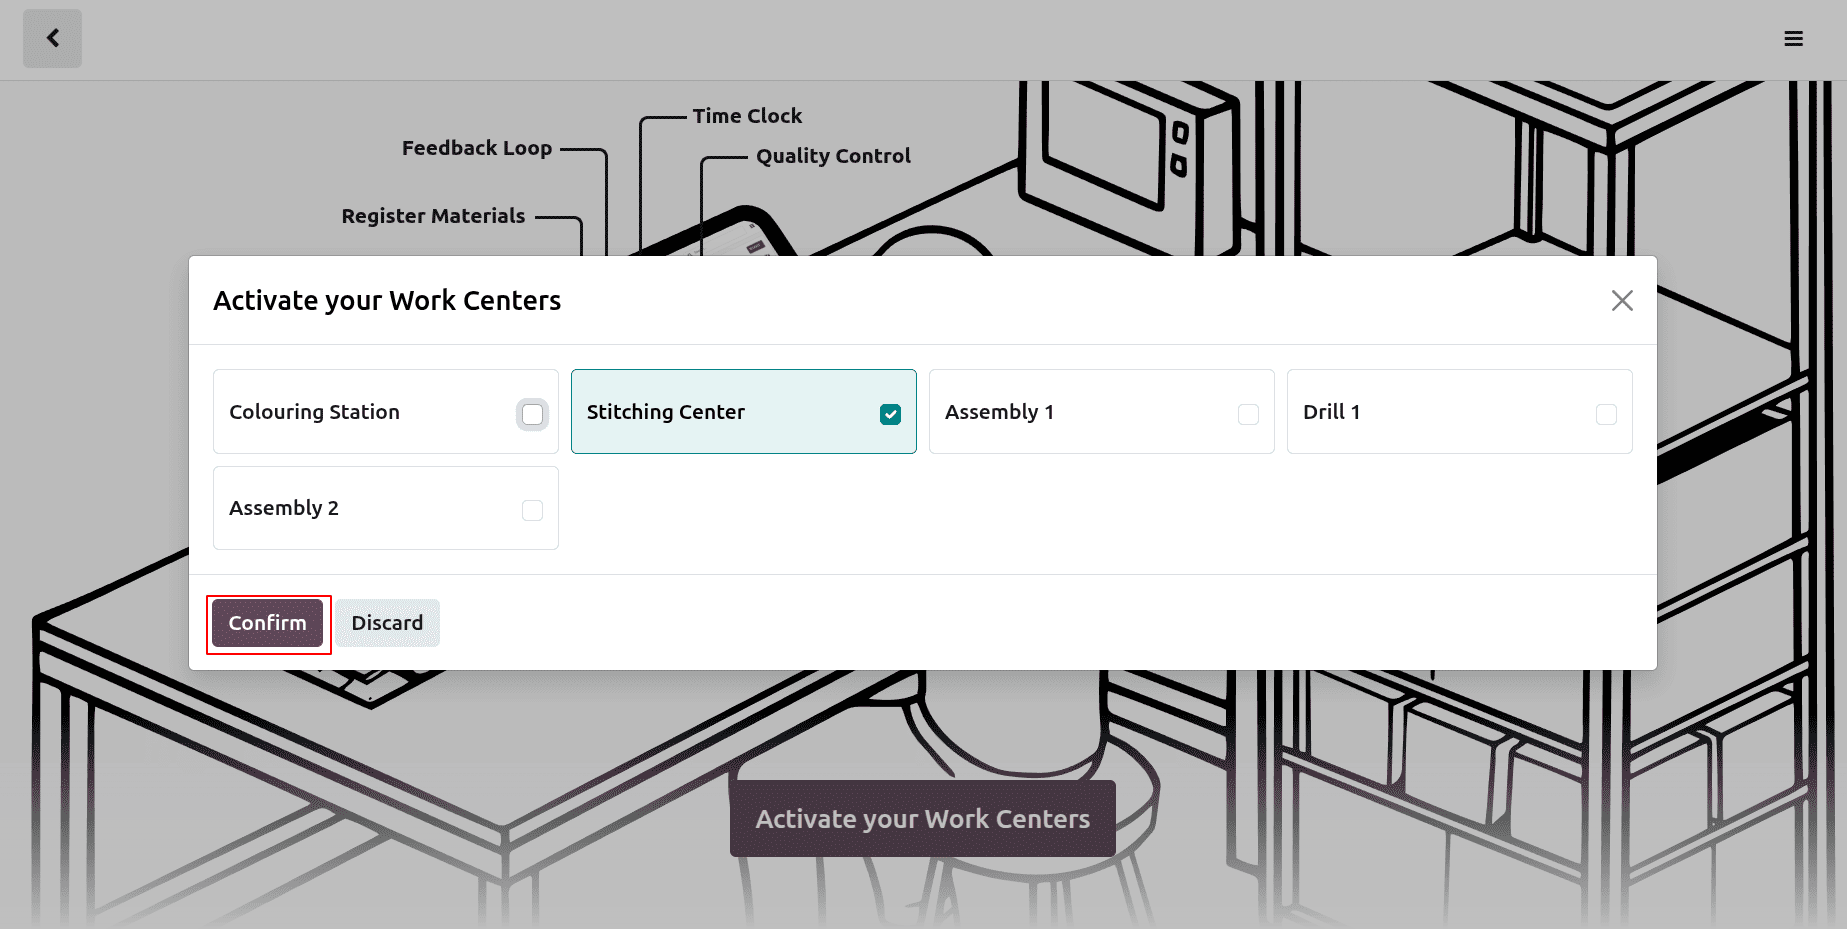
Click on the Activate Work Centers button from there.
Choose the work center from the list and click on the Confirm button.
The Shopfloor app is the following window. Mitchell Admin is the operator responsible for finishing the glass cutting. In the lower left corner, click the Edit Operator button.
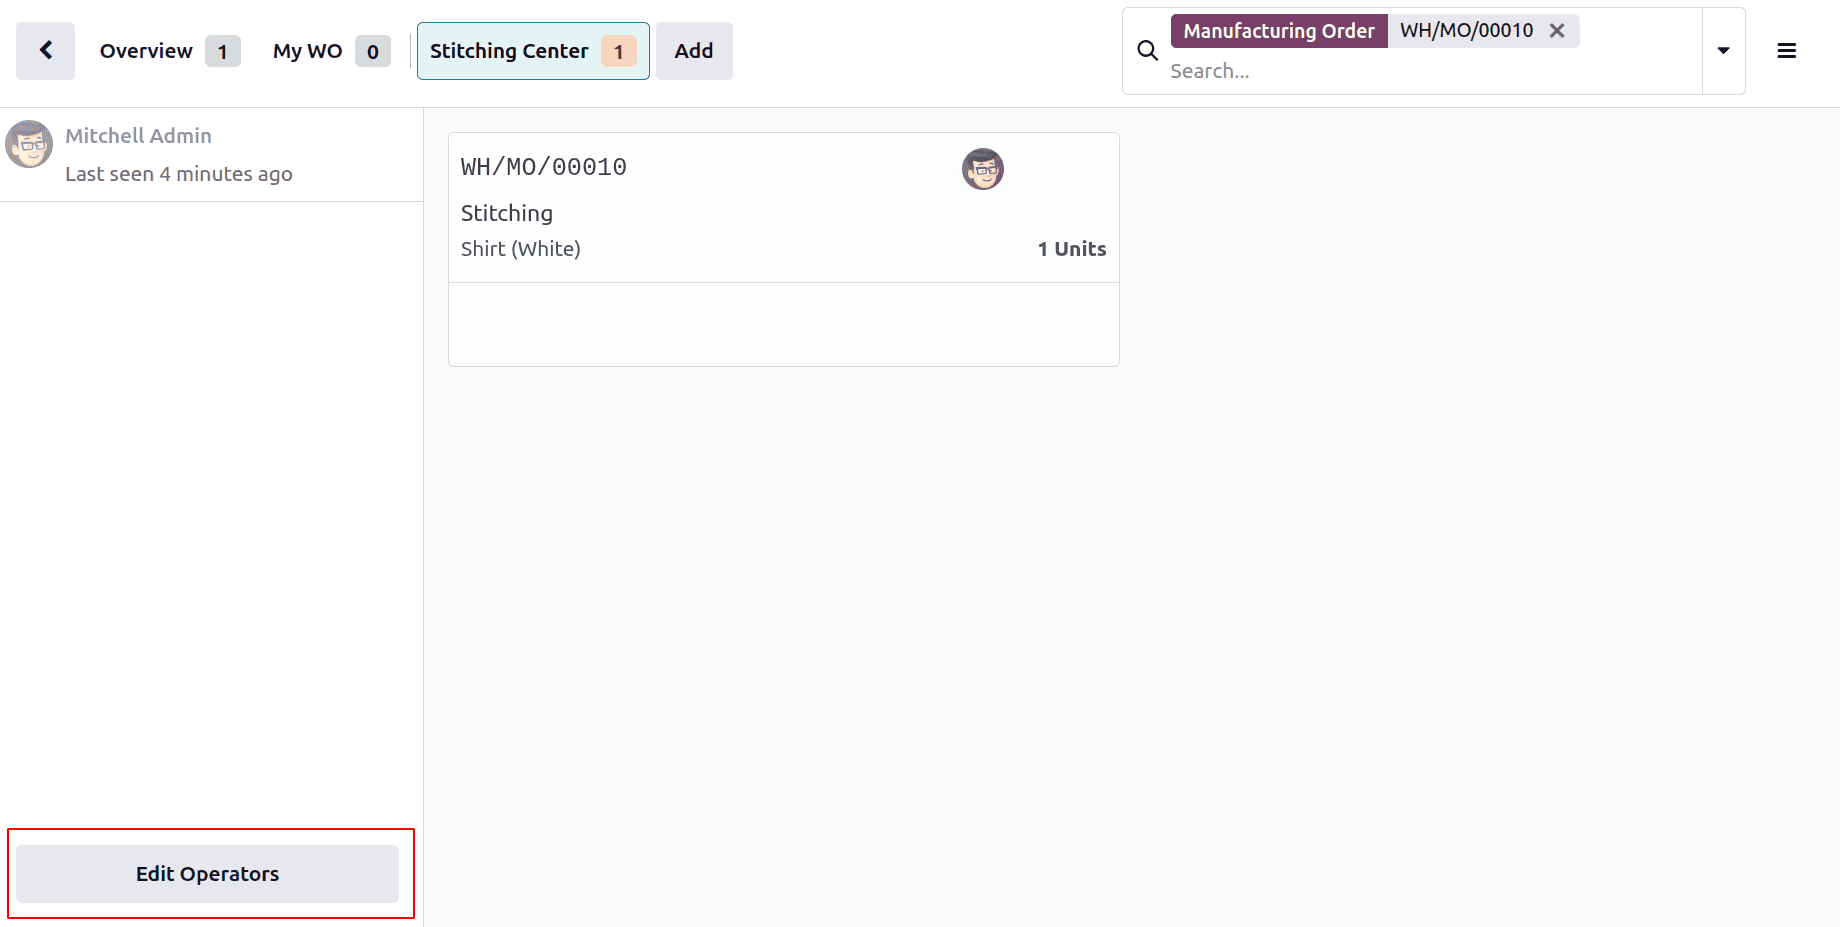
After that, a list of workers will appear. From the list, select Mitchell Admin, the employee.
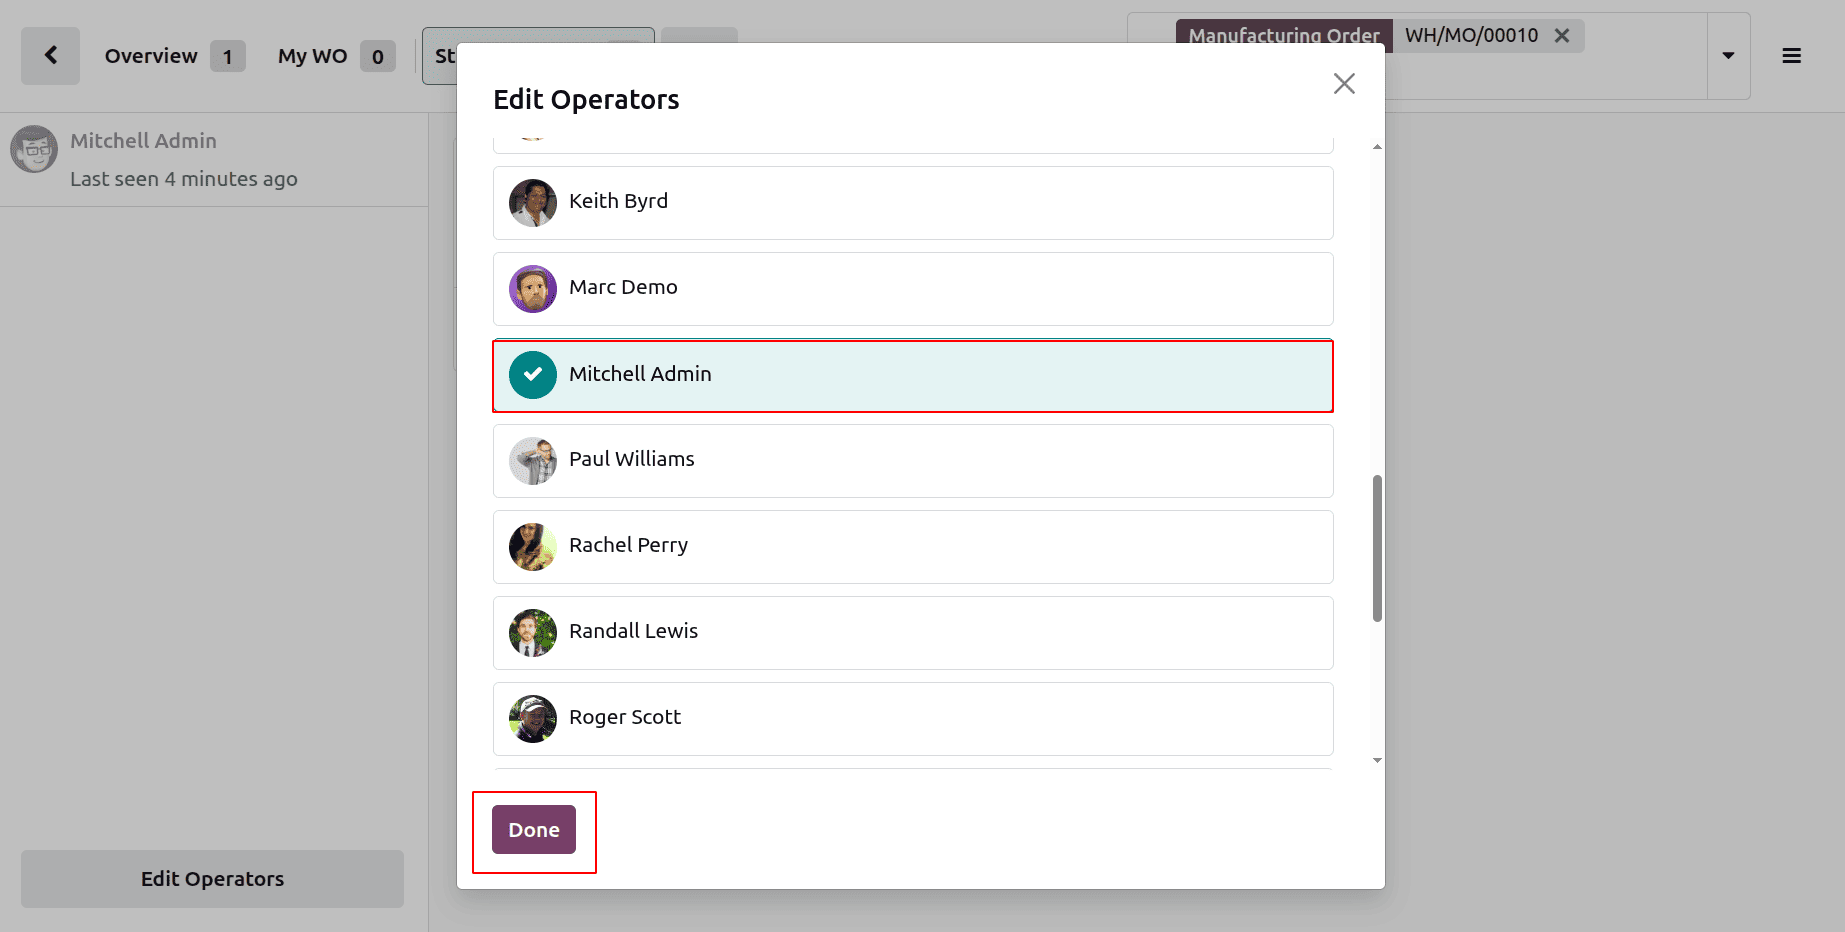
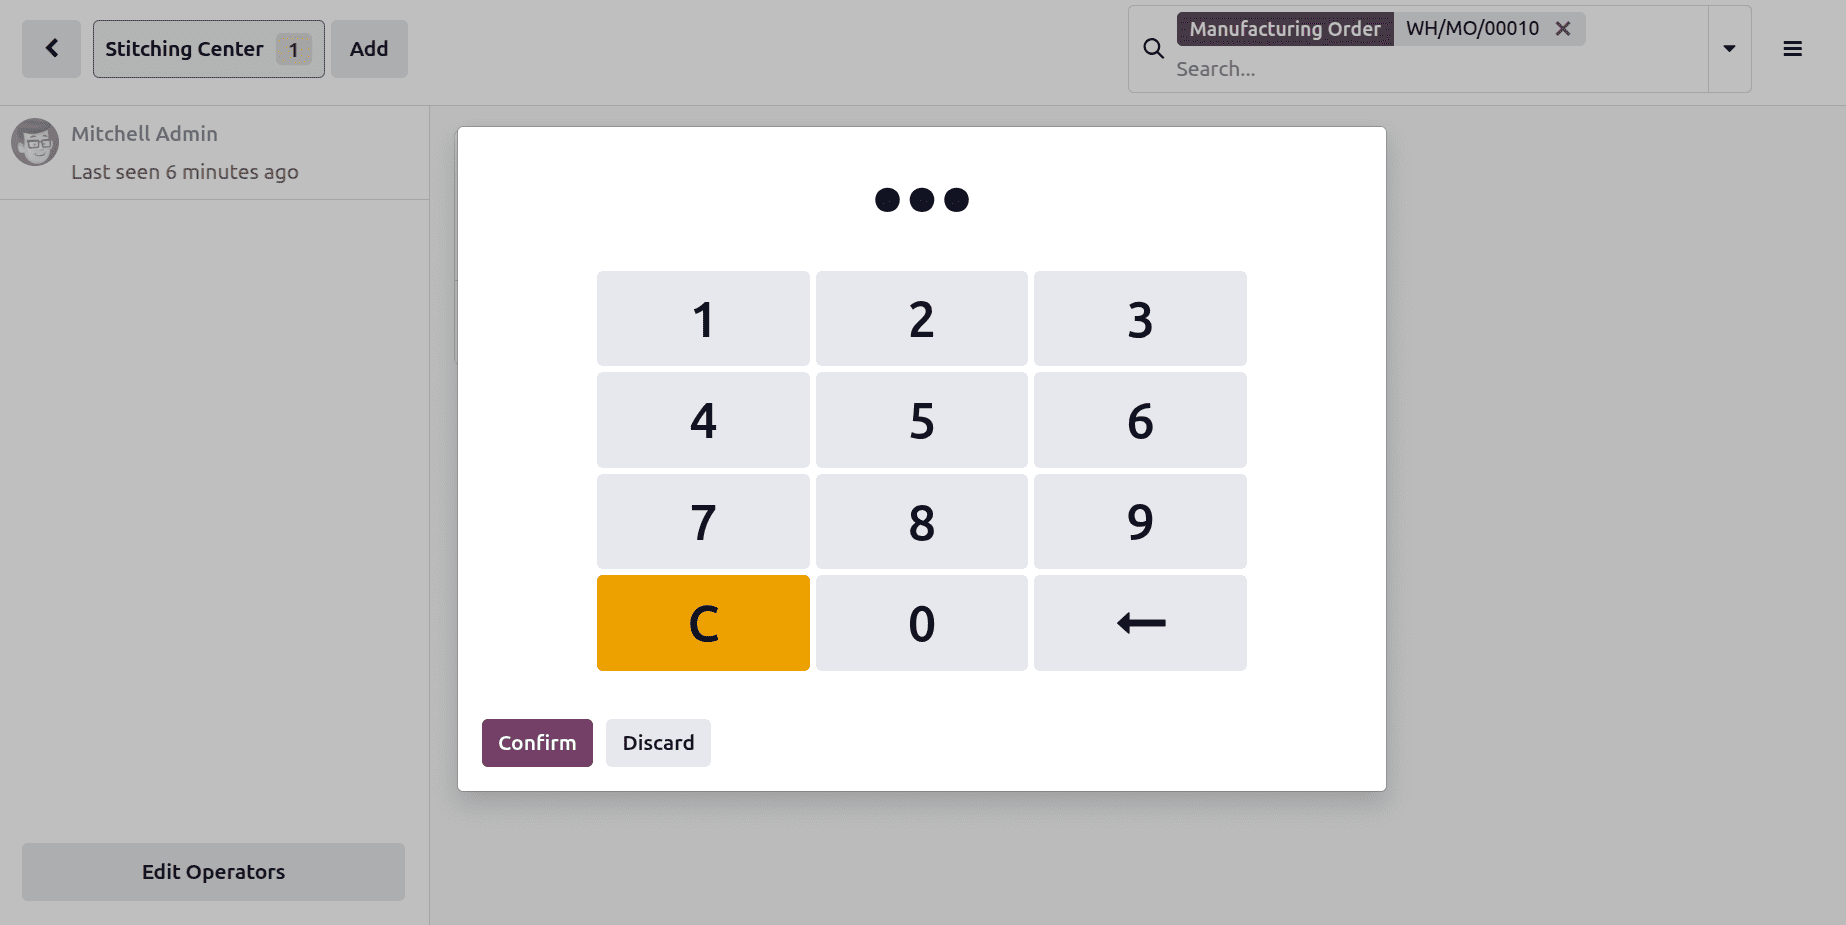
After that, enter the PIN to log in. Next, press the "Confirm" button.
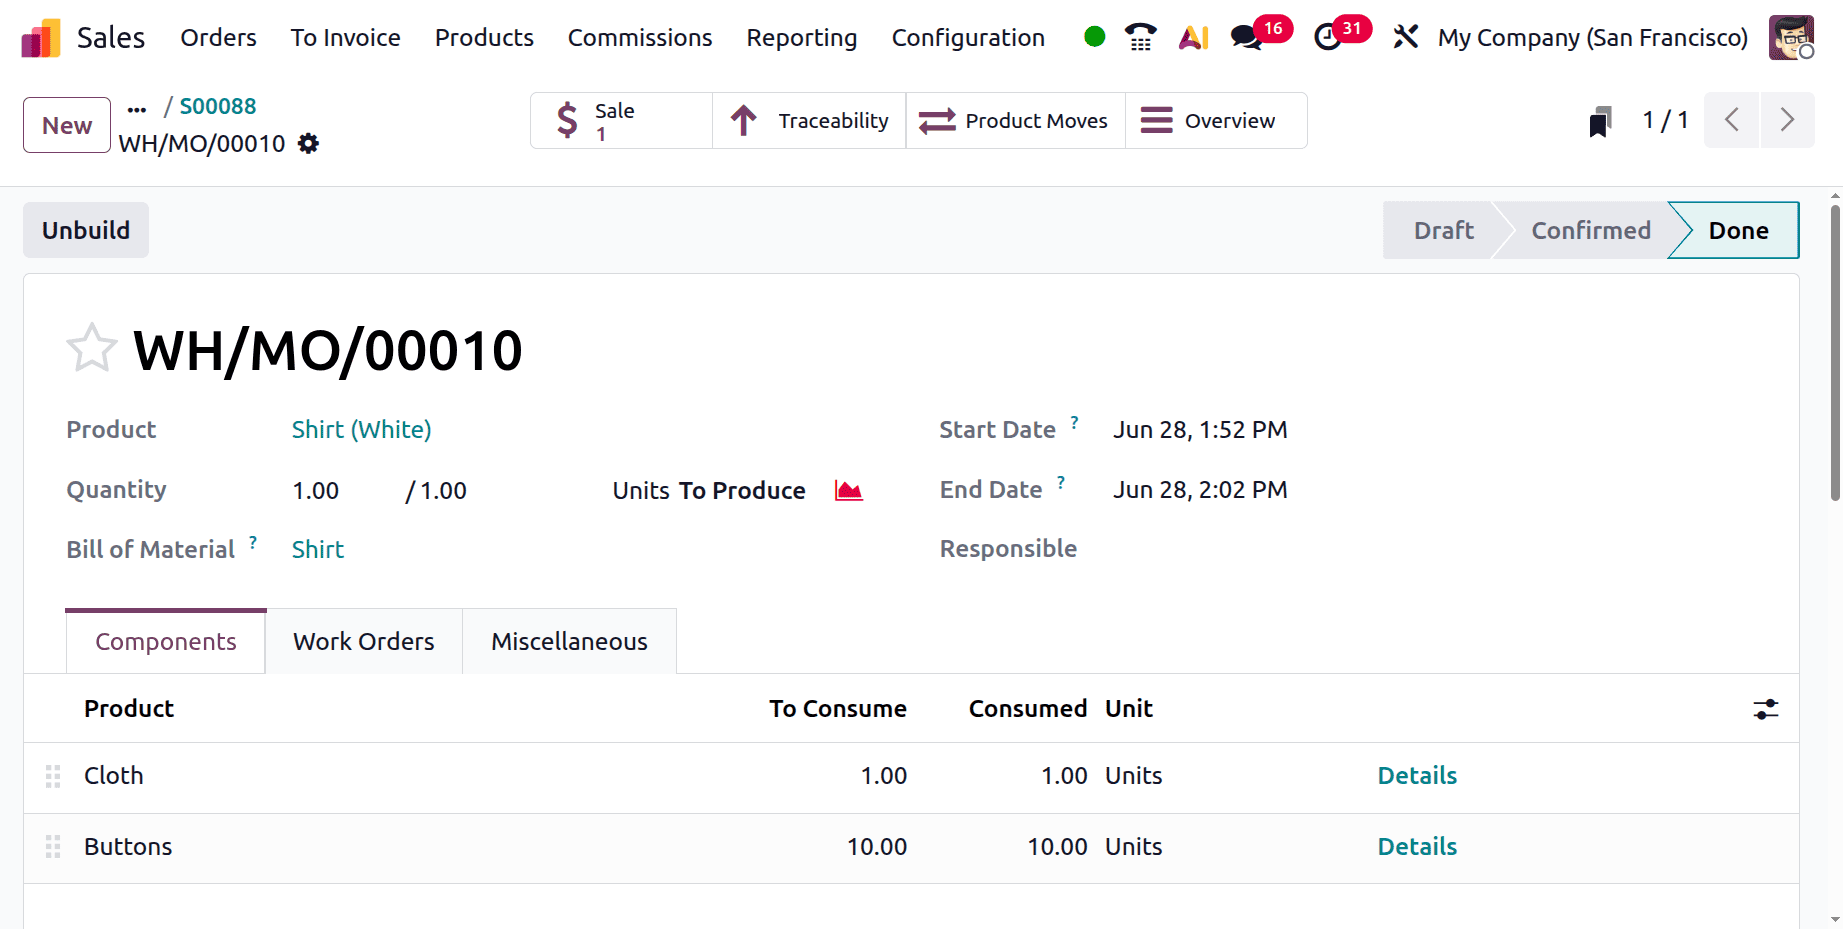
Mitchell Admin, the employee, is now logged into the shop floor. Additionally, the Glass Cutting operation is displayed there. To begin the process, click the Start. To finish the process, click the Close Production option.
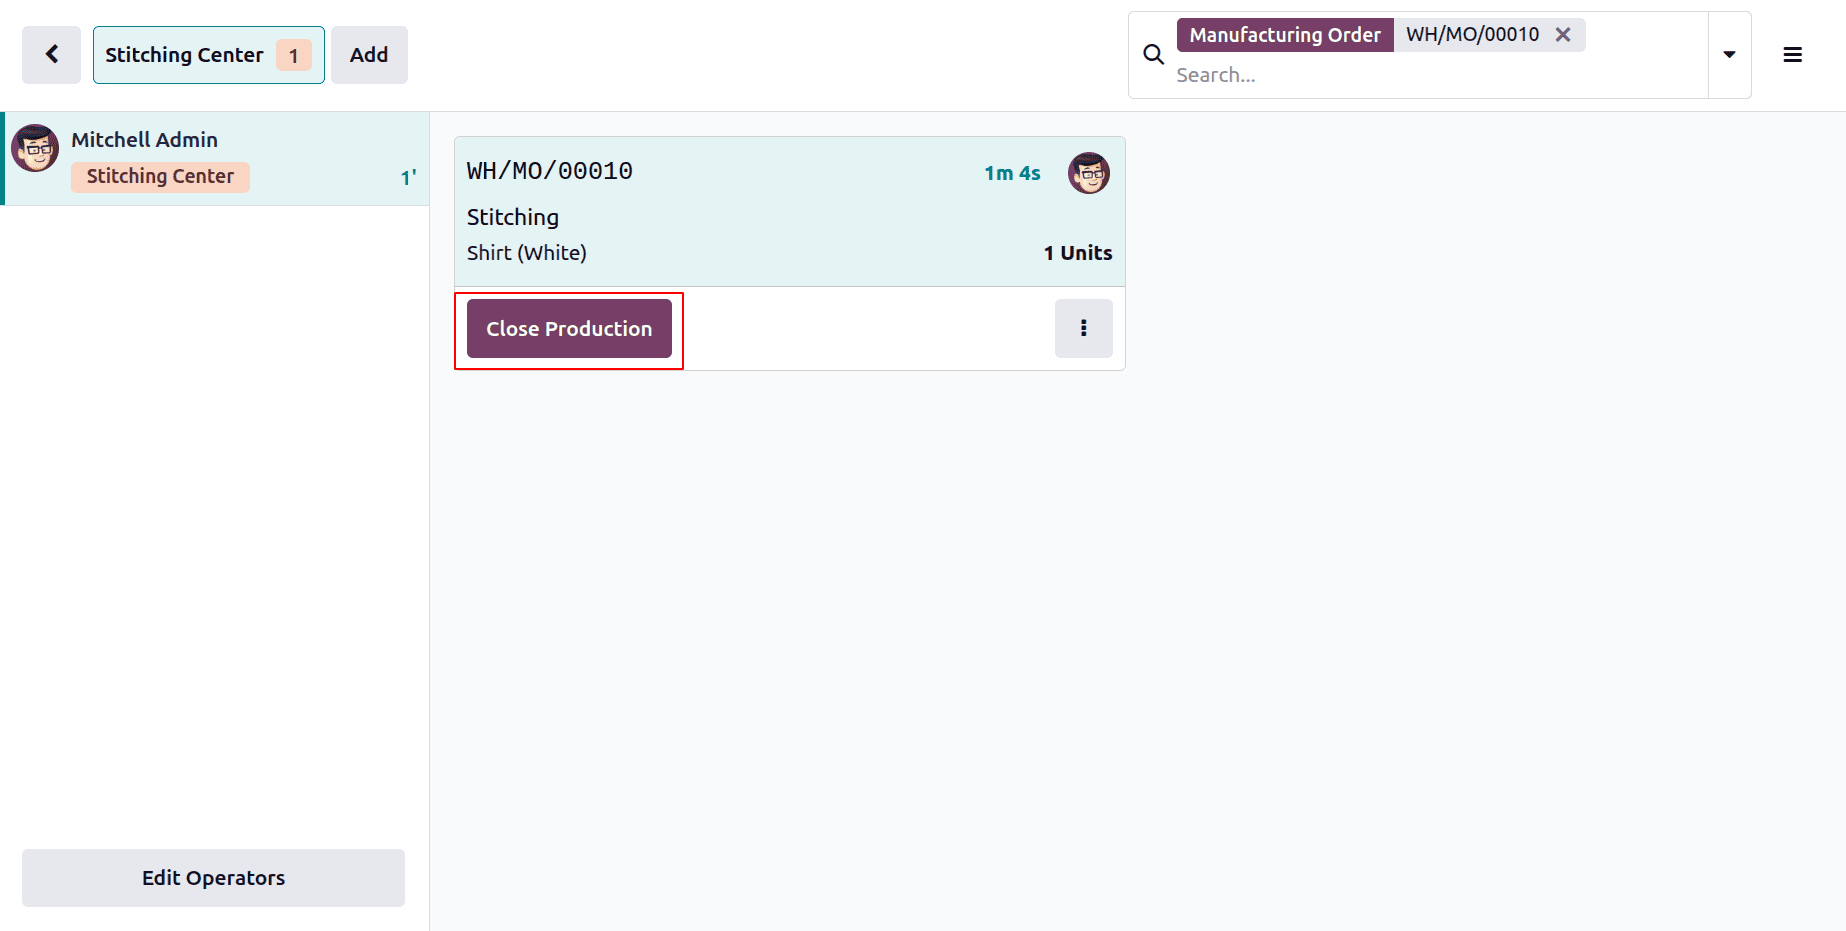
The manufacture of the white shirt is now finished. Buttons and cloth are the components that were extracted. Additionally, only one procedure stitching is carried out.
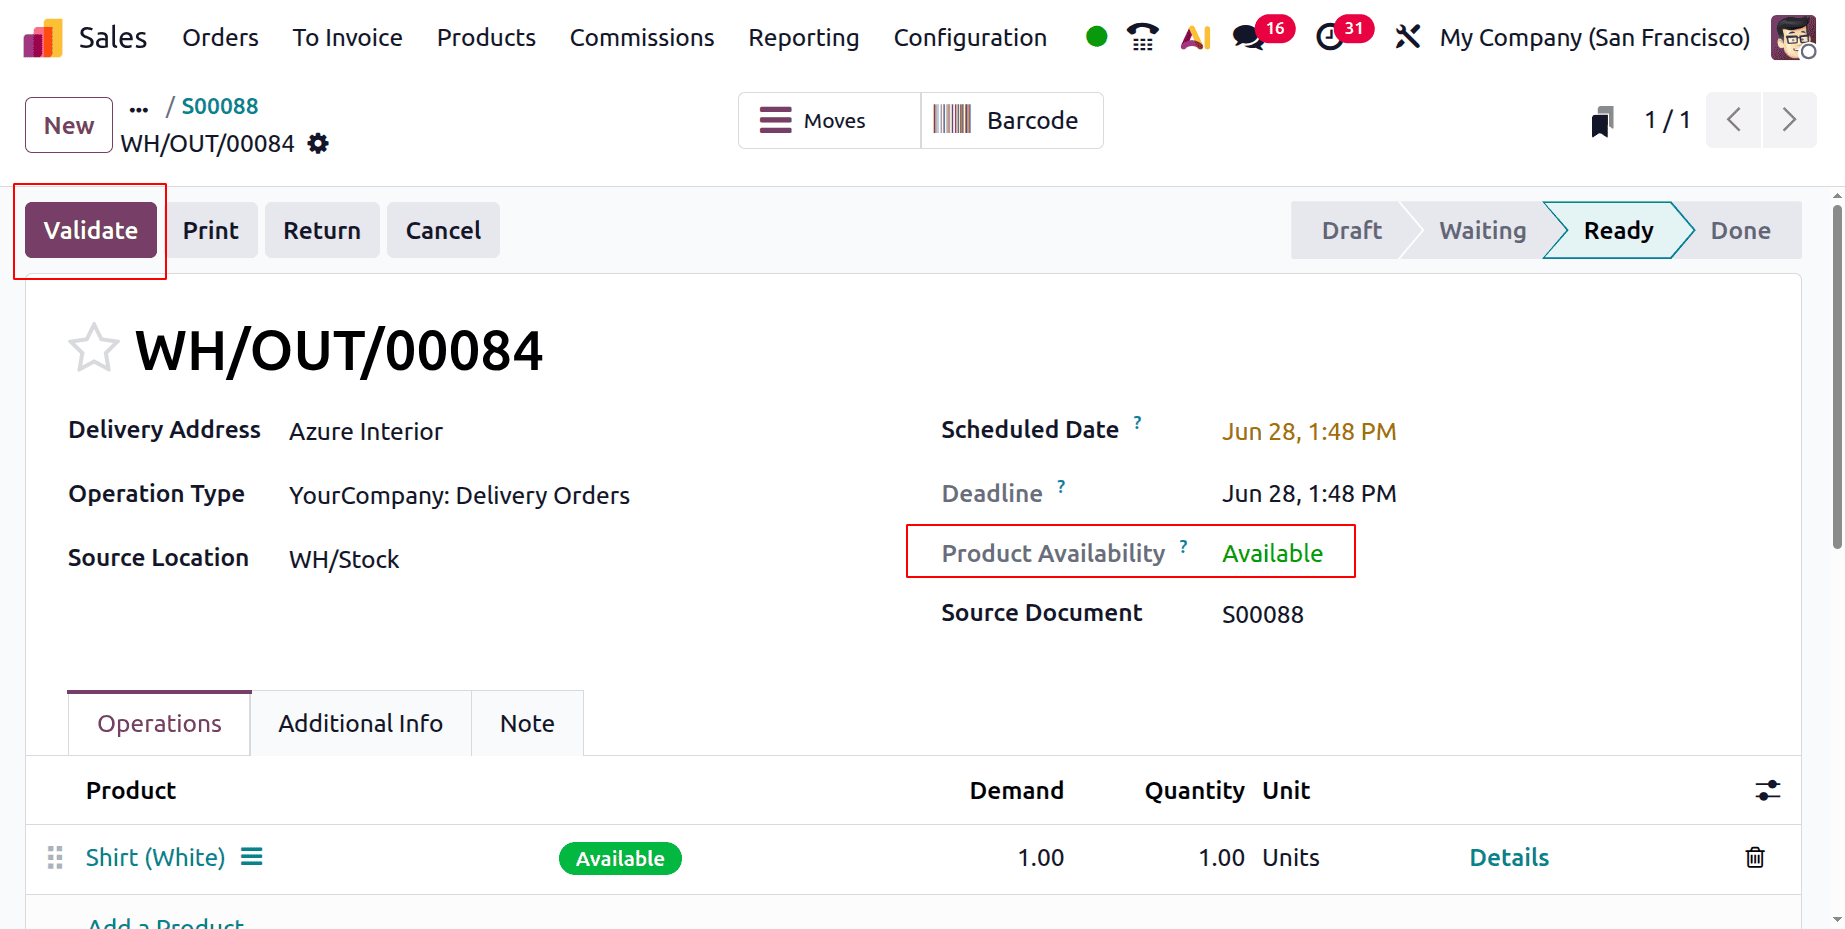
Return to the sale order to finish it. Next, select "Delivery" to confirm the delivery.
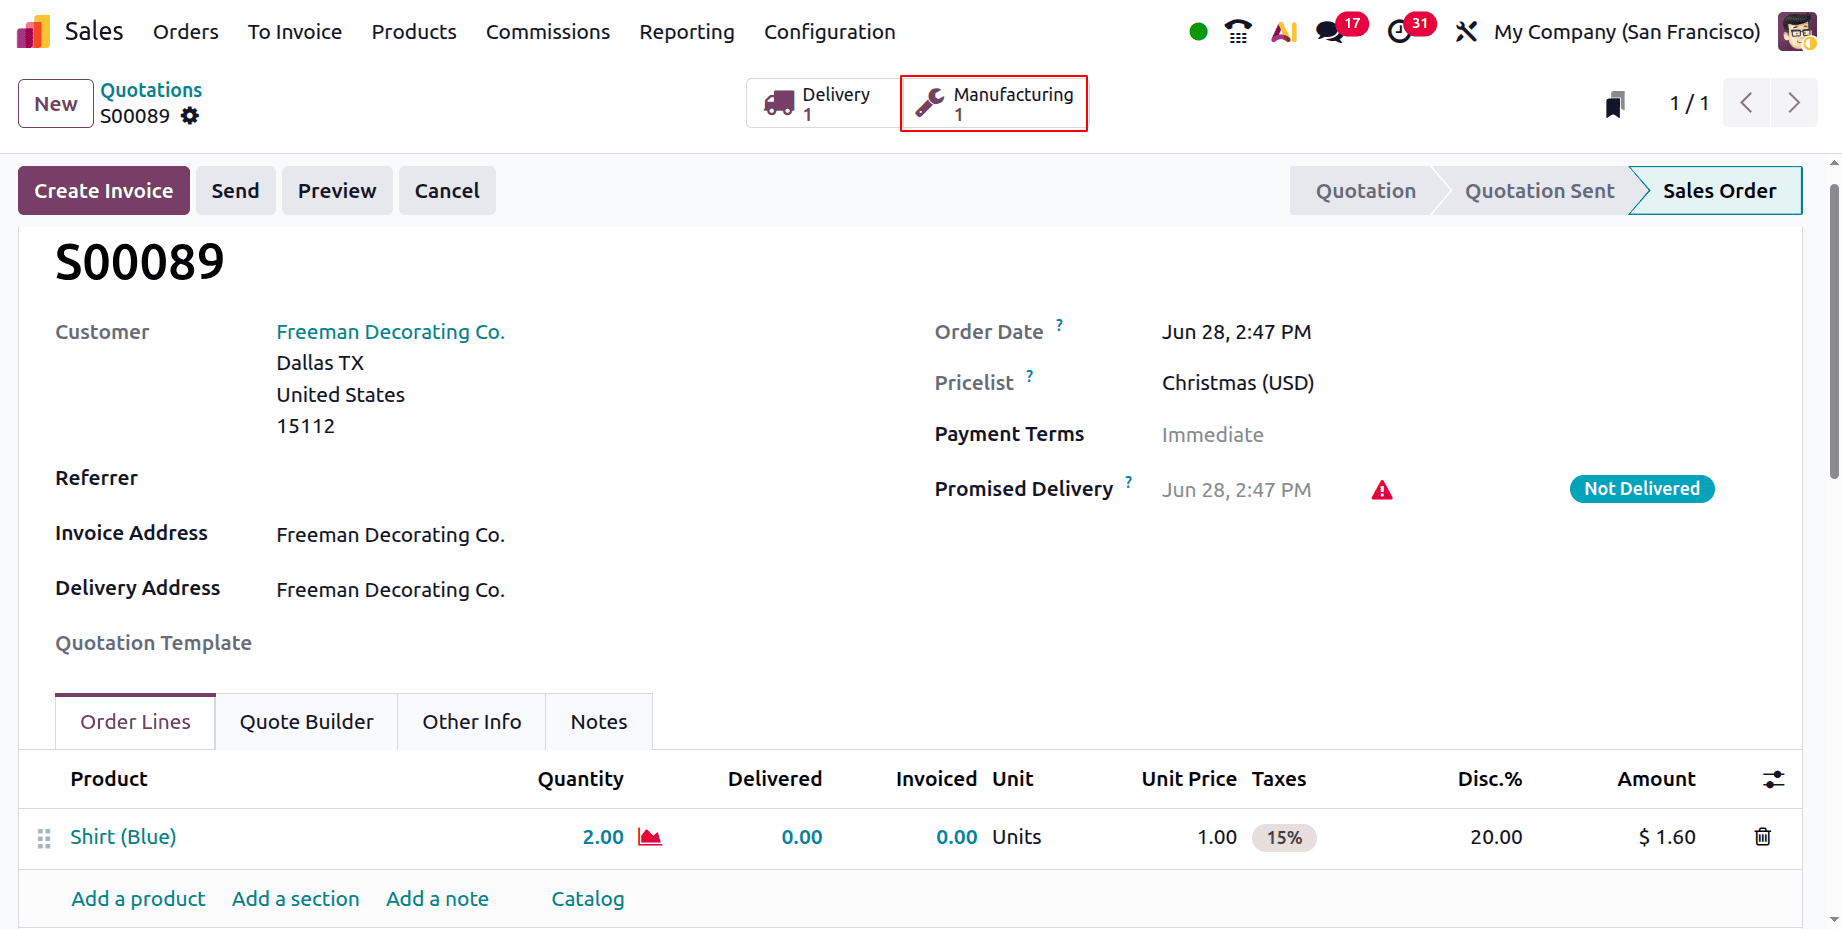
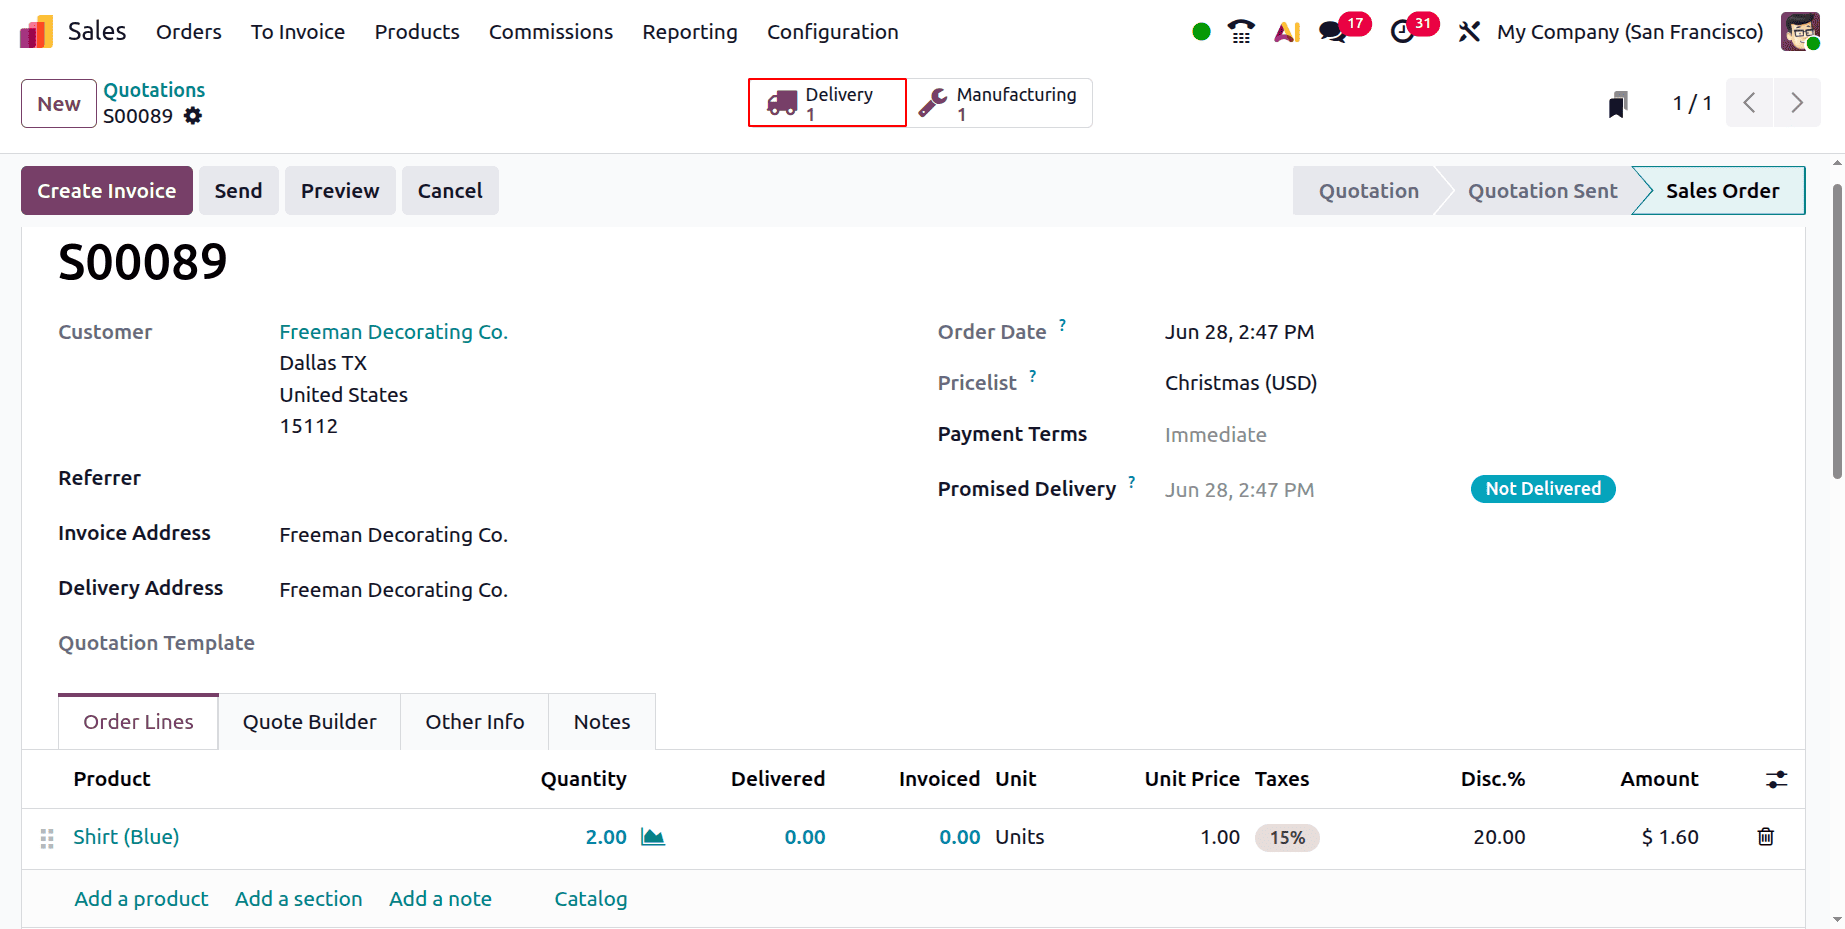
The second client, Freeman Decorating Co. asked for two quantities of blue shirts.
The quotation verifies the order and is generated as indicated below.
As mentioned earlier, a Delivery and a Manufacturing are created there. First, open the Manufacturing.
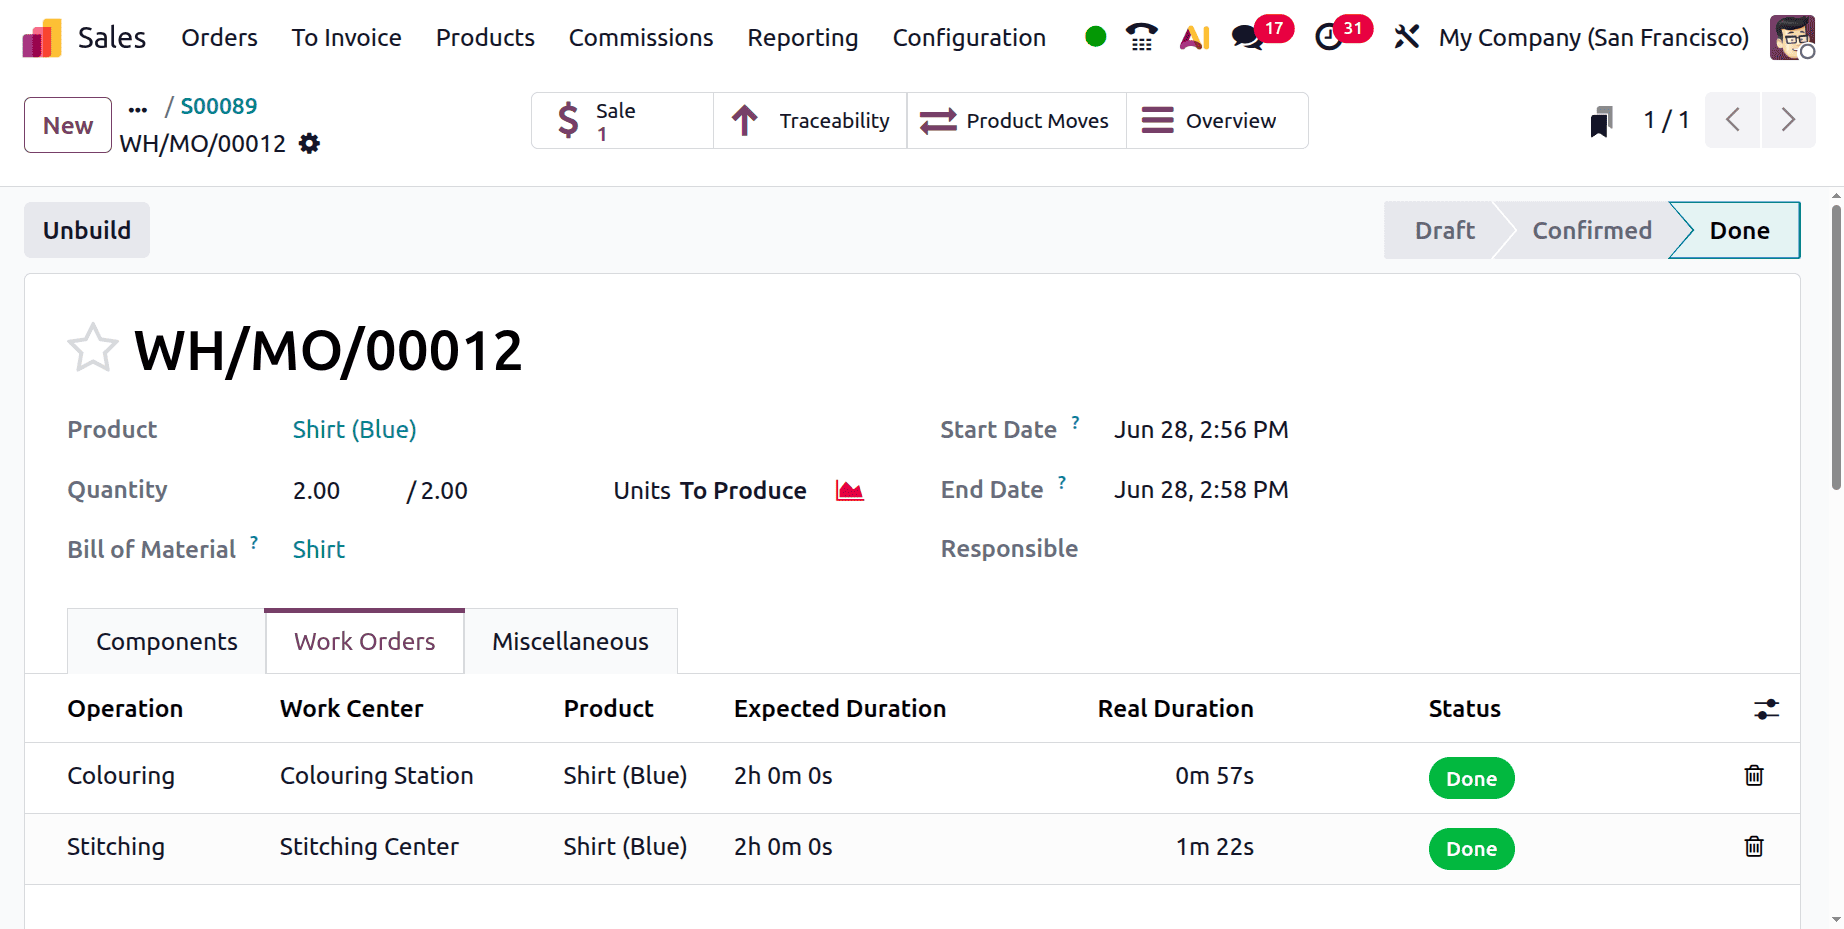
Here, a manufacturing order was made for a blue shirt. Buttons, colour, and cloth are the constituents. Two quantities need to be produced. The component quantity also rose in accordance with the quantity.
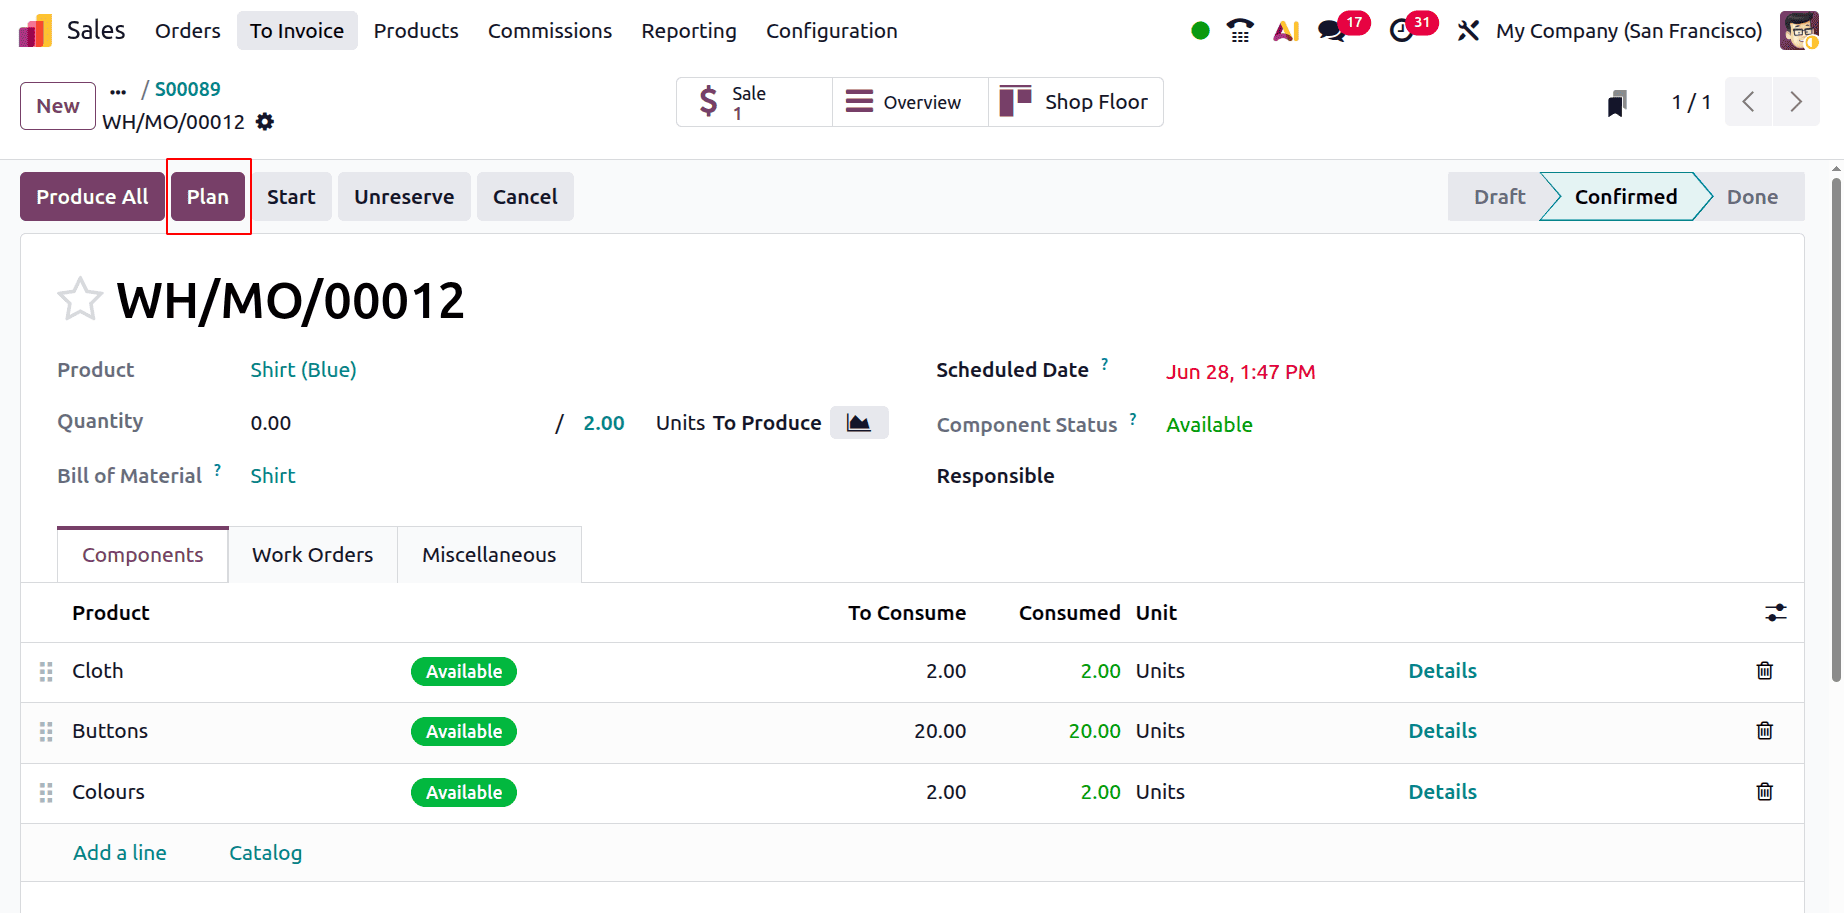
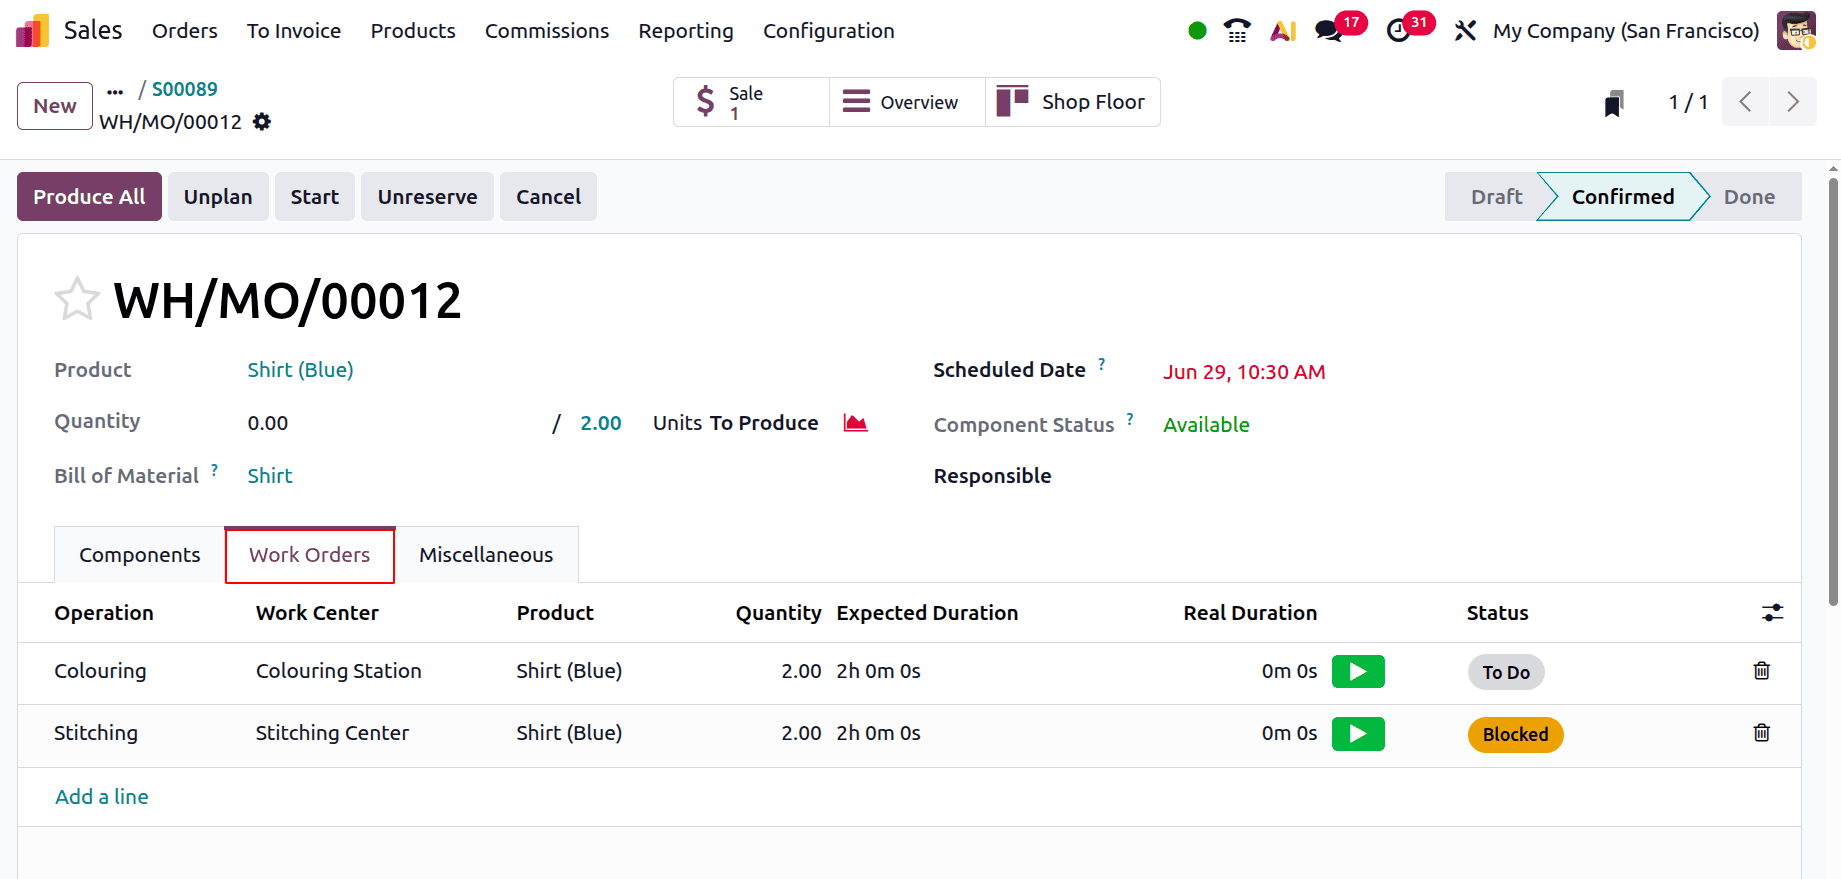
Colouring and stitching are then done inside the Work Orders. Plan the production order first, as previously said.
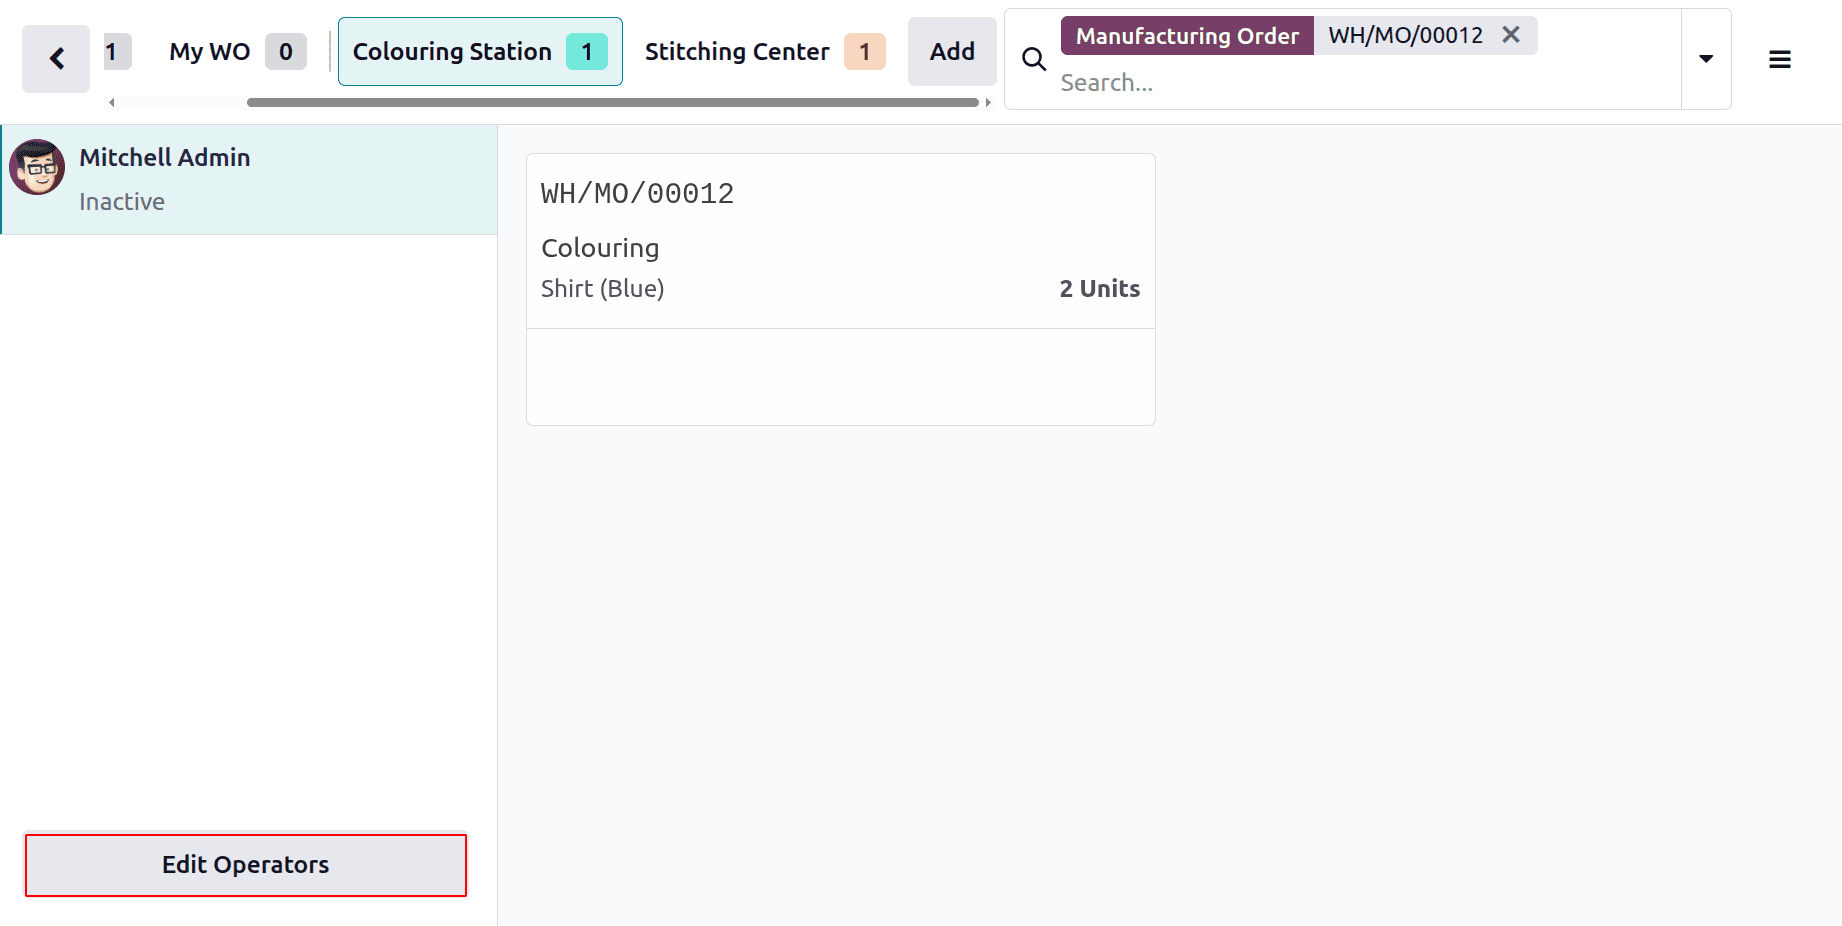
First starts with the operation Colouring. So enter the Shop Floor. To add work center, click on the Add button.
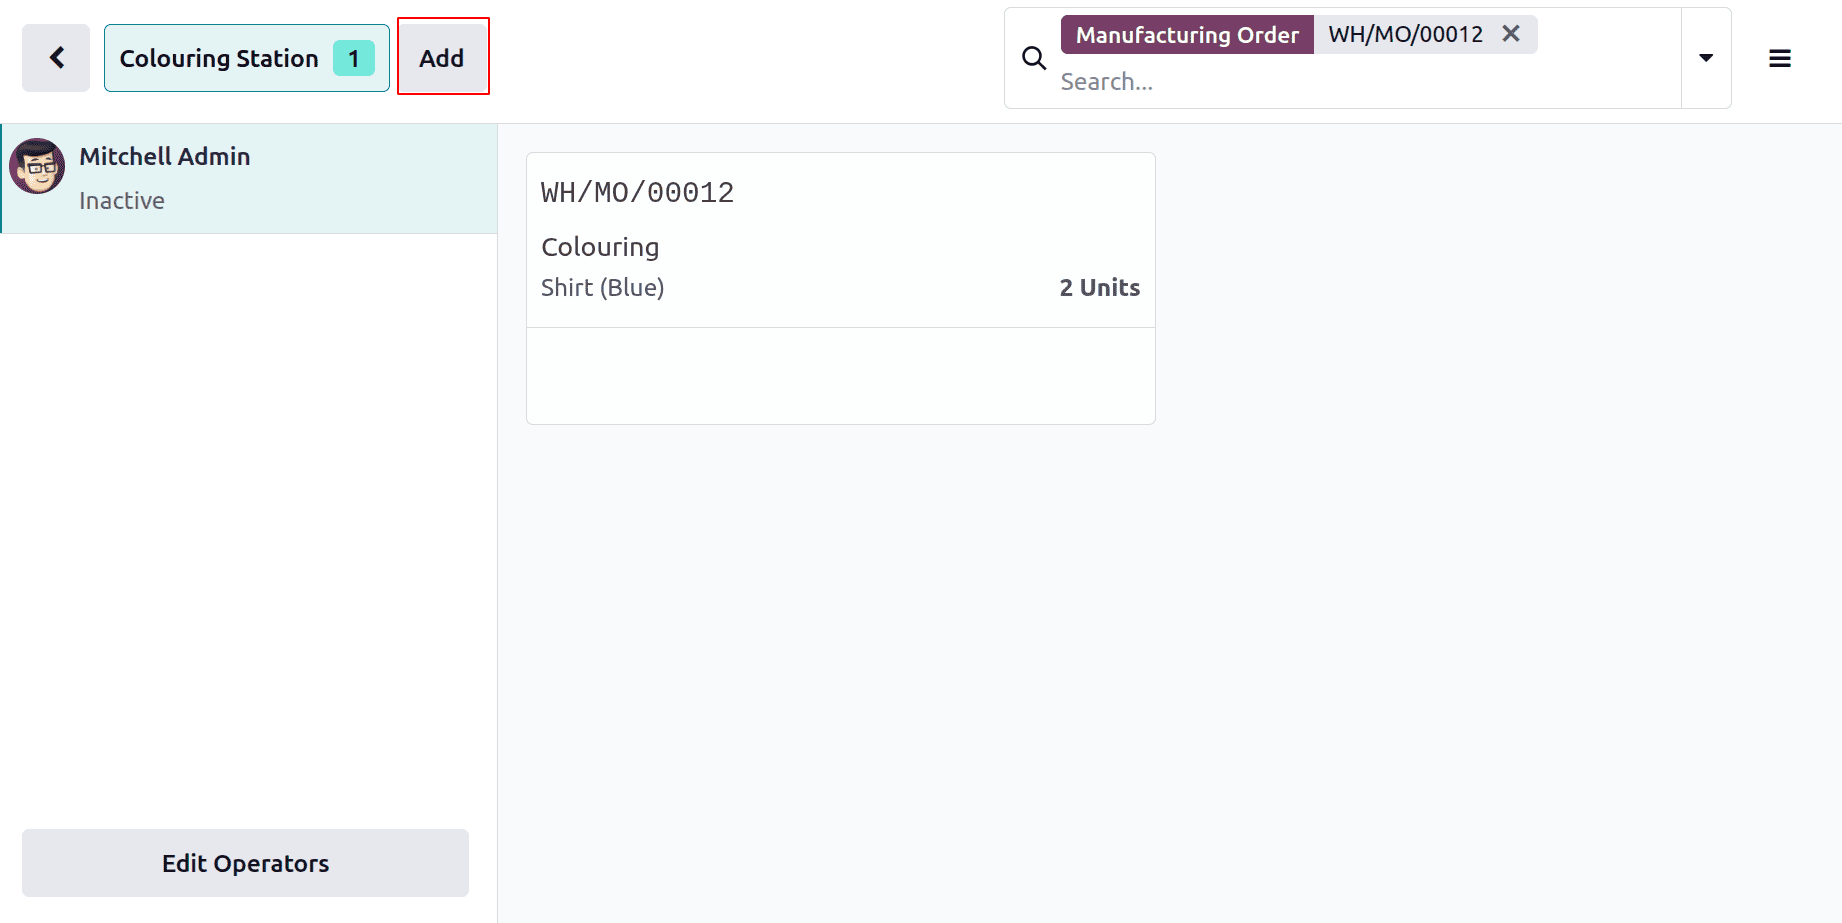
Here, the 2 operations were performed in two different work centers. So choose the work centers as shown below.

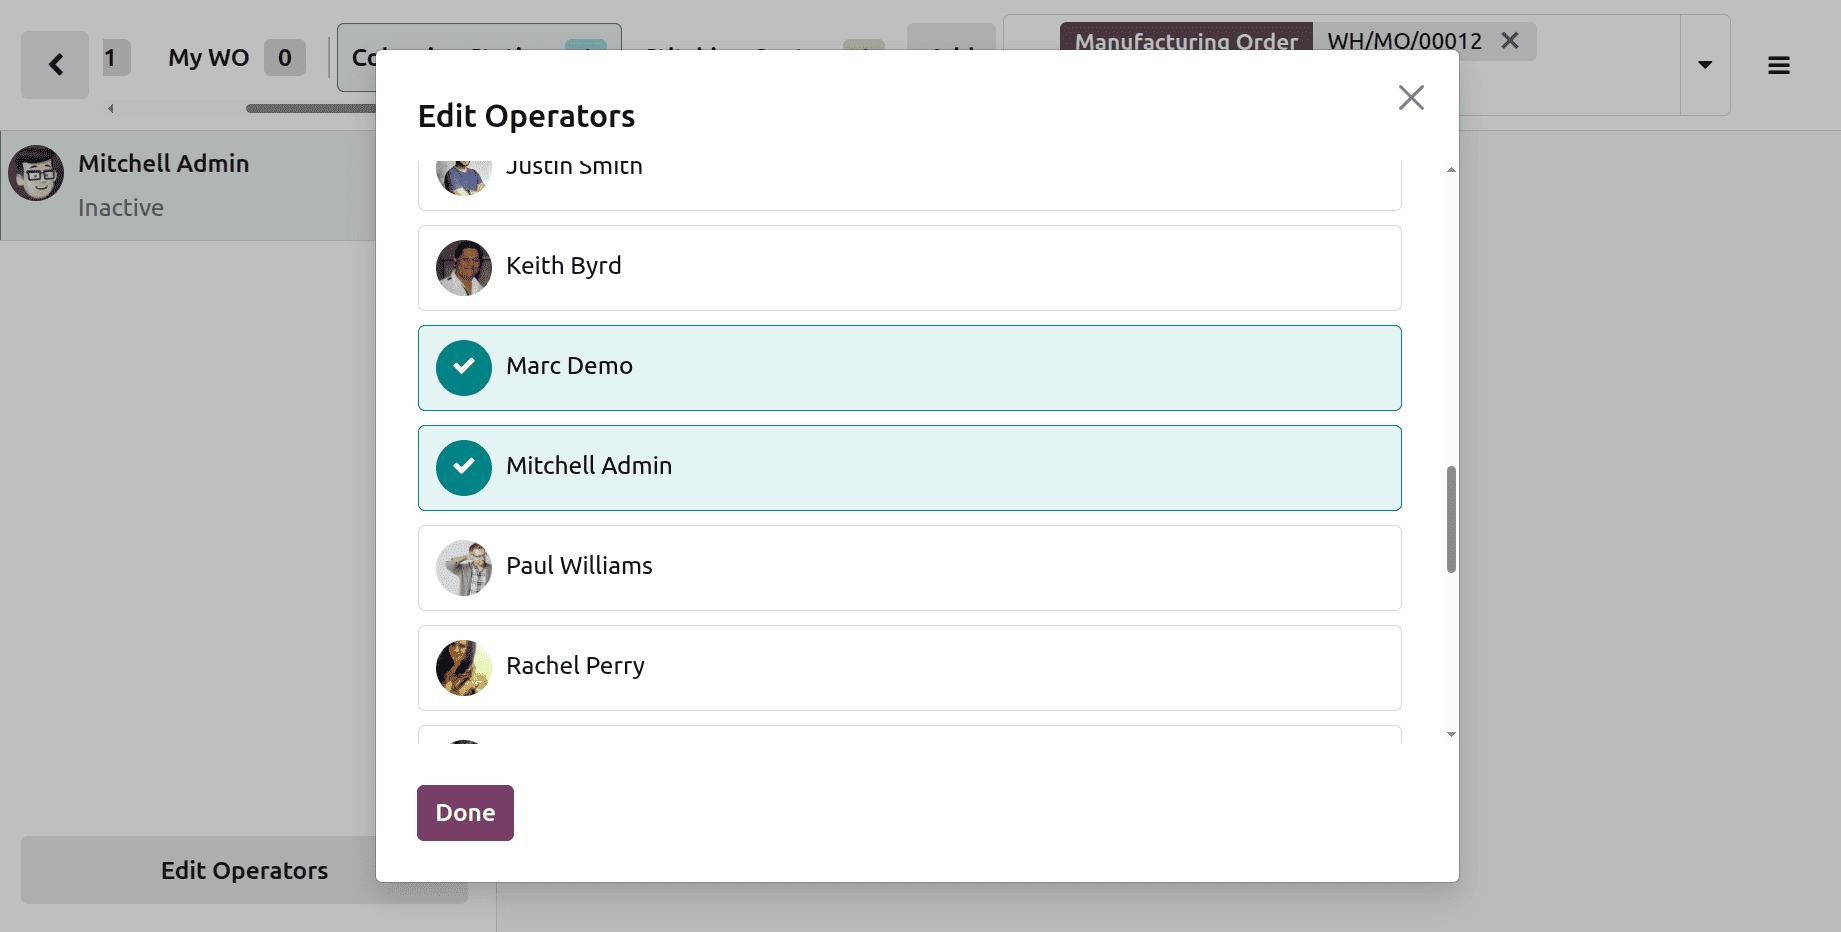
The Allowed employee of the Work Center Courting Station is Marc Demo. So click on the Edit Operator to choose the operator.
Then choose the operators.
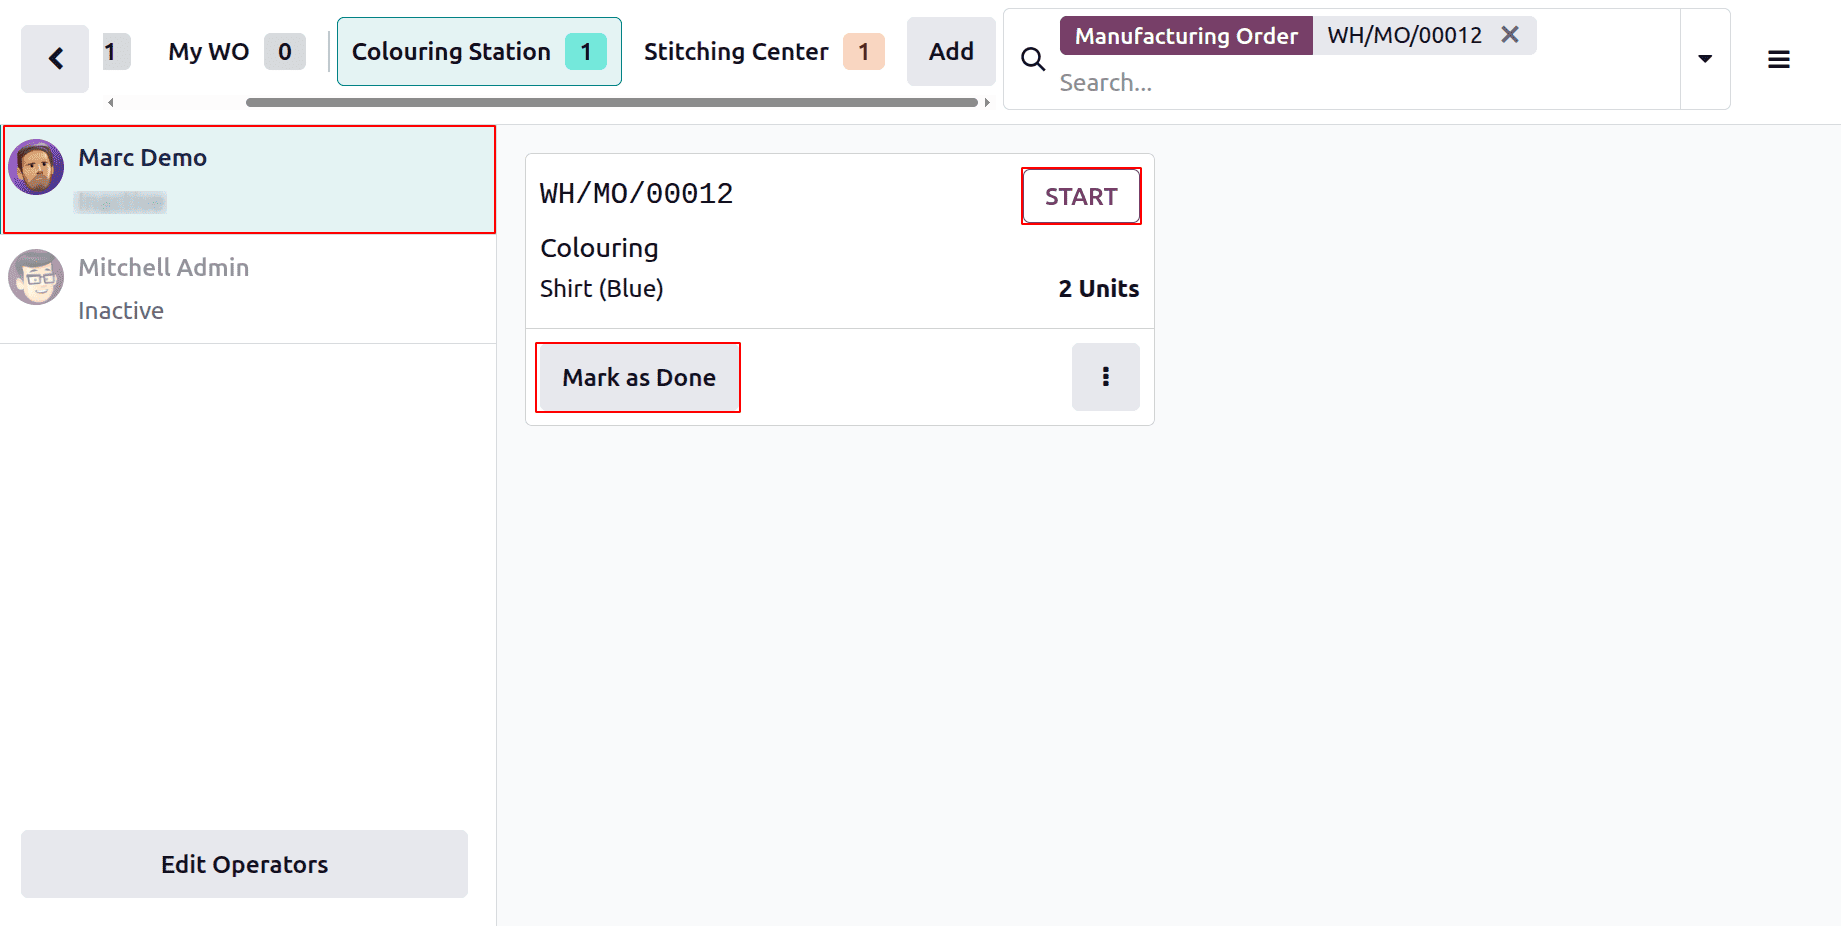
To start the operation, click on the Start button.
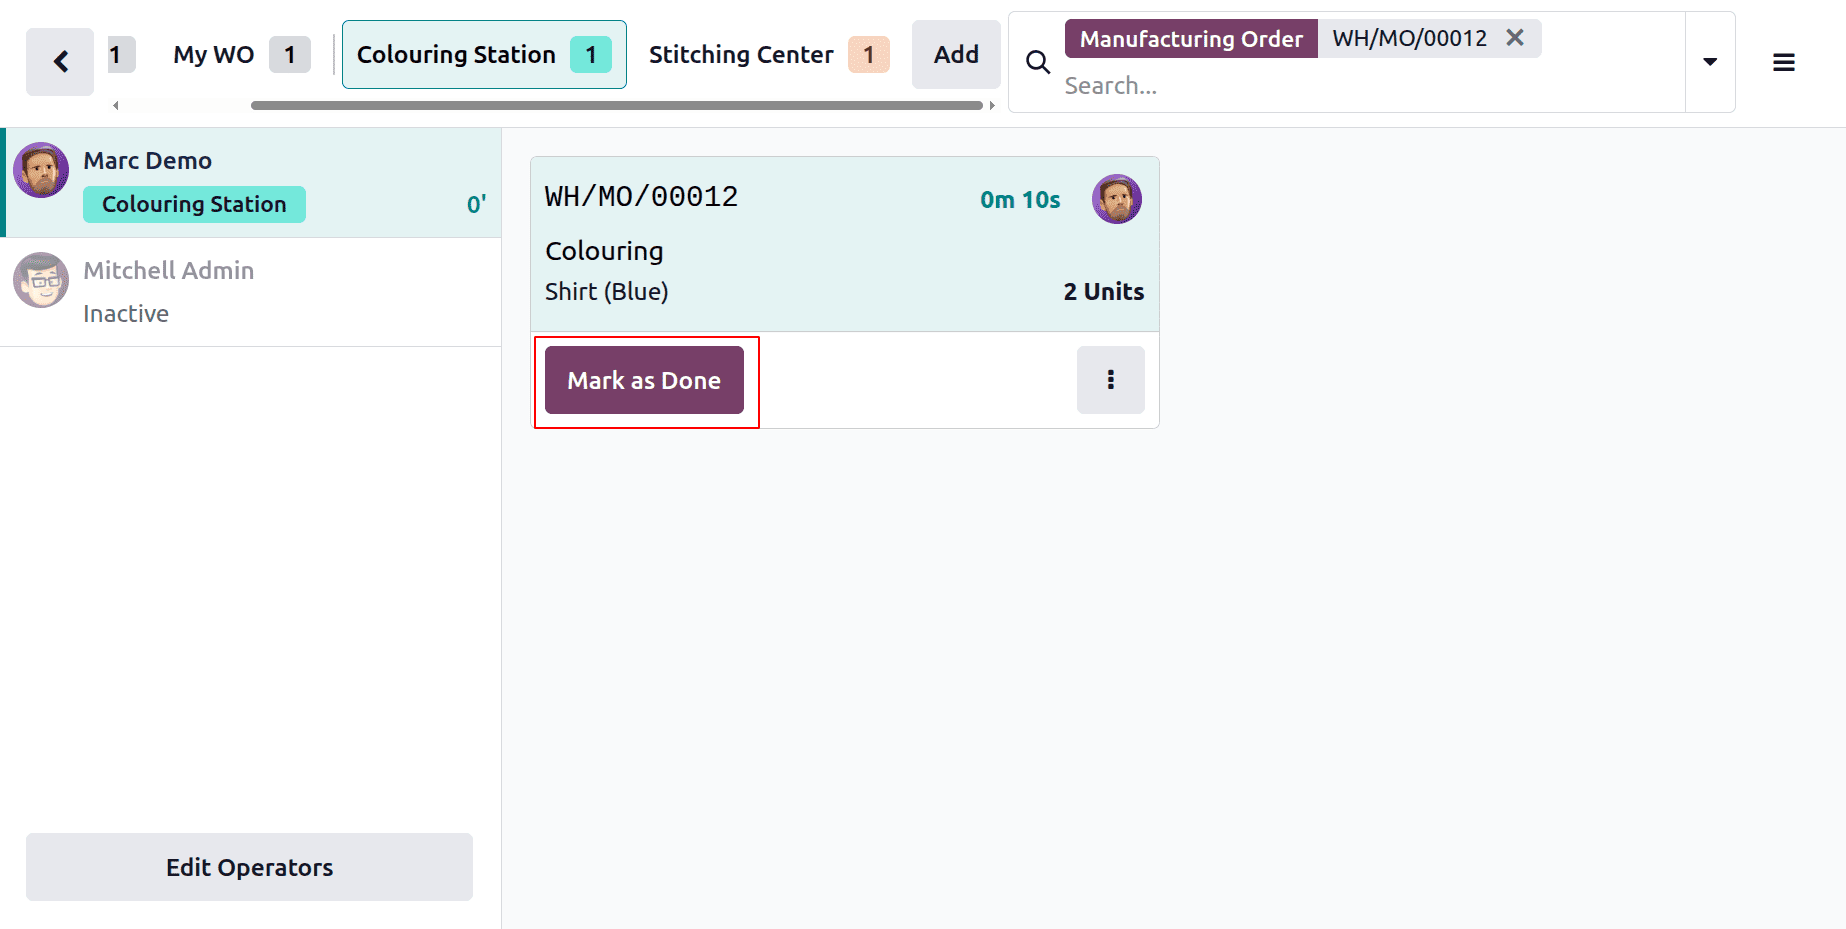
After completing the operation, click on the Mark as Done button.
Then move to the second work center named Stitching Station. Start the operation. After completing, click on the Close Production button.
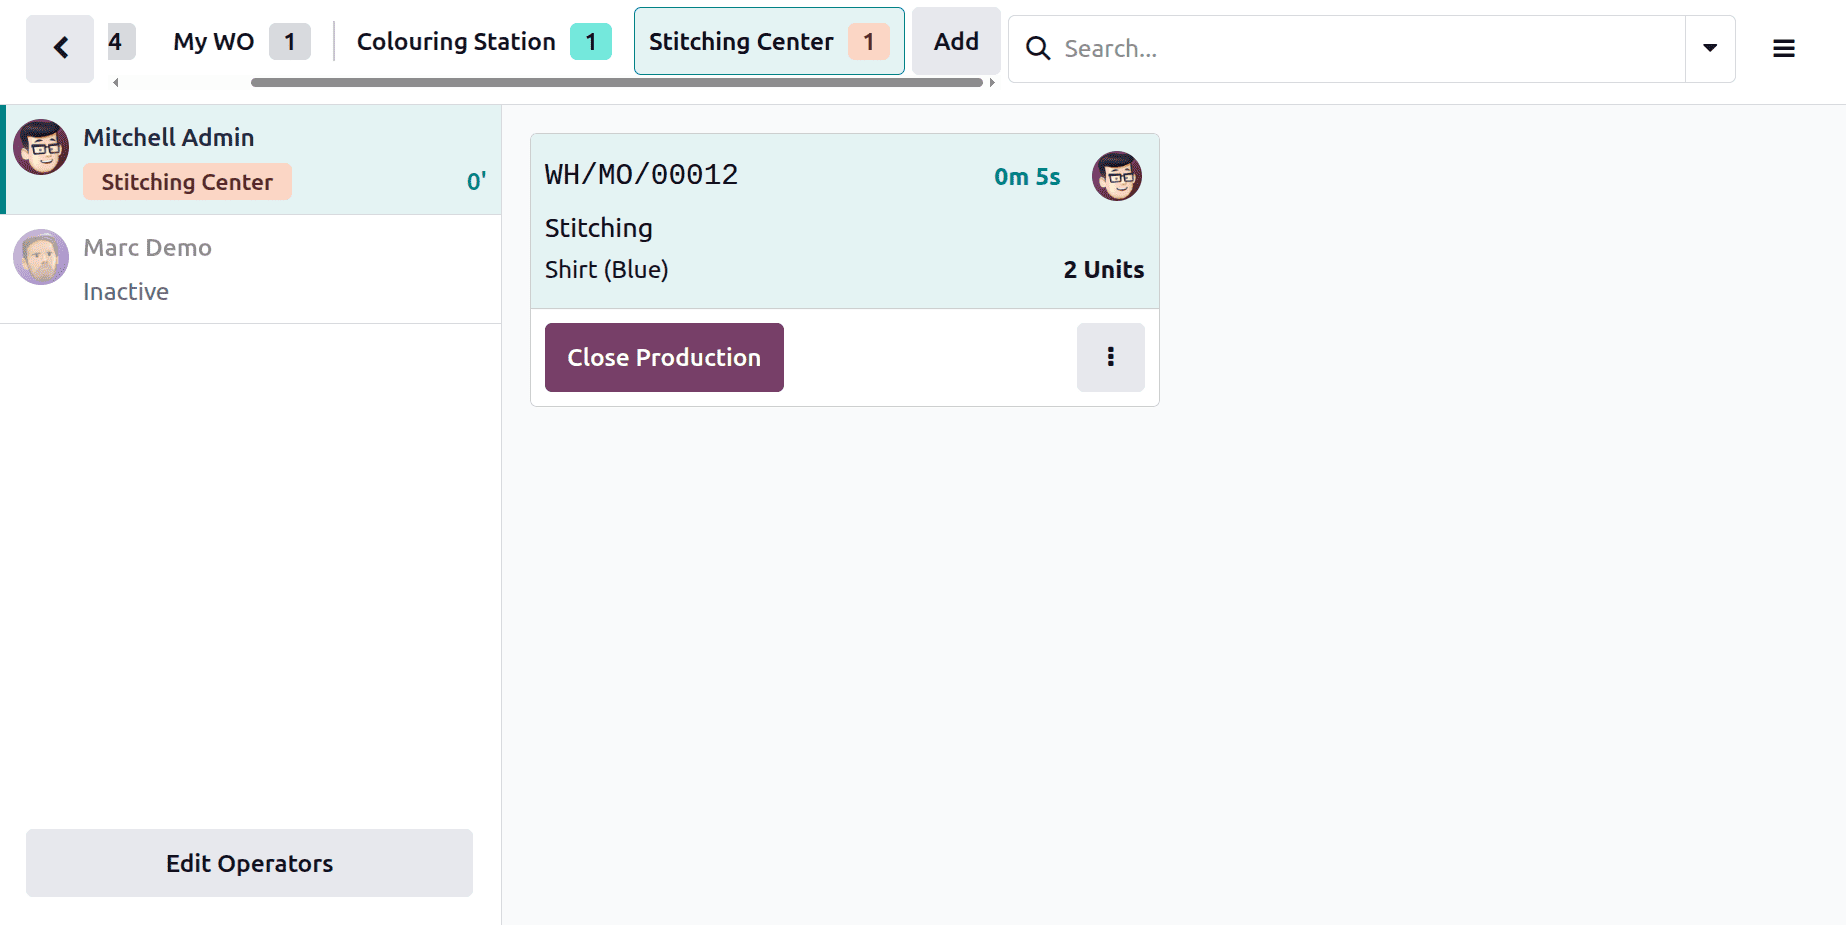
As shown below, the manufacturing is completed.
Move back to the sale order to complete the Delivery.
Validate the Delivery to complete the Sale order.
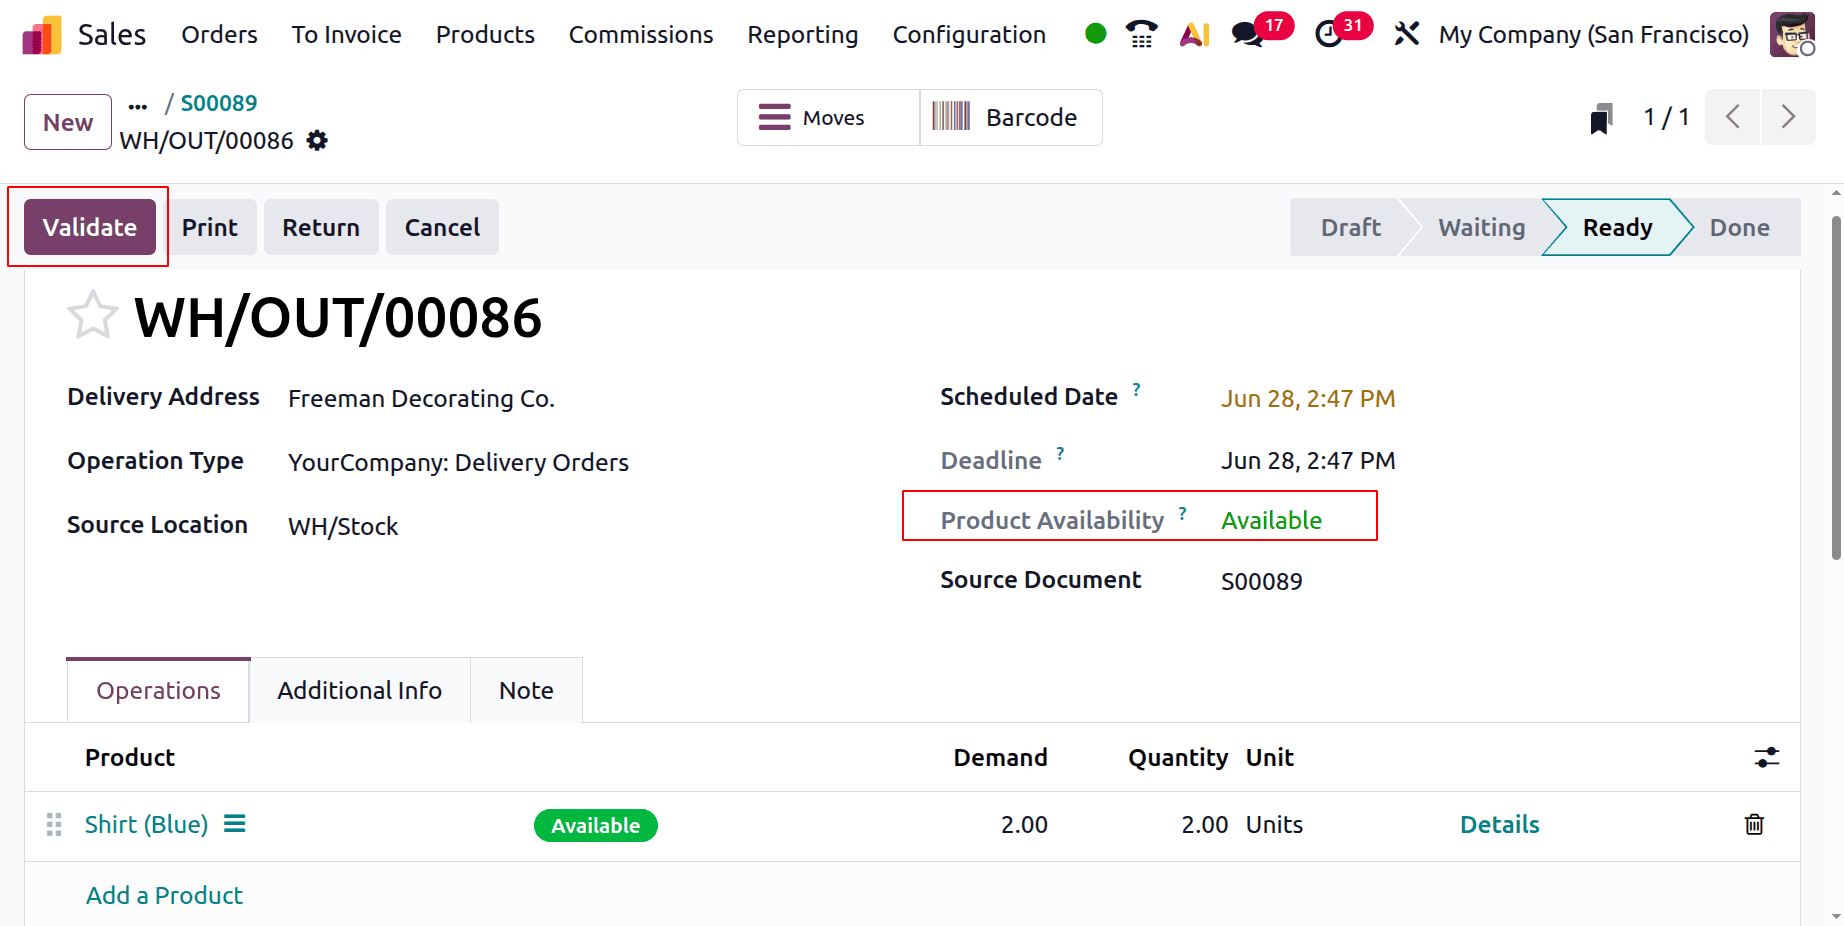
The merchandise has now been replenished, allowing users to distribute it. Two amounts are available: The Blue Shirt is prepared for delivery. Verify the delivery.
In conclusion, Odoo 19 provides a flexible and efficient way to distribute the production of any product variation among many workcenters in compliance with specific operational needs. This ensures optimal resource utilization and effective manufacturing procedures tailored to variant-specific requirements.
To read more about How Production of Each Variant is Routed to Multiple Workcenters in Odoo 18, refer to our blog How Production of Each Variant is Routed to Multiple Workcenters in Odoo 18.