Authentication is one of the most important and necessary parts of an application. Login screens are easy to build, but handling and managing the authentication logic in an application can become really hard. We may need to reinvent the handling of authentication tokens, user sessions, refresh logic, and permissions.
If you are building a React app that needs authentication and authorization without reinventing every authentication logic, then Keycloak is the right choice. It gives you a complete authentication system out of the box. It will handle the login, roles, tokens, social sign-ins, etc. In this blog, we will learn how to secure a React app using Keycloak.
Step 1: Set Up Keycloak Server
First, you will need to run a Keycloak instance. We can use Docker to run the Keycloak instance.
docker run -p 8080:8080 \
  -e KEYCLOAK_ADMIN=admin \
  -e KEYCLOAK_ADMIN_PASSWORD=admin \
  quay.io/keycloak/keycloak:latest start-dev
You can open Keycloak at http://localhost:8080 and log in with
- Username: admin
- Password: admin
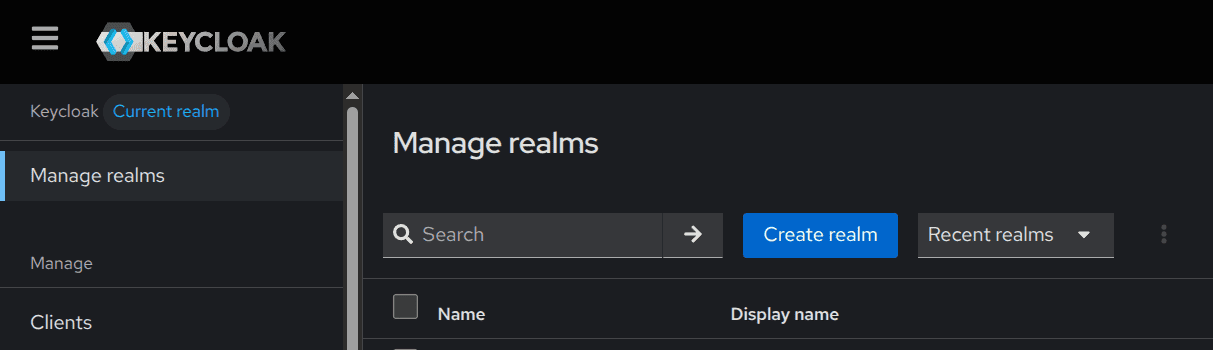
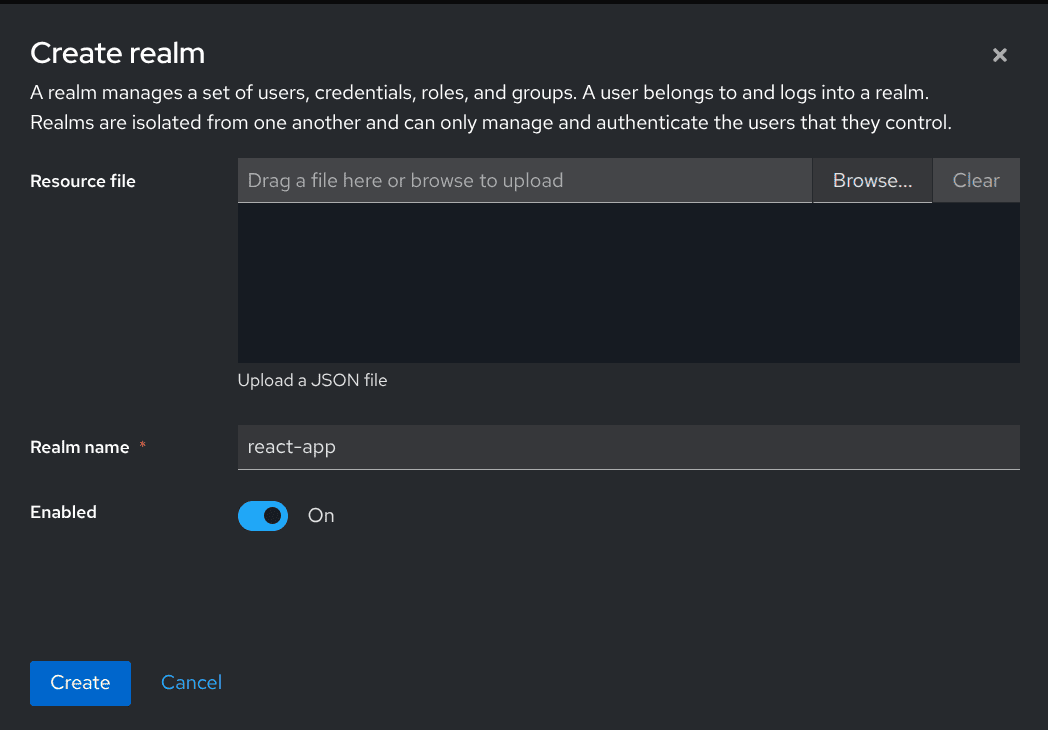
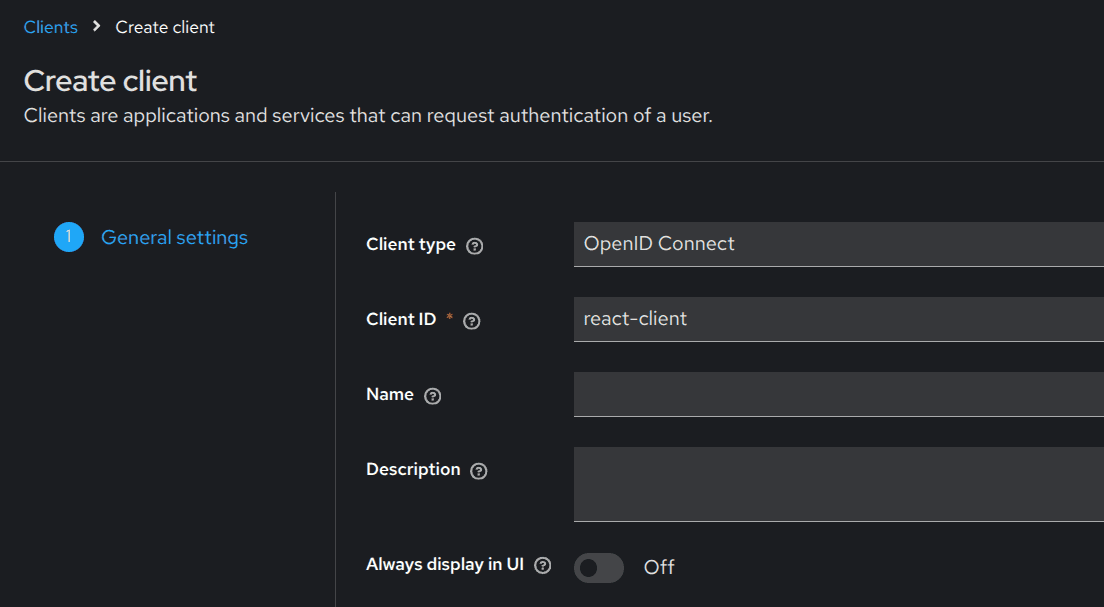
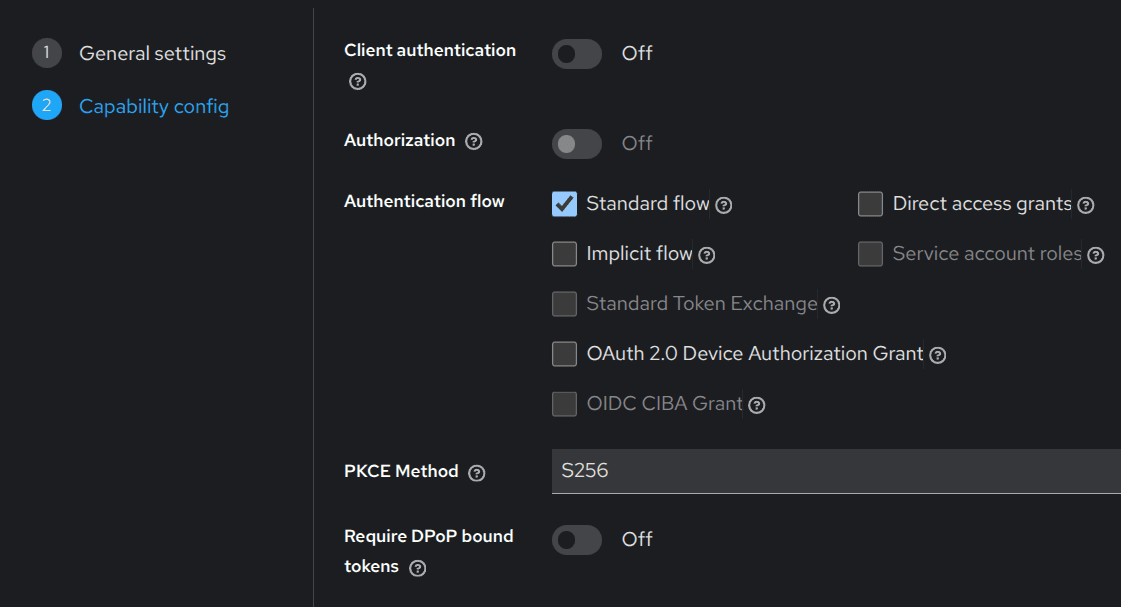
Step 2: Create a Realm and Client
Now we need to create a new realm and a client for the React application. Follow these steps:
Create a Realm
- Go to Manage Realm > Create Realm
- Name it: react-app
Create a Client
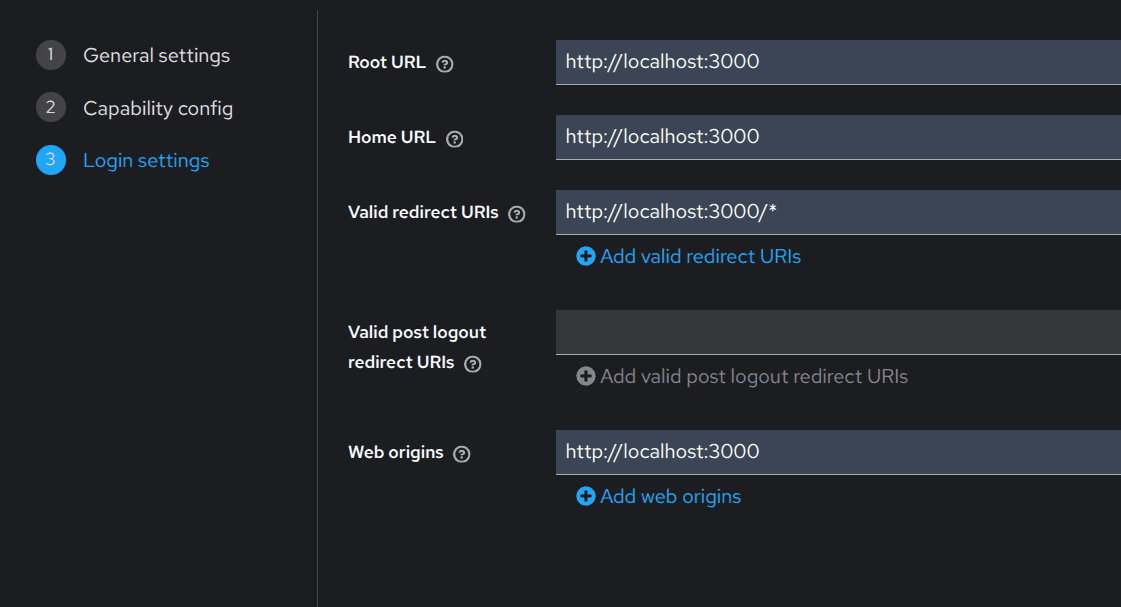
- Client ID: react-client
- Authentication flow: Standard flow
- Root URL: http://localhost:3000
- Valid redirect URIs: http://localhost:3000/*
Step 3: Install Keycloak in React
Create a new react app if it has not been created
npm create vite@latest my-app
Now, we need to install all the required Keycloak packages in your React app.
npm install keycloak-js @react-keycloak/web
Step 4: Configure Keycloak
Now we need to configure Keycloak in React. Create a configuration file (keycloak.js) in your src directory.
import Keycloak from "keycloak-js";
const keycloak = new Keycloak({
  url: "http://localhost:8080",
  realm: "react-app",
  clientId: "react-client",
});
export default keycloak;
Step 5: Add Authentication Provider
Update main.tsx file
import React from "react";
import ReactDOM from "react-dom/client";
import { ReactKeycloakProvider } from "@react-keycloak/web";
import App from "./App";
import keycloak from "./keycloak";
ReactDOM.createRoot(document.getElementById("root")).render(
  <ReactKeycloakProvider
    authClient={keycloak}
    initOptions={{
      onLoad: "login-required",
      checkLoginIframe: false,
    }}
  >
    <App />
  </ReactKeycloakProvider>
);
Step 6: Access User Info in Components
Now you can access authentication states using Keycloak hooks.
import { useKeycloak } from "@react-keycloak/web";
function App() {
  const { keycloak, initialized } = useKeycloak();
  if (!initialized) return <div>Loading...</div>;
  return (
    <div>
      <h1>
        Welcome {keycloak.profile?.username}
      </h1>
      <button onClick={() => keycloak.logout()}>
        Logout
      </button>
    </div>
  );
}
export default App;
Step 7: Make Secure API Requests
import { useKeycloak } from "@react-keycloak/web";
export function useApi() {
  const { keycloak } = useKeycloak();
  const getProtectedData = async () => {
    const res = await fetch("http://localhost:5000/protected", {
      headers: {
        Authorization: `Bearer ${keycloak.token}`,
      },
    });
    return res.json();
  };
  return { getProtectedData };
}
Step 8: Protect Routes
import { useKeycloak } from "@react-keycloak/web";
import { Navigate } from "react-router-dom";
function PrivateRoute({ children }) {
  const { keycloak, initialized } = useKeycloak();
  if (!initialized) return <div>Loading...</div>;
  return keycloak.authenticated ? children : <Navigate to="/" />;
}
With Keycloak, we get a complete production-ready authentication system that will handle all the hard parts and authentication logic for you, making the development process simpler and more efficient.
To read more about How to Set Up shadcn/ui in a React App, refer to our blog How to Set Up shadcn/ui in a React App.