Odoo 19 provides a flexible user access management system that allows administrators to control what different users can see and do within the database. User roles and access rights help organizations protect sensitive information while giving employees, customers, and other users access to the features they need.
Odoo provides different user types for different purposes, including internal users who work with the backend, portal users who access selected information through the customer portal, and public users who visit the website without logging in.
In this blog, we will explore the different user types in Odoo 19, how to manage portal access, and how to invite an internal user to an Odoo database.
Understanding User Types in Odoo 19
Odoo 19 provides three roles that determine the general level of access available to a user:
- Internal User – An internal user who works with the Odoo backend and has access to the applications and records assigned to them.
- Portal User – An external user, such as a customer or vendor, who can access information through the Odoo portal.
- Public User – A website visitor who has not logged into the Odoo database.
These authorizations dictate the level of access and the actions that the internal user is permitted to carry out. These permissions can be configured from the user's profile under the Access Rights tab.
The public user role in Odoo is managed by a specifically created user, which is kept archived and only used to manage their access rights.
Managing Access for an Internal User
Internal users are users who need access to the Odoo backend. Their permissions can be configured according to their responsibilities.
Step 1: Open the Users Menu
Go to Settings > Users & Companies > Users
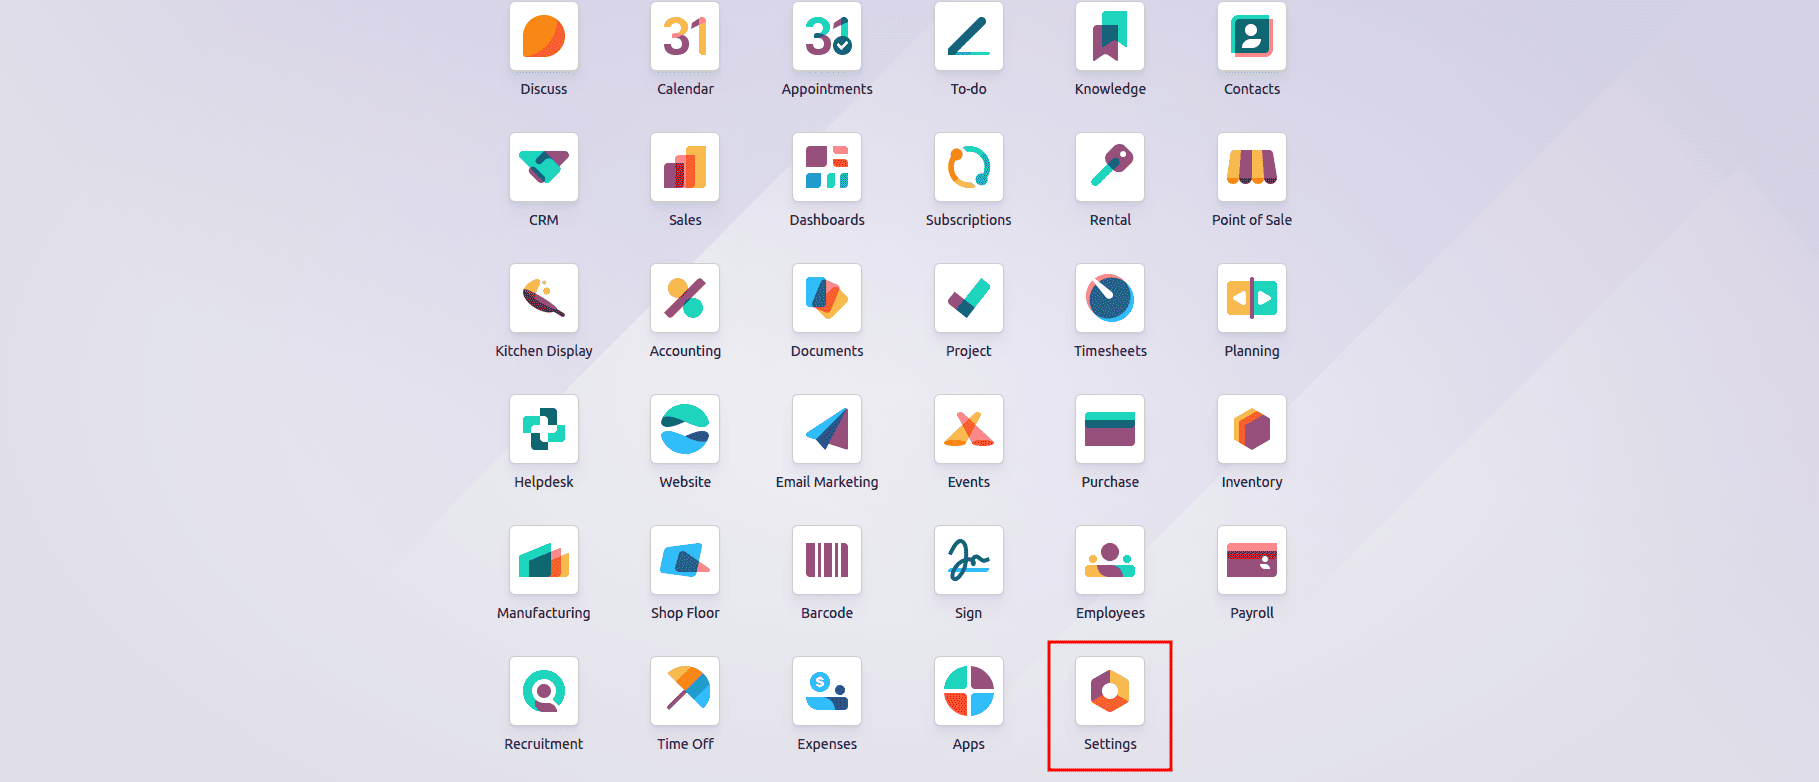
Select any one of the options:
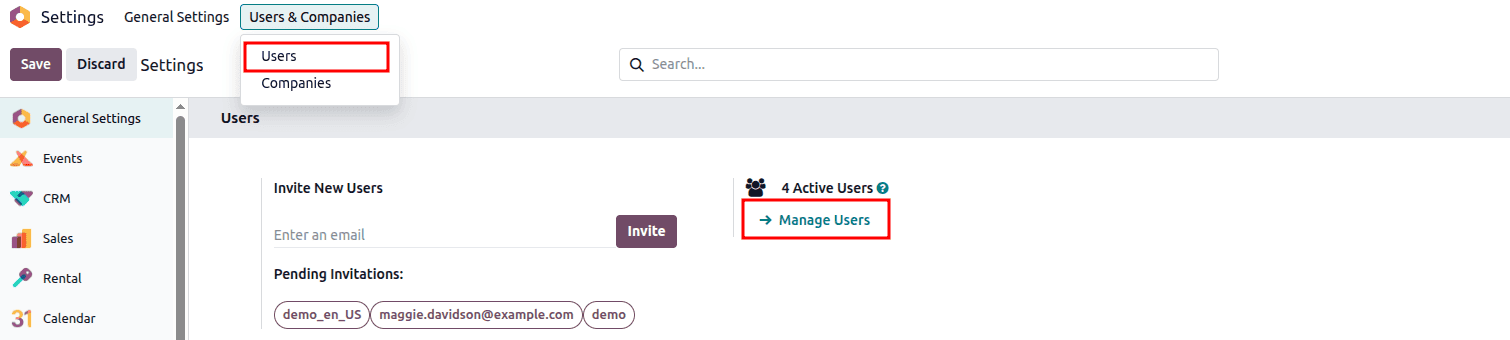
Select an existing user or click New to create a new one.

Step 2: Configure Access Rights
Open the user's Access Rights tab.
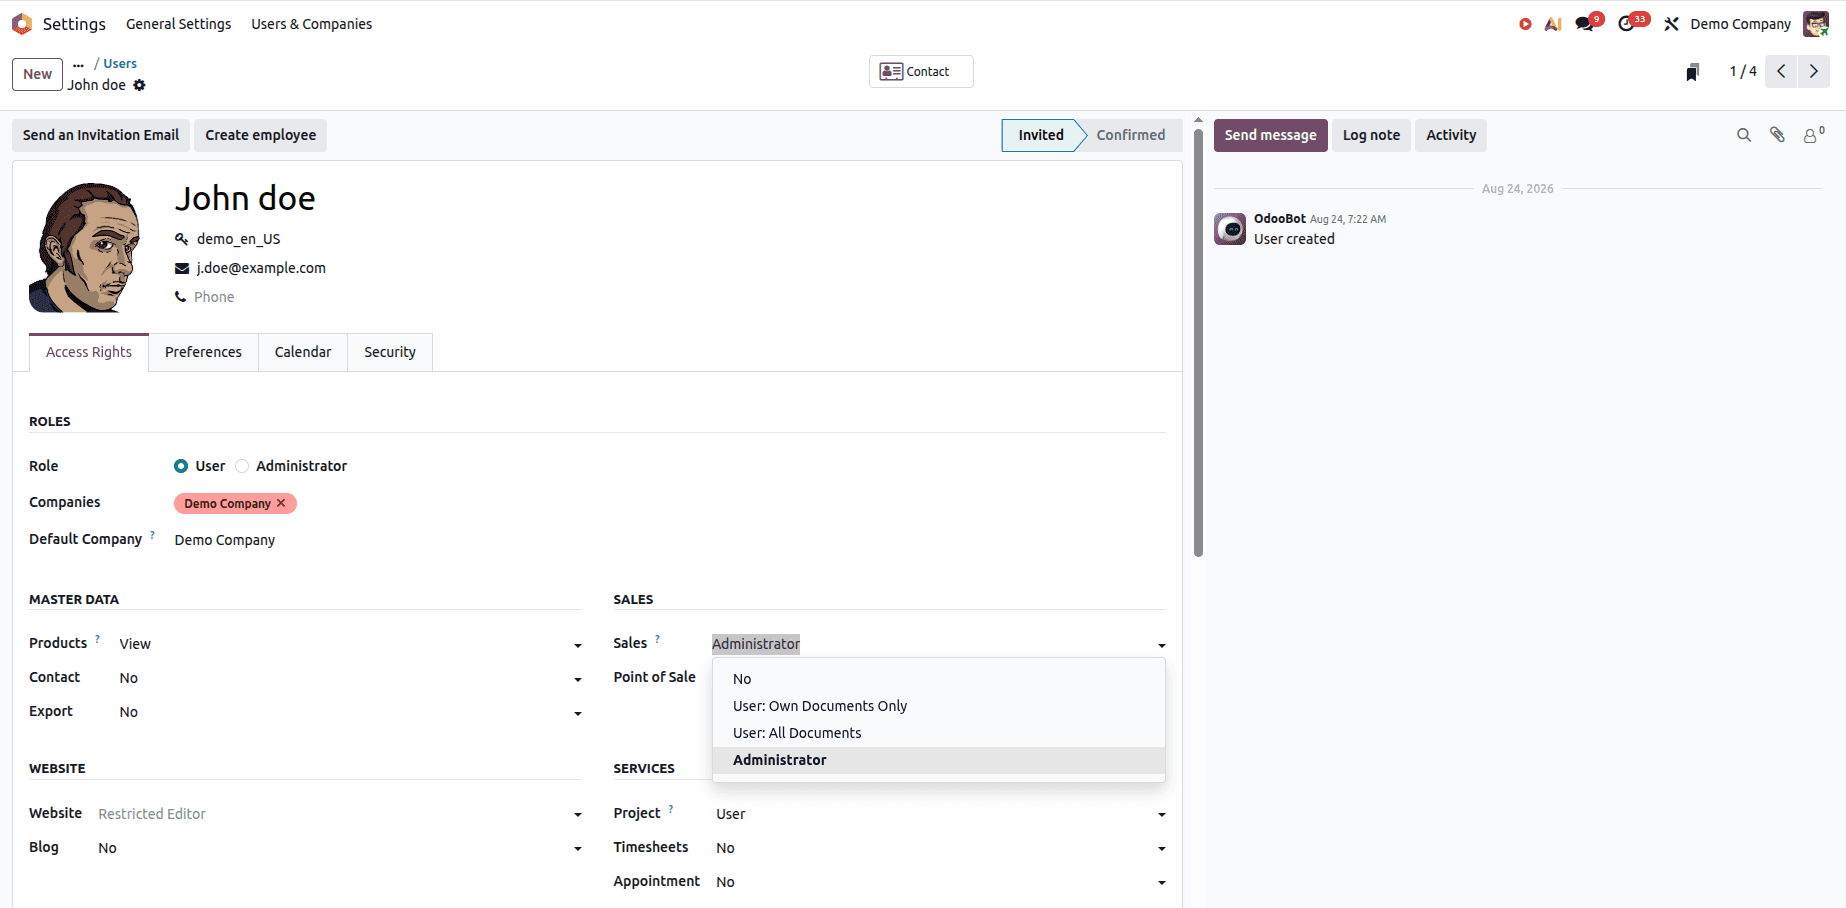
The available application sections depend on the applications installed in the Odoo database. For each application, select the appropriate level of access for the user.
Depending on the application, Odoo can provide options such as:
- User: Own Documents
- User: All Documents
- Administrator
- No access
And other custom options depending on customizations.
These permissions specify what resources the internal user can reach and what actions they are allowed to execute.
Step 3: Save the User
After configuring the required permissions, click Save.
Access for the user will subsequently depend on the chosen roles and groups.
Note: Only administrators or users with the appropriate administration access rights can modify access rights for other users.
Managing Portal Access in Odoo 19
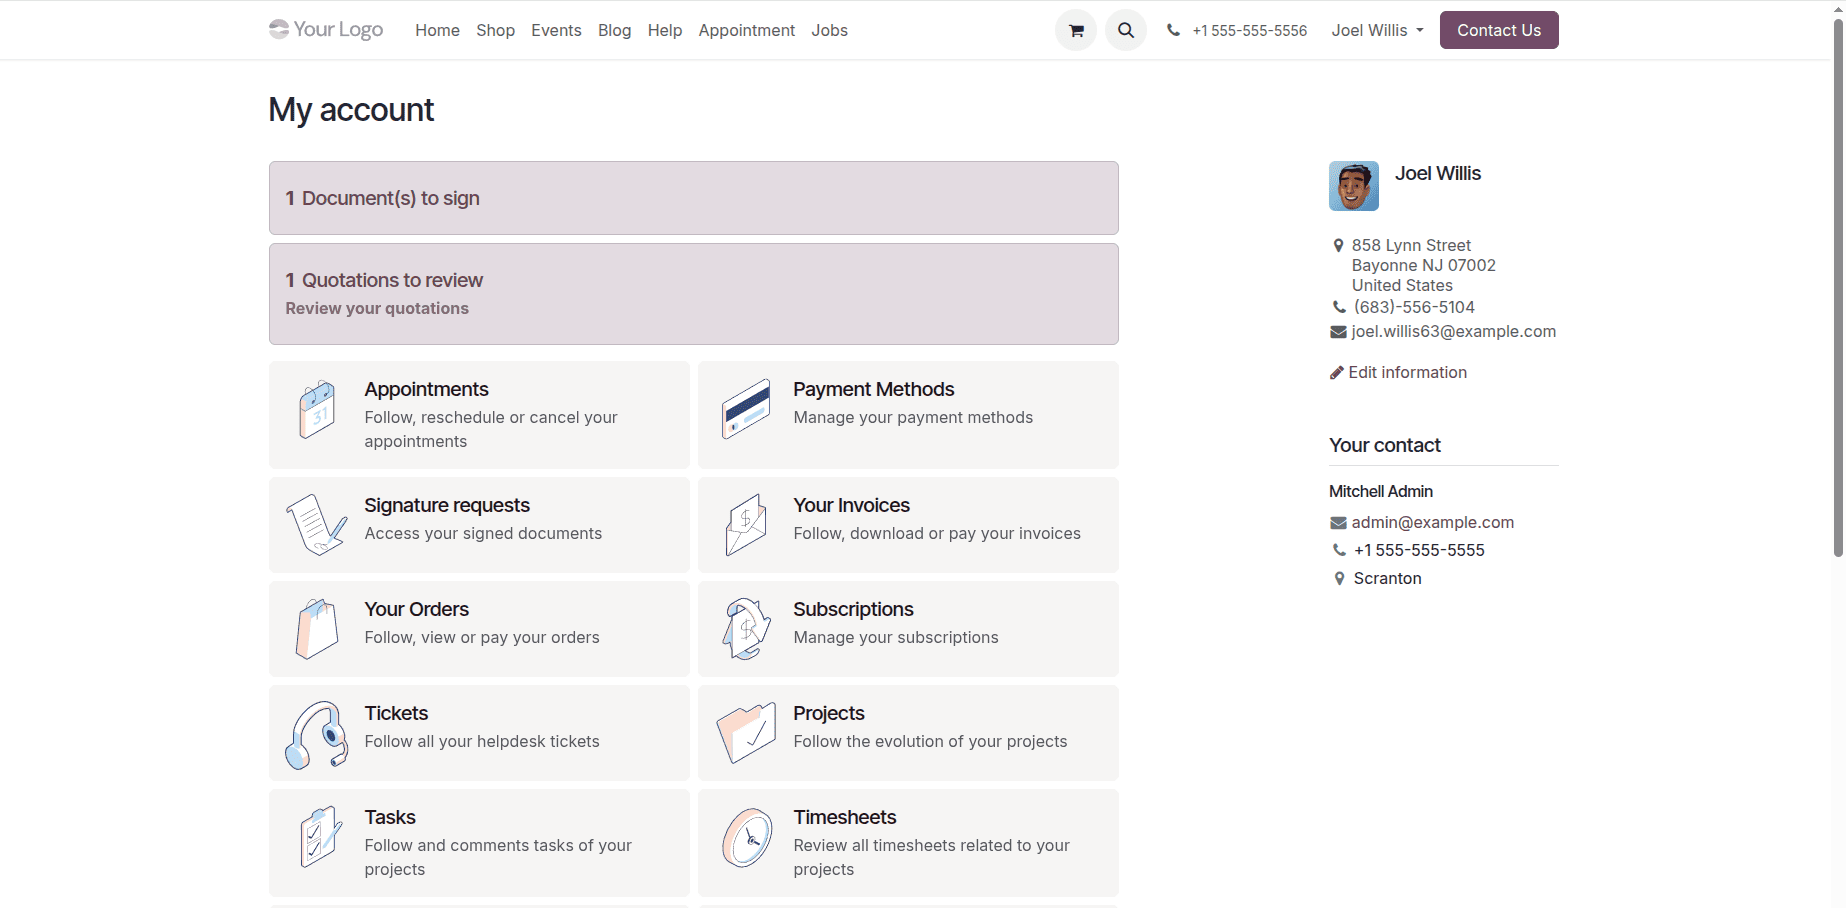
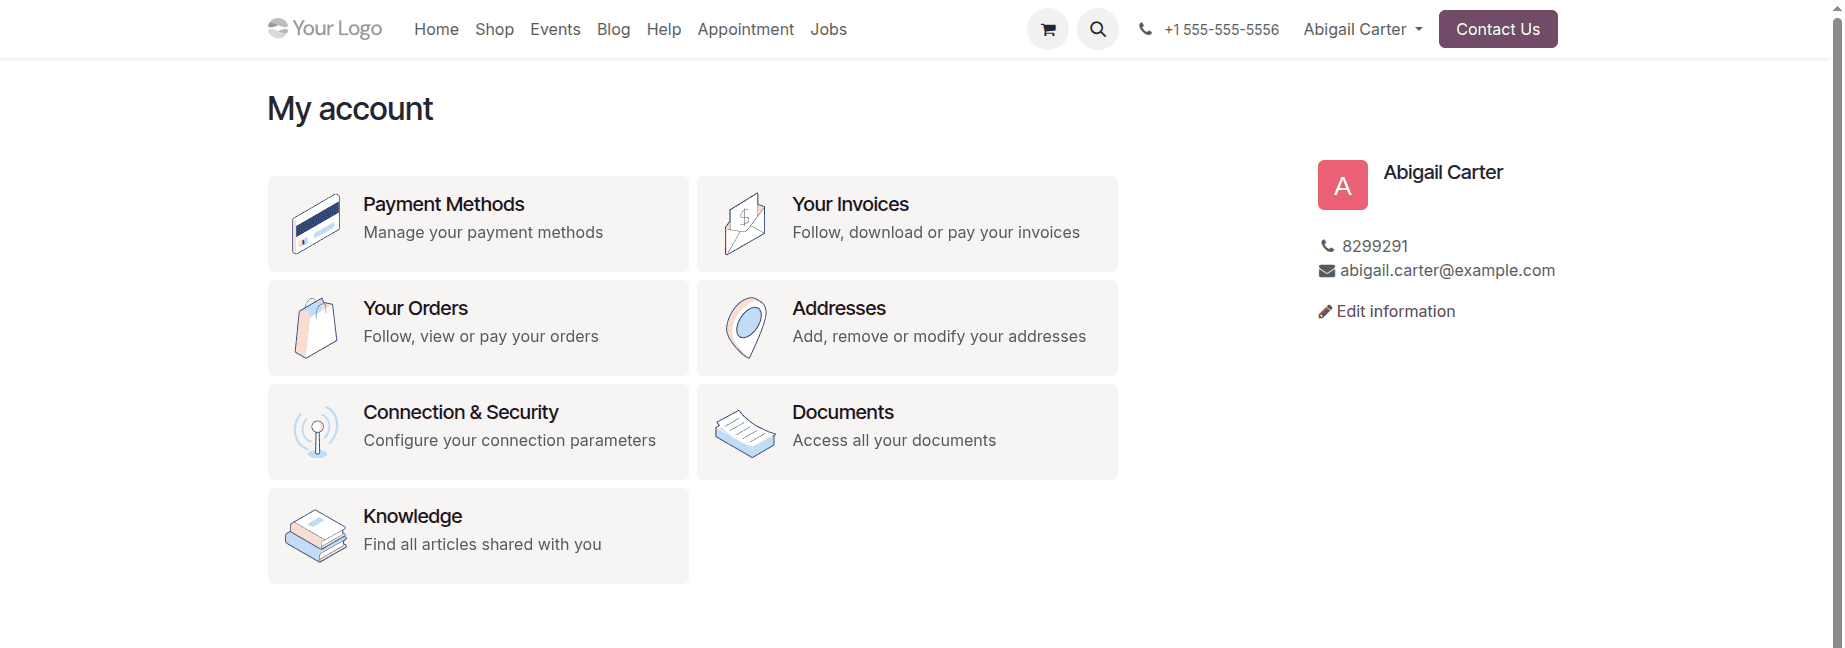
Portal users are designed for outside users like clients and suppliers. Instead of giving them backend access, Odoo allows them to access selected information through the customer portal.
Common portal use cases include allowing customers or vendors to:
- View orders and quotations
- Follow and view invoices
- Download documents
- Make payments
- Manage payment methods
- Manage addresses
- Access other portal-enabled information
Portal users do not receive the same backend access rights as internal users. Their access is limited to the appropriate portal areas.
Internal users with the specific access rights can provide portal access to other users by the following procedure. This requires the outgoing and incoming mail servers to be correctly set up.
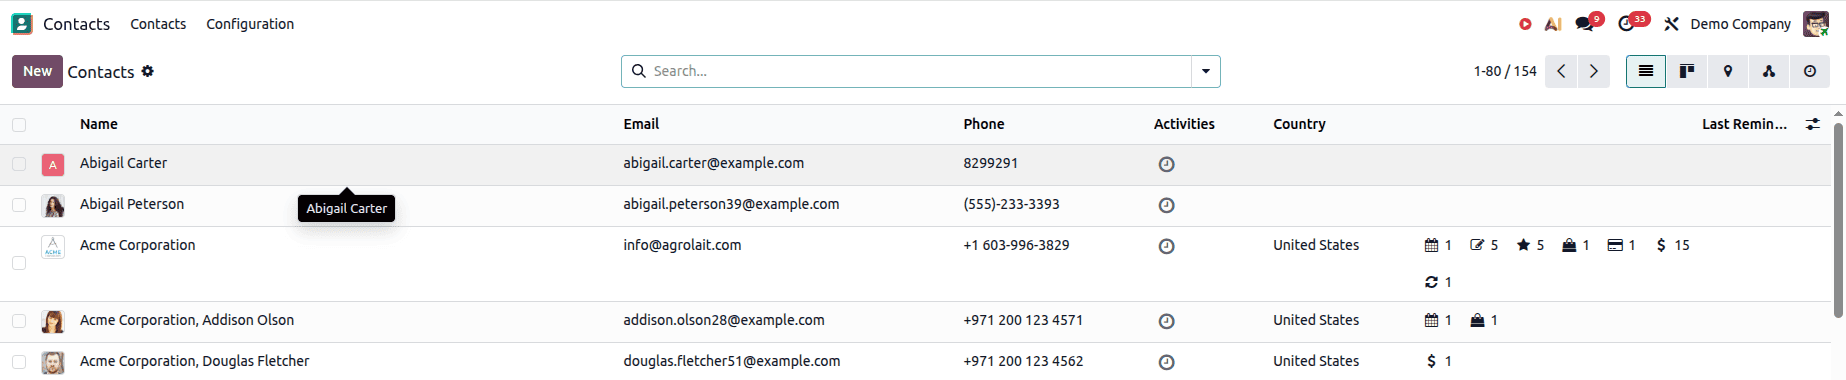
Step 1: Open the Related Contact
Open the Contacts Module.

Go to the relevant customer or vendor contact.
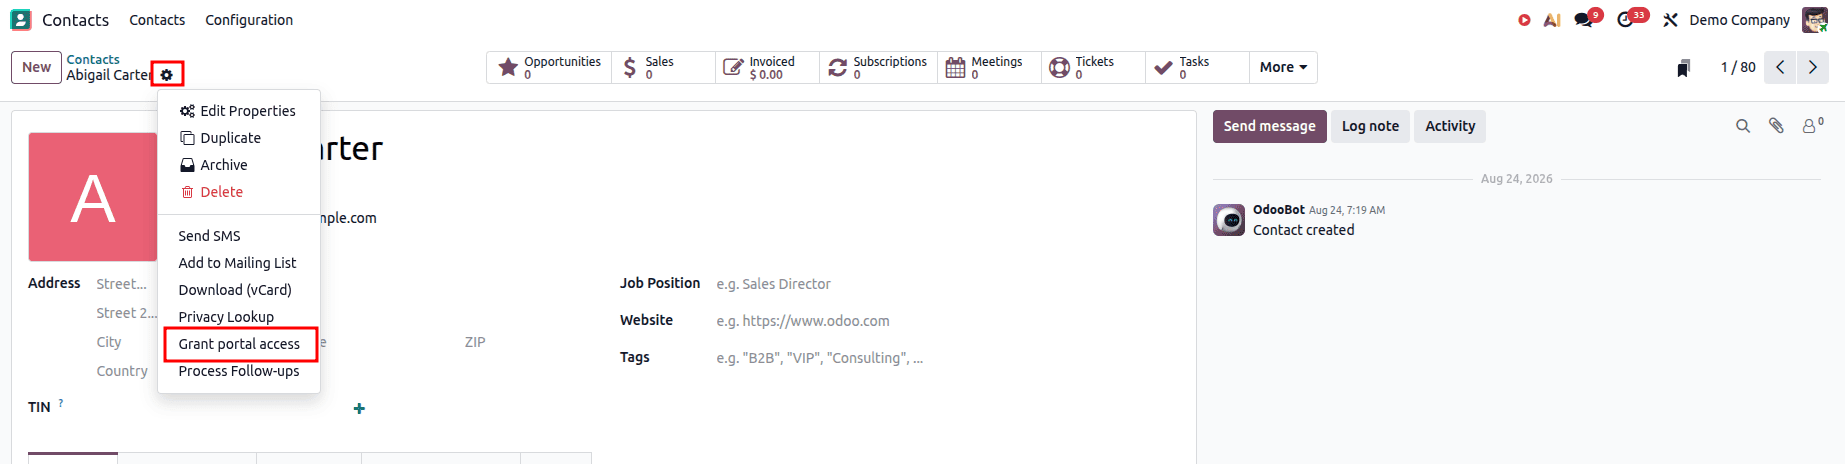
From the contact form, locate the option for granting portal access.
Step 2: Grant Portal Access
Provide the user's email address and grant portal access.
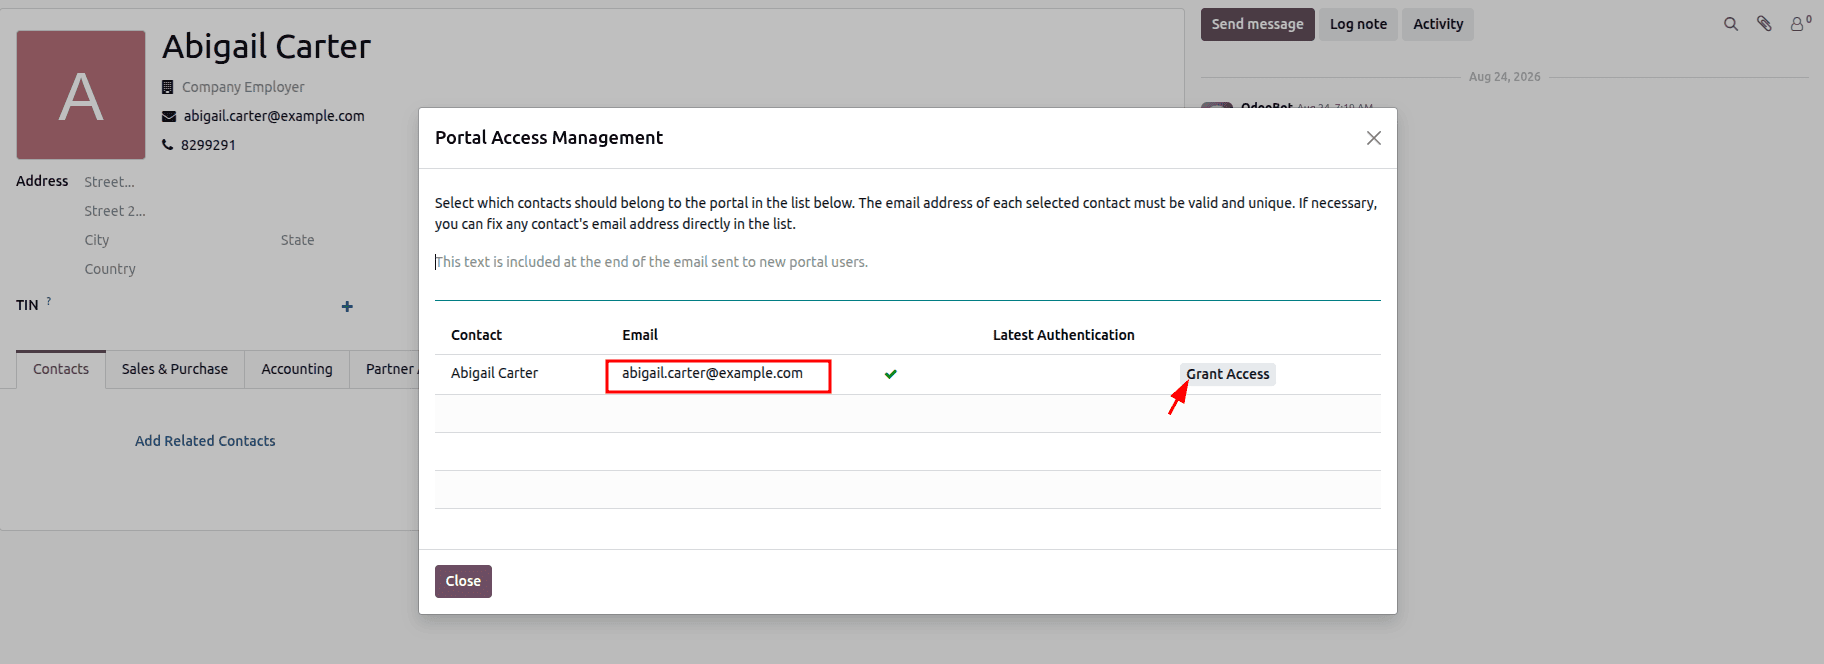
Odoo creates the required portal user and sends an invitation to the email address.
Step 3: User Accepts the Invitation
The recipient can use the invitation link to access the portal and complete the account setup.
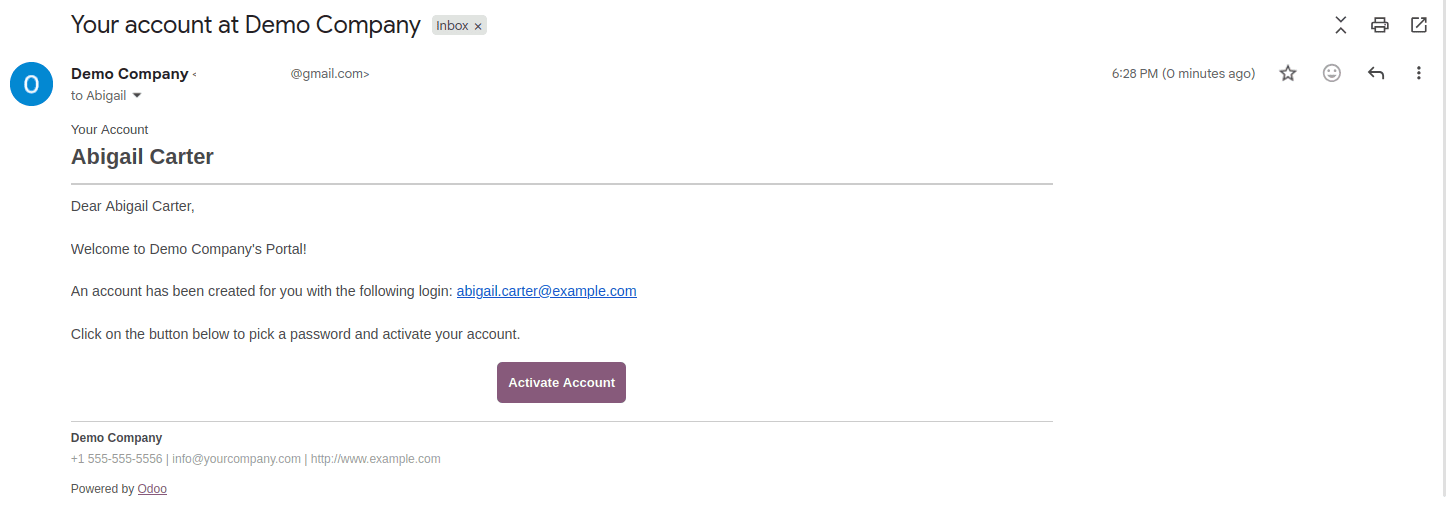
From the email, click the ‘Activate Account’ button to set up the password and set up the portal login.

Once the account is active, the user can log in and access the information available to them through the portal.
Inviting an Internal User in Odoo 19
An internal user can be invited when an employee or other organization member needs access to the Odoo backend.
In case of inviting users when you know their email address, this quick invite option in general settings can be used. Enter the email address and click ‘Invite’ to send the invitation.
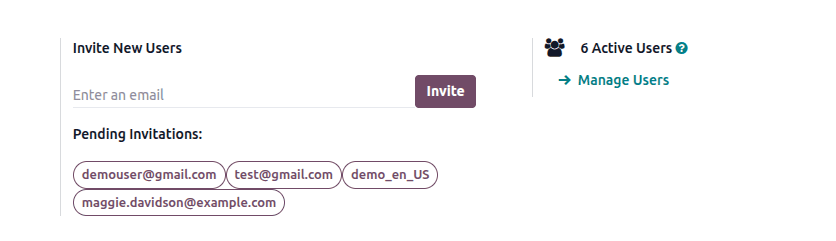
The emails shown under Pending Invitations are people who have been invited but haven't completed the invitation/activation process yet.
When you need to control exactly what access the user gets, the following steps should be followed:
Step 1: Open Manage Users
Go to: Settings > Users & Companies > Users
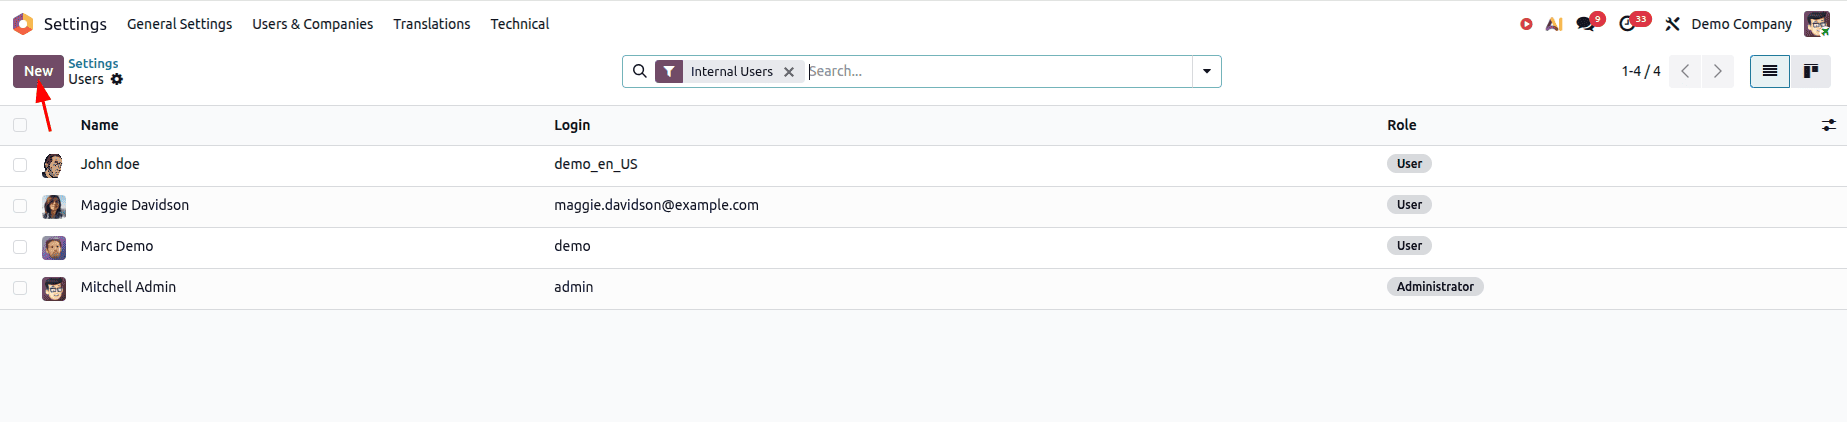
Step 2: Enter the user information and credentials on the form
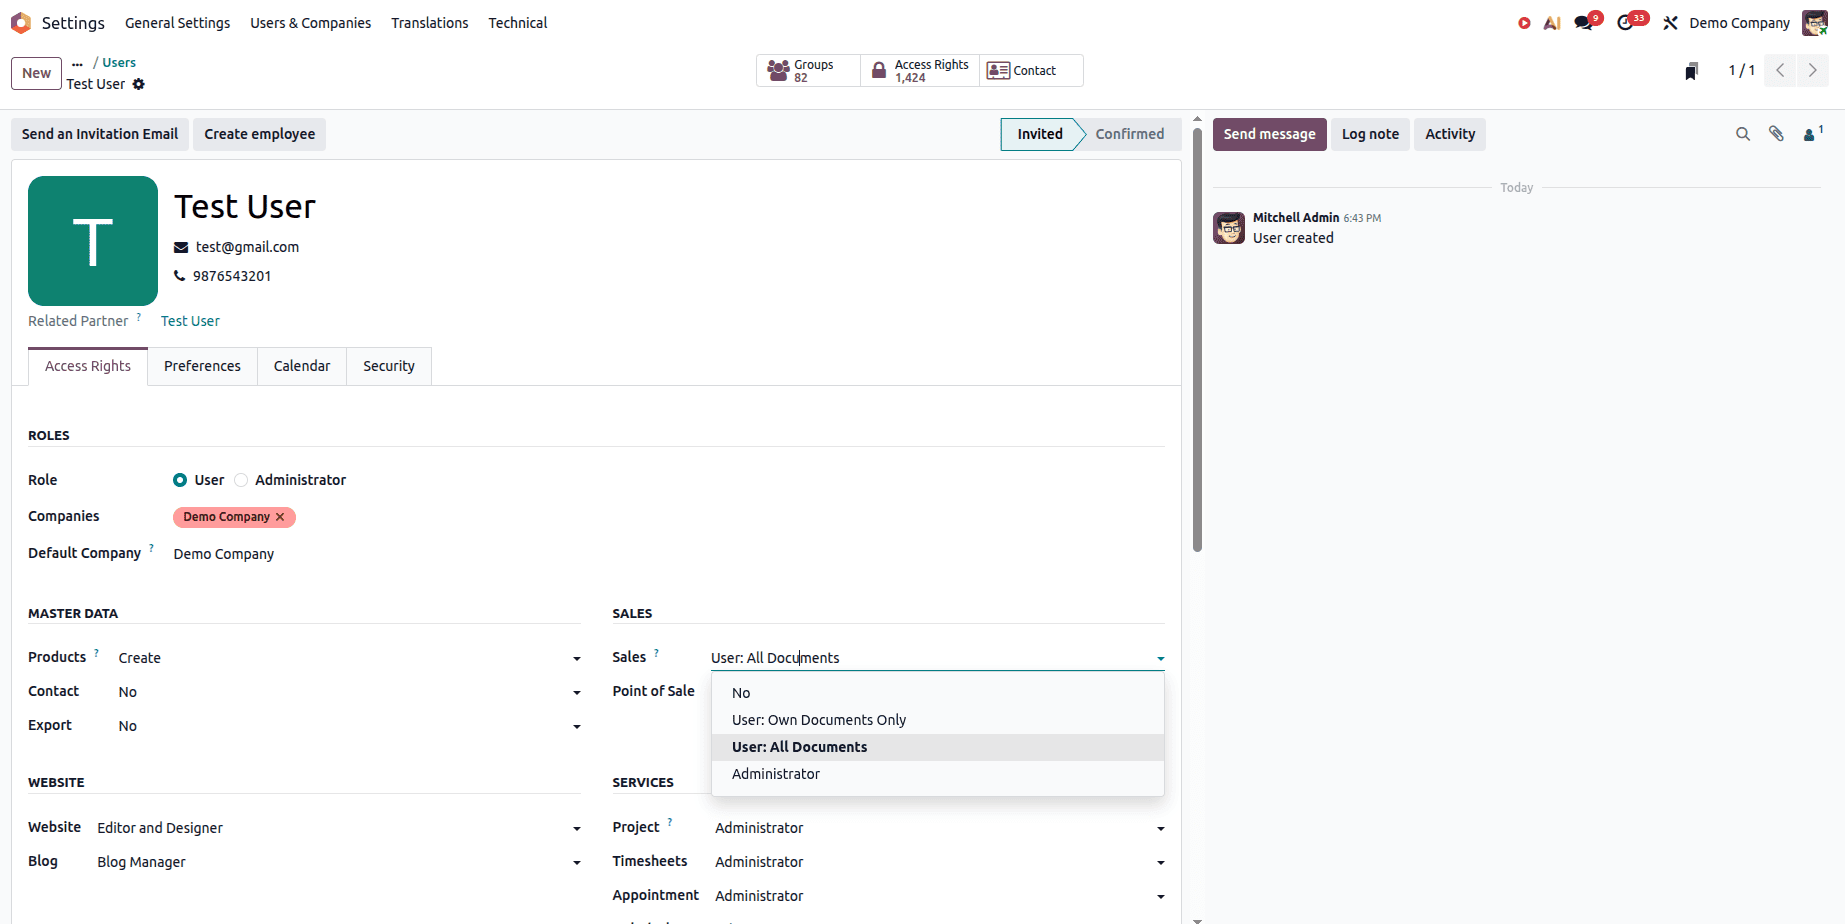
Enter the necessary data, such as:
Here, you can create an employee from the user in case of using the Employee module.
The email address is important because Odoo uses it to send the invitation.
Step 3: Select Application Access
Open the Access Rights tab.
Choose the correct access level for each module that the user must interact with.
For example, a salesperson may require access to the Sales application, while an accountant may require Accounting-related permissions.
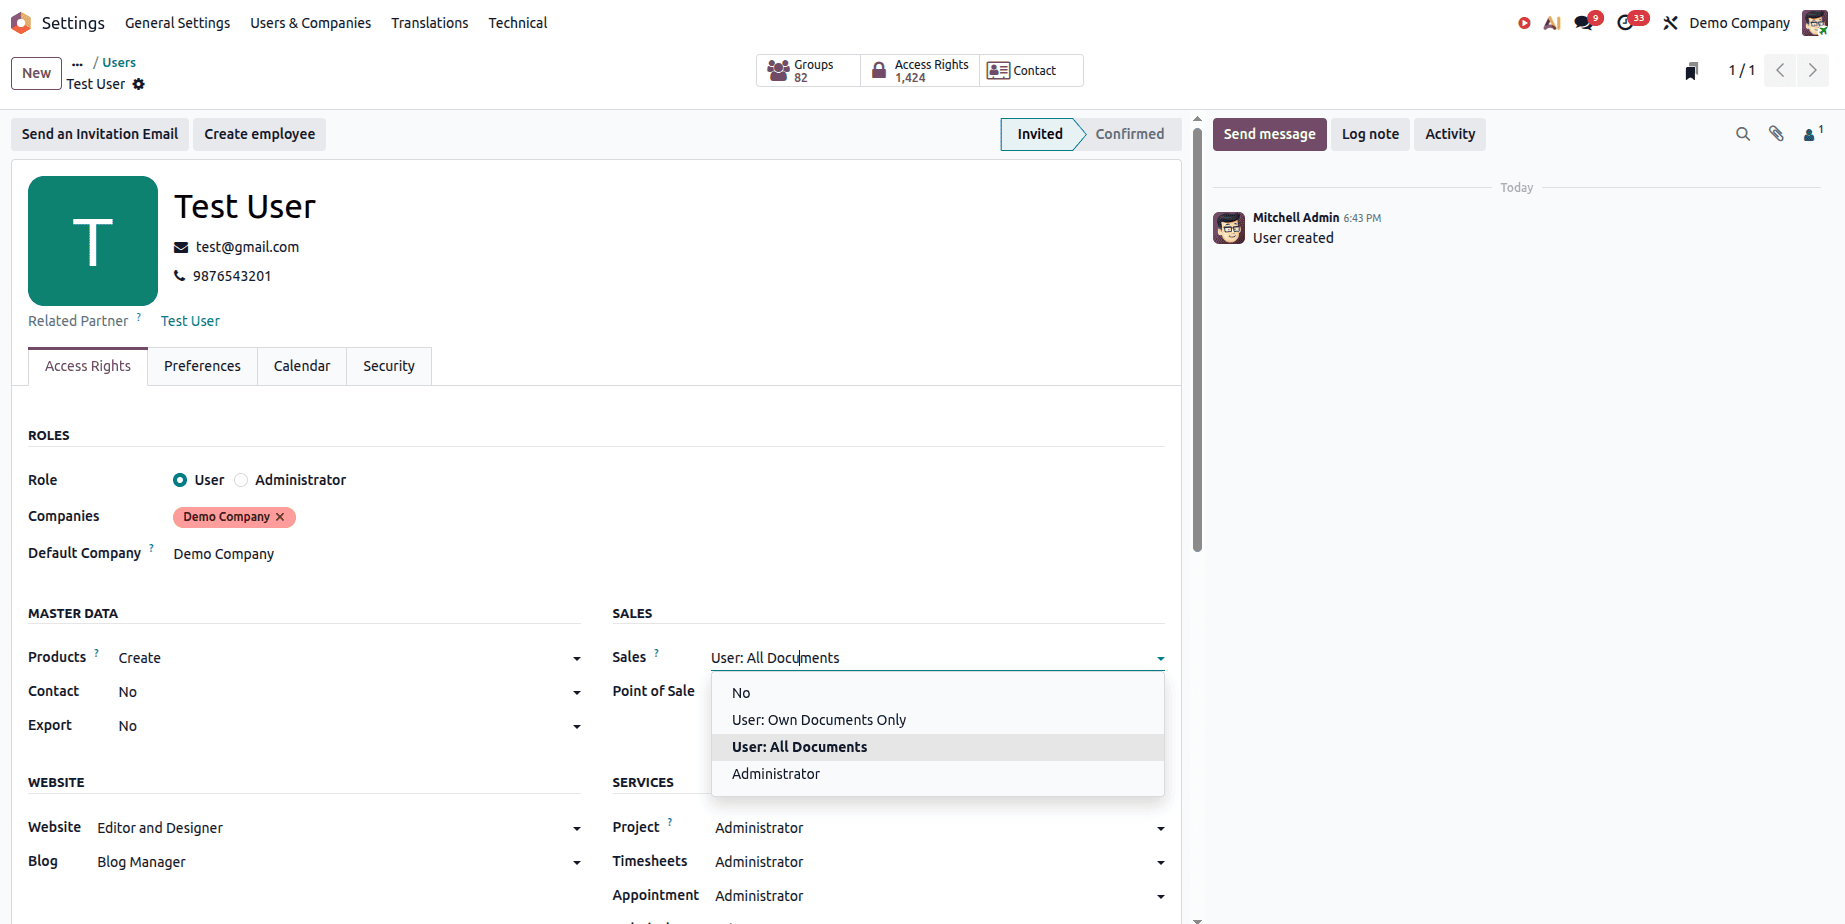
Avoid assigning unnecessary administrator-level permissions. Giving users only the access they require helps reduce the risk of unauthorized changes.
Step 4: Save and Send the Invitation
After entering the required information and configuring the access rights, save the user and click the Send an Invitation mail button to invite the user.

Odoo delivers an invitation email to the email address entered in the user's profile.
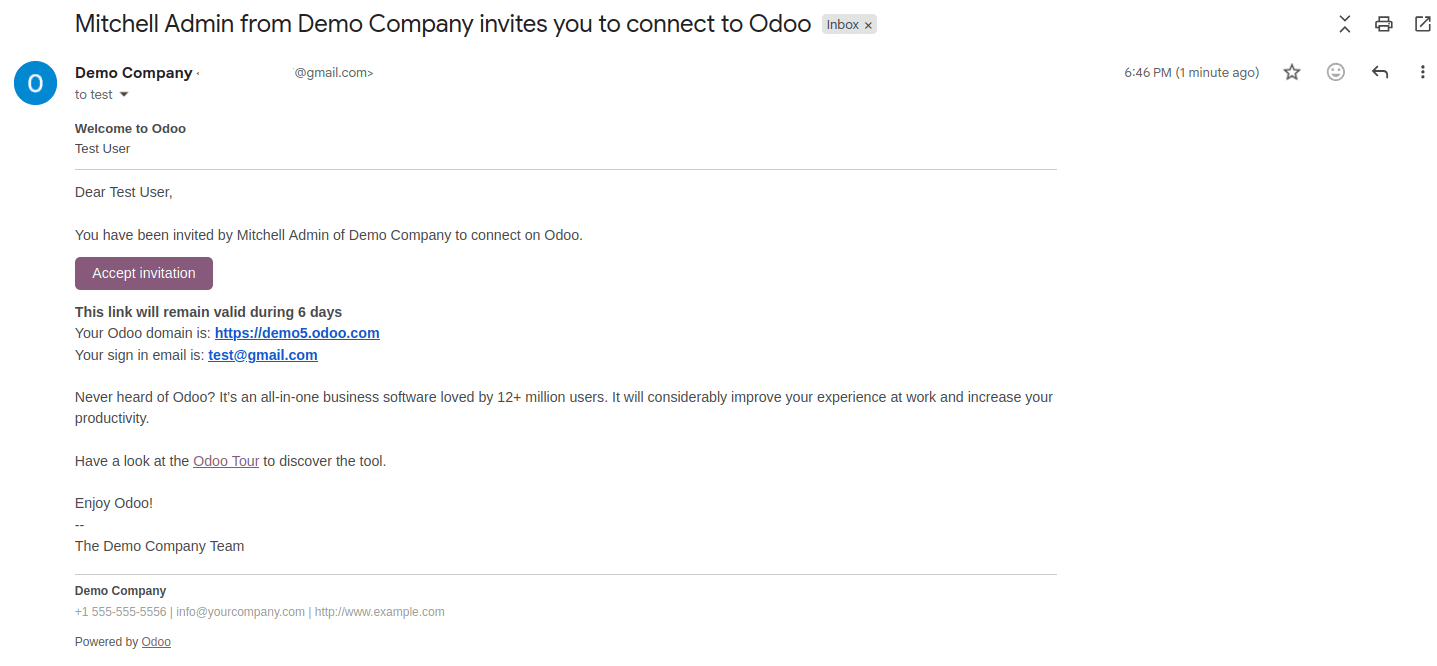
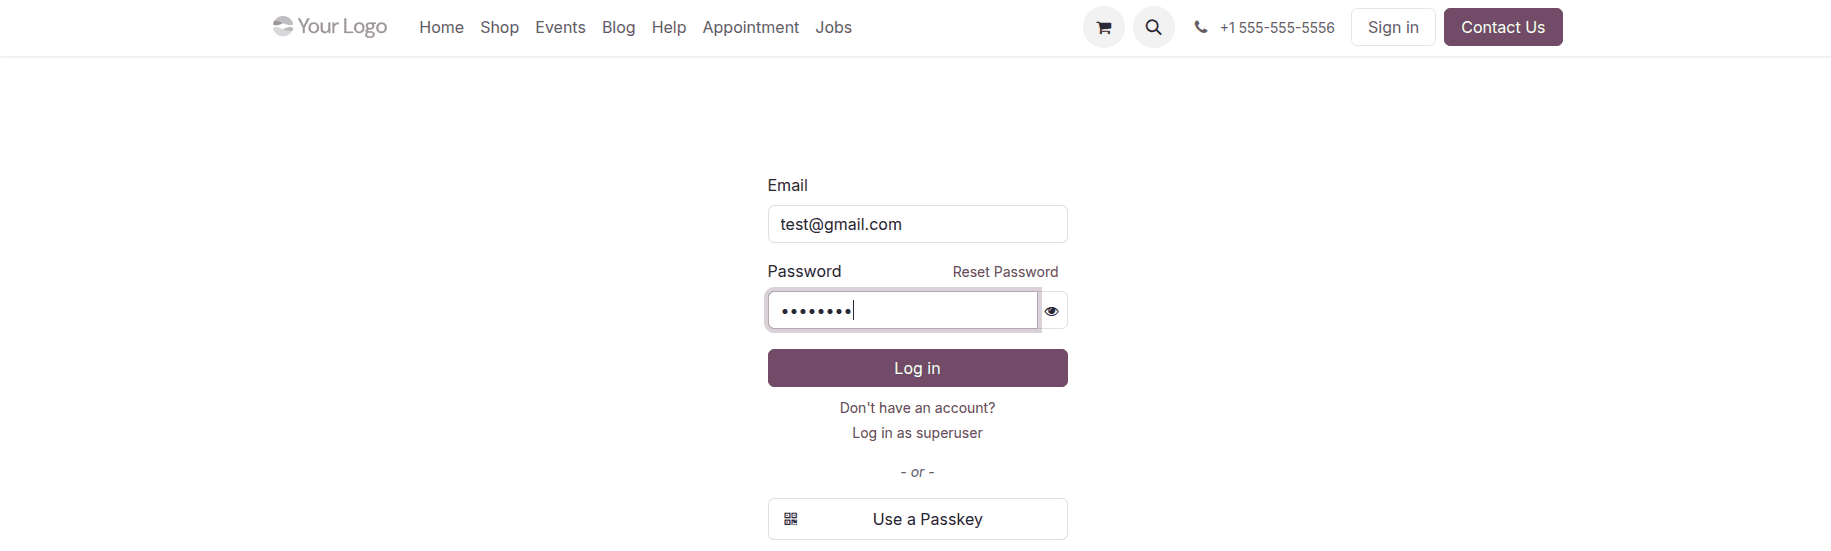
The user can click the ‘Accept invitation’ button from the email to accept the invitation and create their database login.
Access Rights and Security in Odoo 19
Odoo uses multiple layers of access control to determine what users can access.
Fundamentally, access rights dictate whether an individual or group is able to:
- Read records
- Create records
- Edit records
- Delete records
Odoo employs record rules to impose additional limitations on the records that a user is permitted to access. For example, a user may have permission to read sales orders, while a record rule can restrict them to seeing only specific sales orders.
Access rights determine the operations a user can perform, while record rules further control which records those permissions apply to.
Managing users correctly is an important part of securing an Odoo 19 database. Odoo offers various user categories: internal users, portal users, and public users (website visitors), enabling organizations to grant access based on the specific needs of each user.
Internal users can be assigned application-specific permissions from their Access Rights tab, while portal users can access selected information through the Odoo portal without receiving normal backend access.
When creating an internal user, administrators can enter the user's details, configure the required application permissions, and send an invitation directly from the Users menu.
By assigning only the permissions users actually need, organizations can maintain better control over their Odoo 19 database and reduce unnecessary access.
To read more about What are the Different User Types in Odoo 18, refer to our blog, What are the Different User Types in Odoo 18.