A sales quotation is a formal document provided by a seller or supplier that outlines the prices, terms, and details of specific products or services requested by a customer. Although it is not a binding agreement, a quotation represents an official offer that the buyer can accept to proceed with the purchase at the stated price. A well-structured quotation includes a breakdown of the items or services, applicable costs, and payment conditions, helping ensure transparency between both parties.
The Odoo 19 Sales Module simplifies the process of preparing professional quotations. It allows users to create reusable quotation templates for frequently sold products or services, ensuring faster and more consistent customer proposals. This feature helps companies streamline the quotation process by defining product details, sections, and notes efficiently. Furthermore, Odoo 19 automatically calculates subtotals, reducing the need for manual computation and improving overall accuracy.
This guide explains how to add products, sections, and notes within a sales quotation using the Odoo 19 Sales application.
Creating a New Product
Before generating a quotation, users must first ensure that the required products exist within the product inventory. In Odoo Sales, this can be done by navigating to the “Products” section under the “Products” menu.
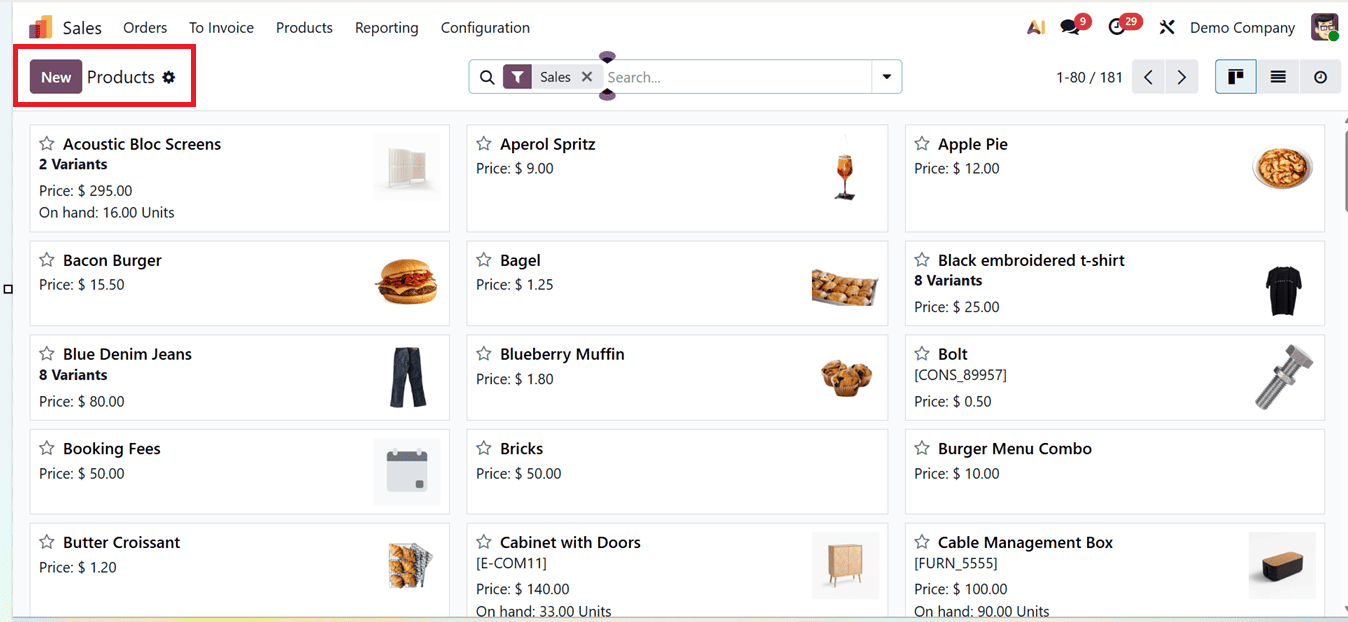
To create a new product, click the “New” button and enter essential details such as the product name, image, and general information.
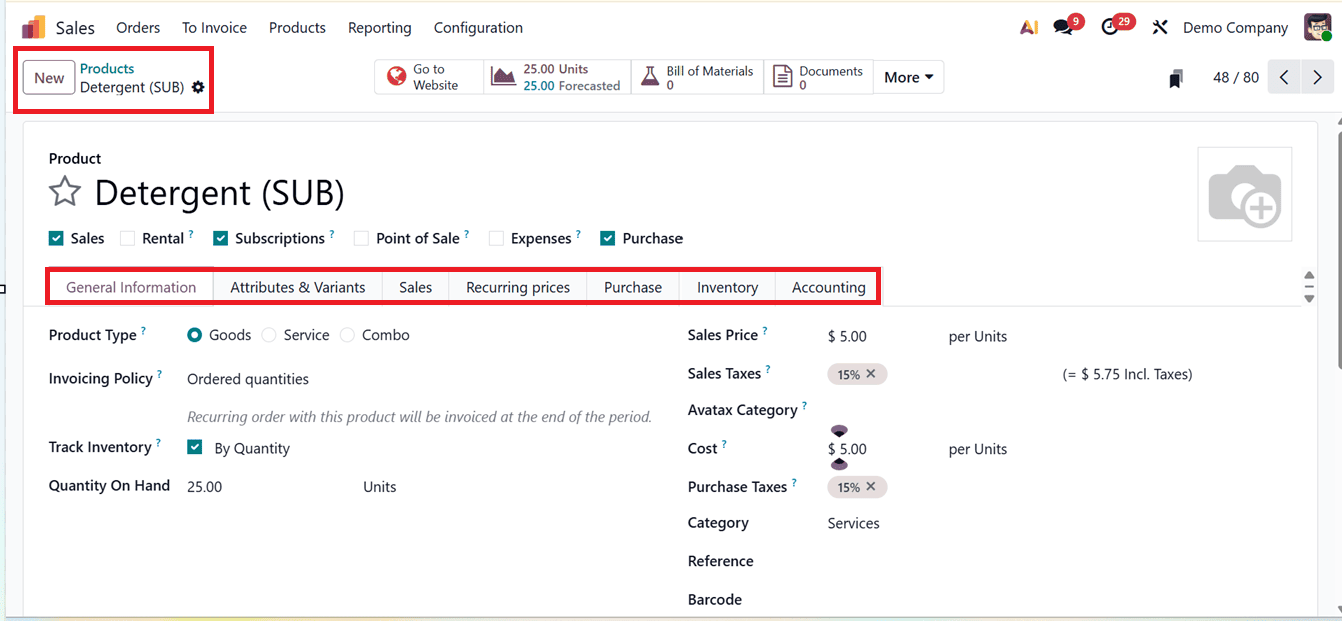
Under the “General Information” tab, specify the Product Type (for example, Storable Product) and set the Invoice Policy to Ordered Quantities. Define the Sales Price, and fill in any other relevant product details across additional tabs. Once all fields are completed, save the configuration. The new product will now be available for selection when creating quotations. To know more about configuring new sales products in Odoo, refer to the Video provided below:
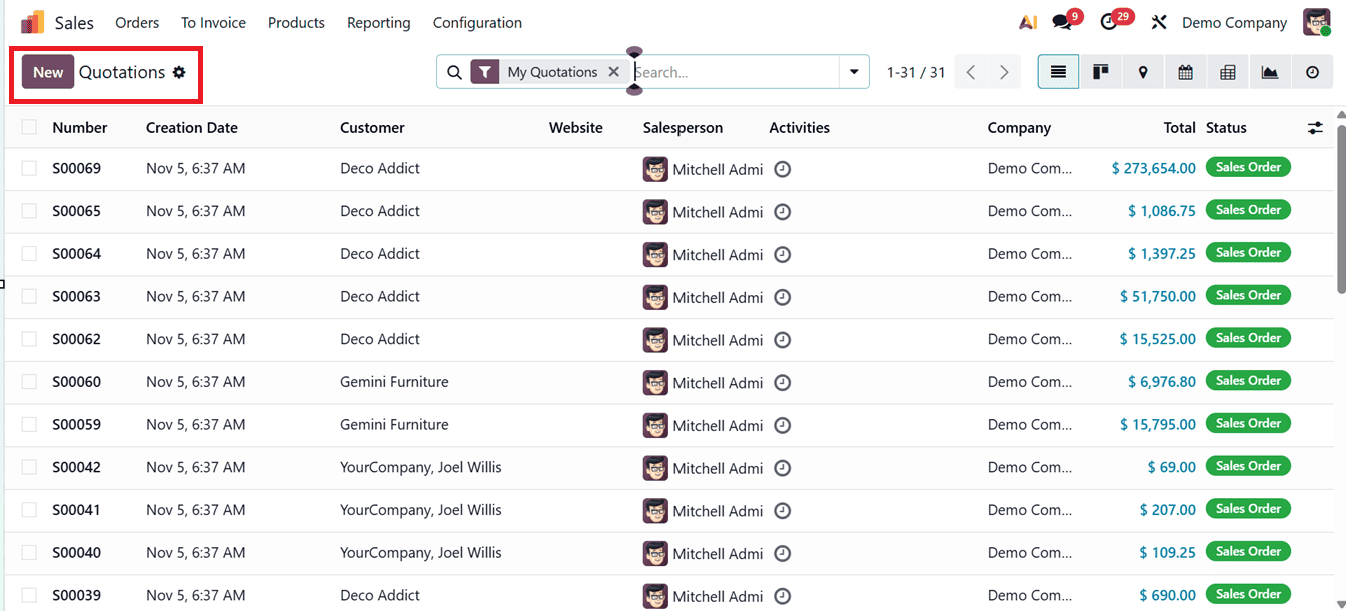
Creating a New Quotation
To generate a quotation, go to the “Orders” menu and select “Quotations.” From the quotation dashboard, click “New” to open the quotation form.
Then, enter the customer’s name and address information in the Customer, Invoice Address, and Delivery Address fields. You can also specify the Expiration Date, Quotation Template, Recurring Plan, Pricelist, and Payment Terms according to the transaction’s requirements.
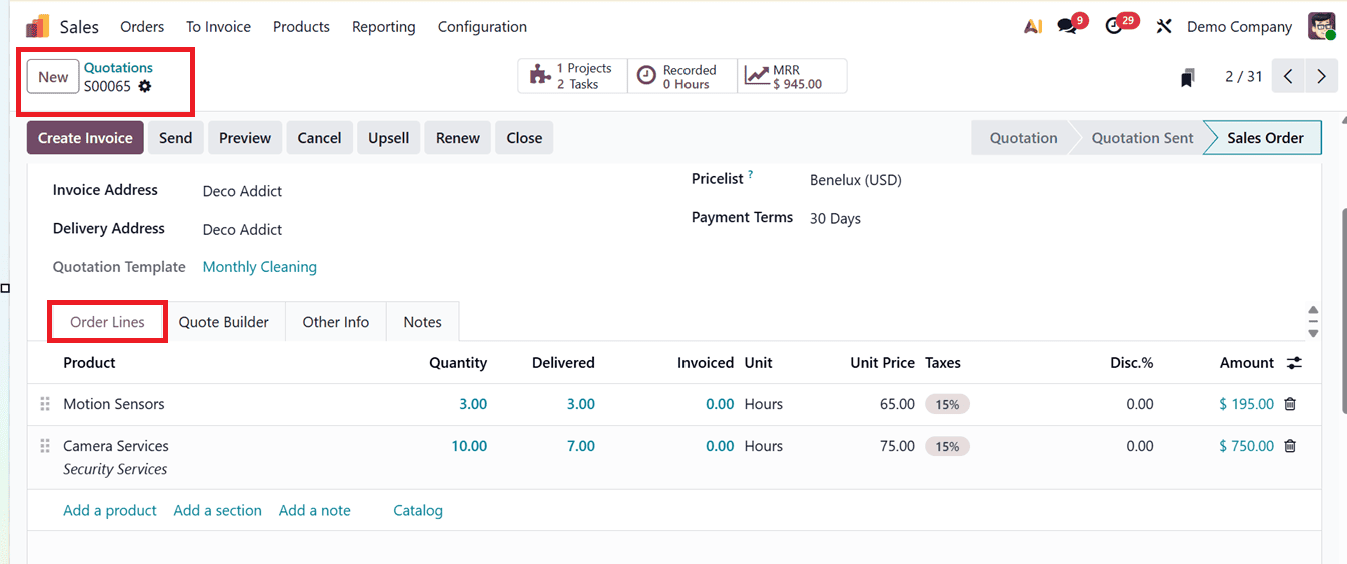
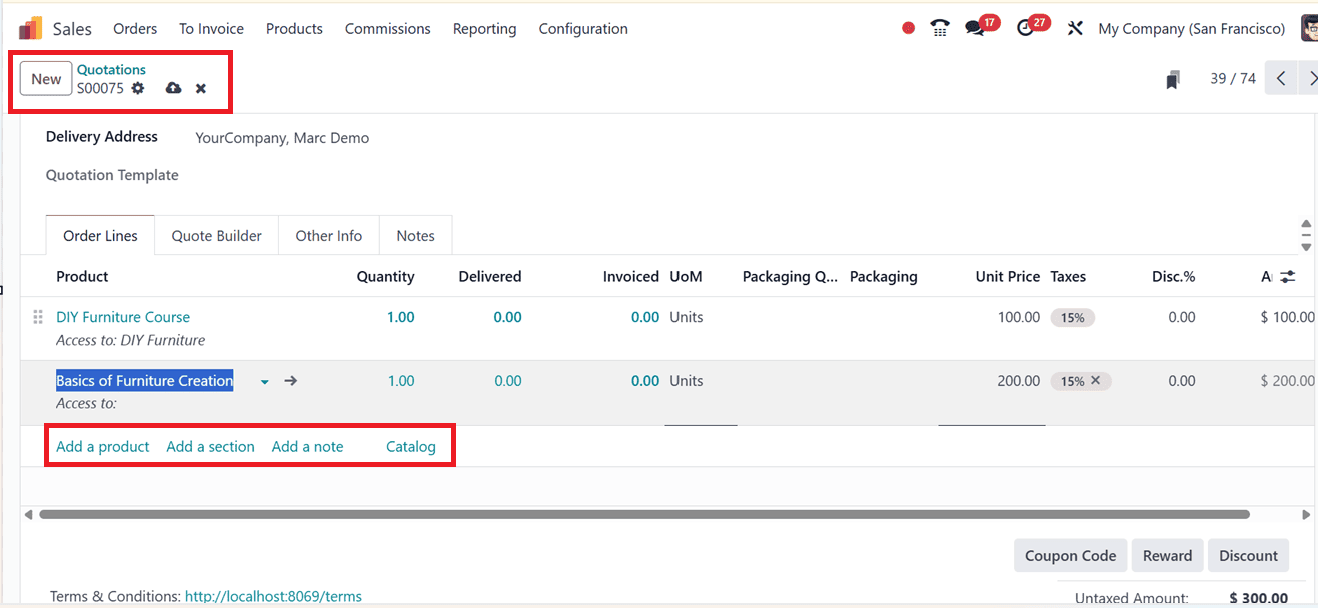
Adding Products, Sections, and Notes
Within the “Order Lines” tab, users can manage products, notes, and sections using the ‘Add a product,’ ‘Add a section,’ ‘Add a note’ and ‘Catalog’ buttons, as depicted in the screenshot below.
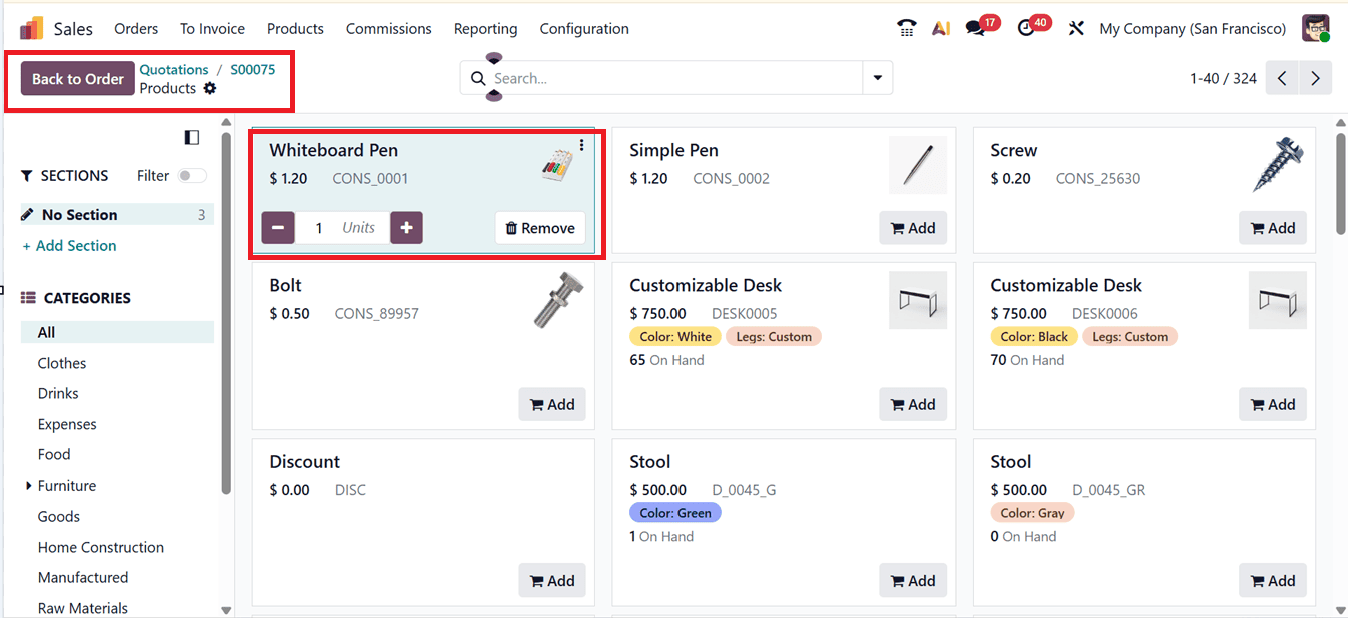
To include a product, click on the “Add a product,” and select the desired item from the product dropdown list or the Product Catalog window. The ‘Catalog’ option allows users to browse and select products using a Kanban view. Quantities can be adjusted using the “+” or “–” symbols, and unwanted products can be removed with the “Remove” button, as shown in the screenshot below.
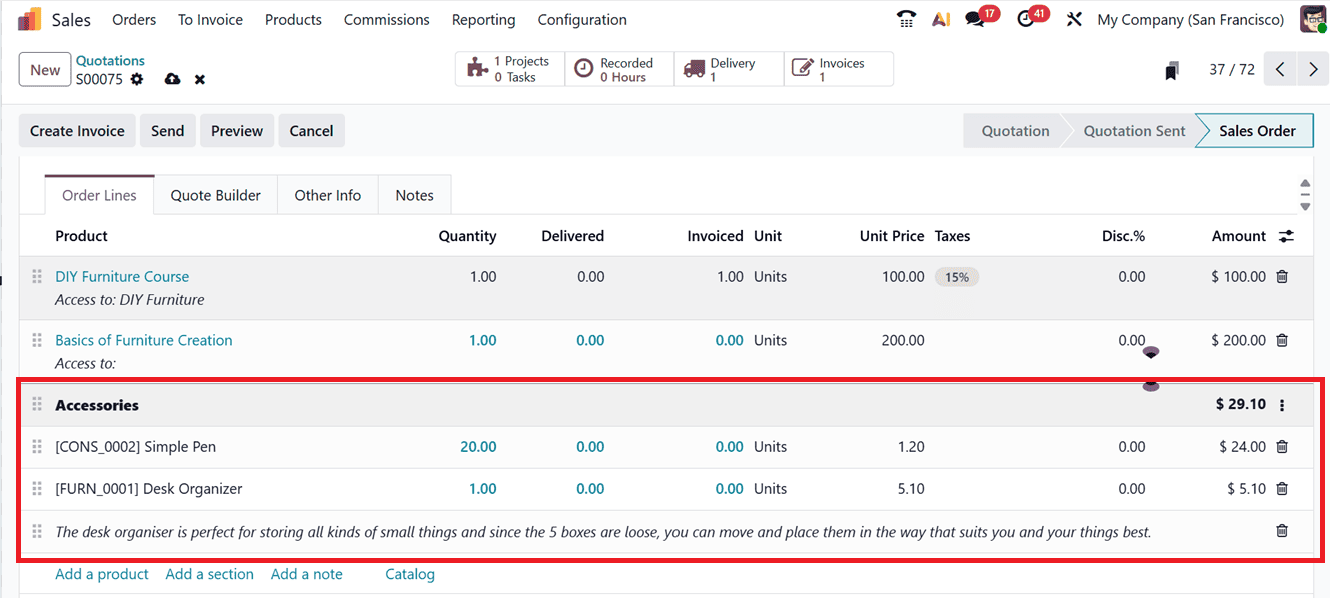
To organize items within a quotation, you can add sections by selecting the “Add a Section” button. Each section can have a custom name to categorize products, such as “Courses” or “Accessories.” Additionally, notes can be inserted using the “Add a Note” option to include remarks or additional details about the products or services. In the quotation layout, section titles appear in bold, while notes are displayed in italic text for easy distinction, as depicted in the screenshot below.
After entering all products, sections, and notes, save the quotation to preserve the changes. Once the products are added to the quotation, the subtotal amounts for each line item are automatically calculated and displayed under the “Order Lines” tab. This automated feature helps users verify pricing accuracy before finalizing the quotation.
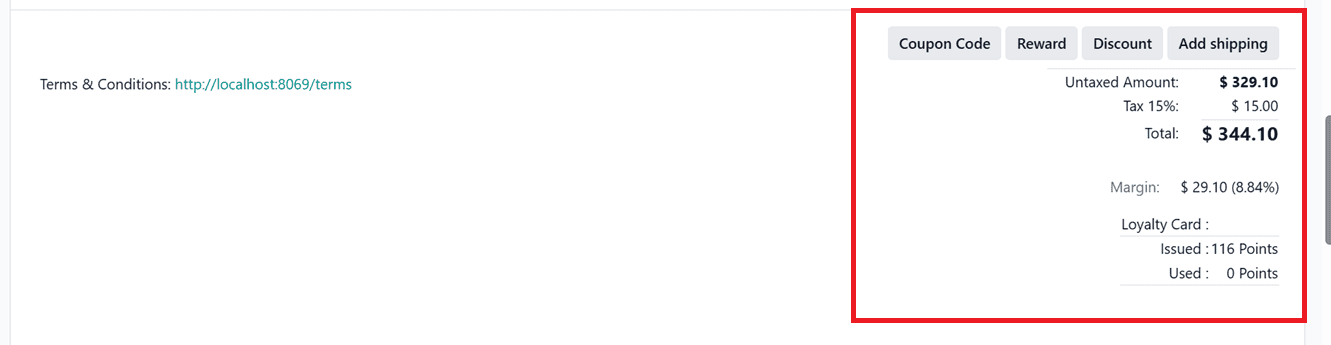
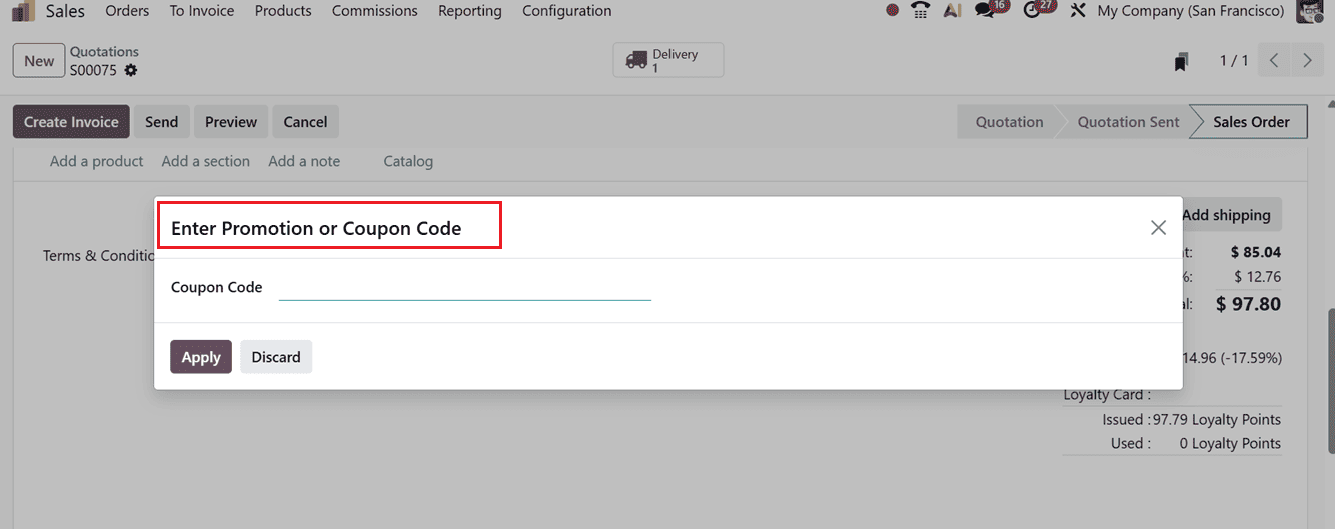
After finalizing the product details, you can apply coupon codes, promotions, discounts, and shipping charges directly from the quotation form. Coupons and promotional offers can be added by clicking the “Coupon Code” or “Promotions” buttons and applying the available discounts in the system in the Enter Promotion or Coupon Code pop up, as shown in the screenshot below.
While additional percentage-based discounts can be specified through the “Discounts” option in accordance with company policy.

Clicking the Reward button automatically refreshes all promotion lines related to the selected customer in the Sales module backend, and Odoo applies the applicable rewards to the order if they meet the required conditions.
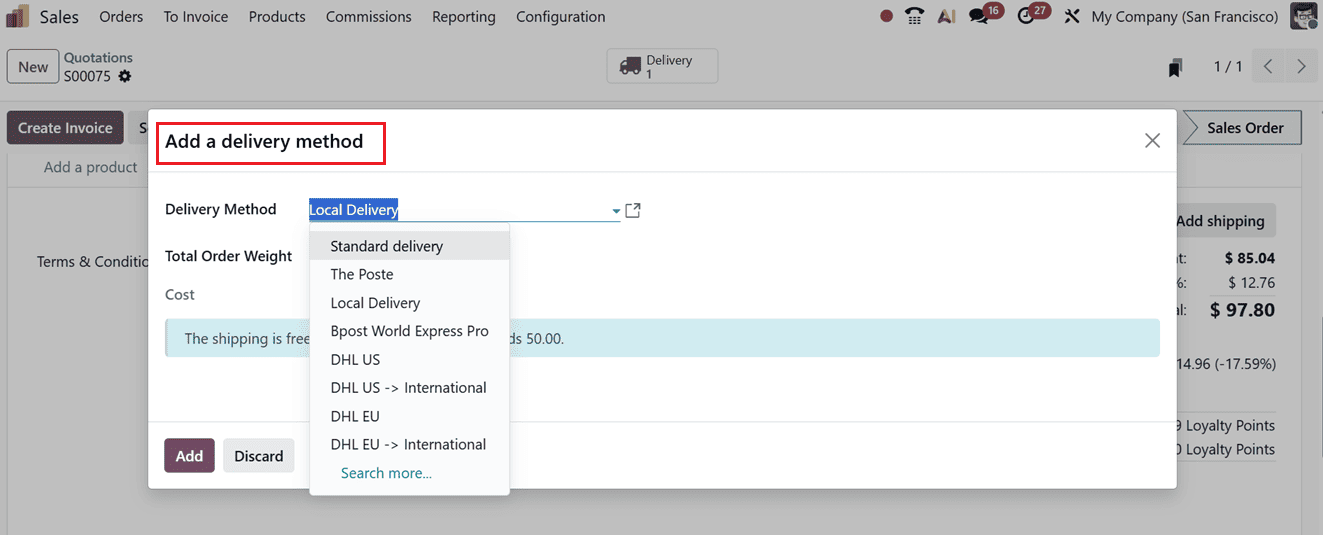
Then, you can add the extra shipping charges by selecting the “Add Shipping” button and choosing the appropriate Delivery Method (such as Standard Delivery, DHL, Local Delivery etc,.), and entering the Total Order Weight and corresponding Cost before clicking “Add” to include it in the quotation, as shown in the screenshot below.
Once all adjustments are complete, the quotation can be saved and moved forward for confirmation or invoice generation. Then, the delivery details are accessible through the “Delivery” smart button at the top of the form and proceed with the next payment and other processes as usual.
The Odoo 19 Sales Module provides a comprehensive set of tools for managing and customizing sales quotations. By allowing users to add sections, notes, optional products, and automatic subtotals, the module simplifies the quotation process while enhancing professionalism and efficiency. These features make Odoo 19 an ideal solution for businesses seeking to streamline their sales operations and deliver detailed, accurate proposals to their customers.
To read more about Overview of Controlling Quotation Validity Periods in Odoo 19, refer to our blog Overview of Controlling Quotation Validity Periods in Odoo 19.