In most businesses, it is the vendor who sends an invoice to the customer after delivering goods or services. But in some industries and business relationships, the opposite happens: the buyer creates the invoice on behalf of the vendor. This is called self-billing, and it is a common practice in sectors like agriculture, logistics, and retail where buyers work with many suppliers and need a faster, more controlled way to handle billing. Odoo 19 supports this process directly within the Accounting module, making it easy to manage self-billing agreements without needing any workarounds.
This blog explains what self-billing is, who it is for, how to set it up in Odoo 19, and how it works in practice.
What is self-billing?
Self-billing is an arrangement where the buyer, instead of the vendor, creates the invoice for a purchase. The buyer generates the bill based on what was received, sends a copy to the vendor, and the vendor accepts it as the official invoice for that transaction. Both sides agree to this process upfront, and it is usually backed by a formal self-billing agreement.
This works really well in situations where:
- A company works with a large number of vendors and wants to control the billing cycle instead of waiting for invoices to arrive.
- The vendor may not have the resources or setup to regularly generate and send invoices.
- Prices are agreed on delivery rather than before, so the buyer is better placed to raise the invoice once goods are received.
In these cases, self-billing saves time for both parties and reduces the chances of billing errors or delays.
How to configure self-billing in Odoo 19
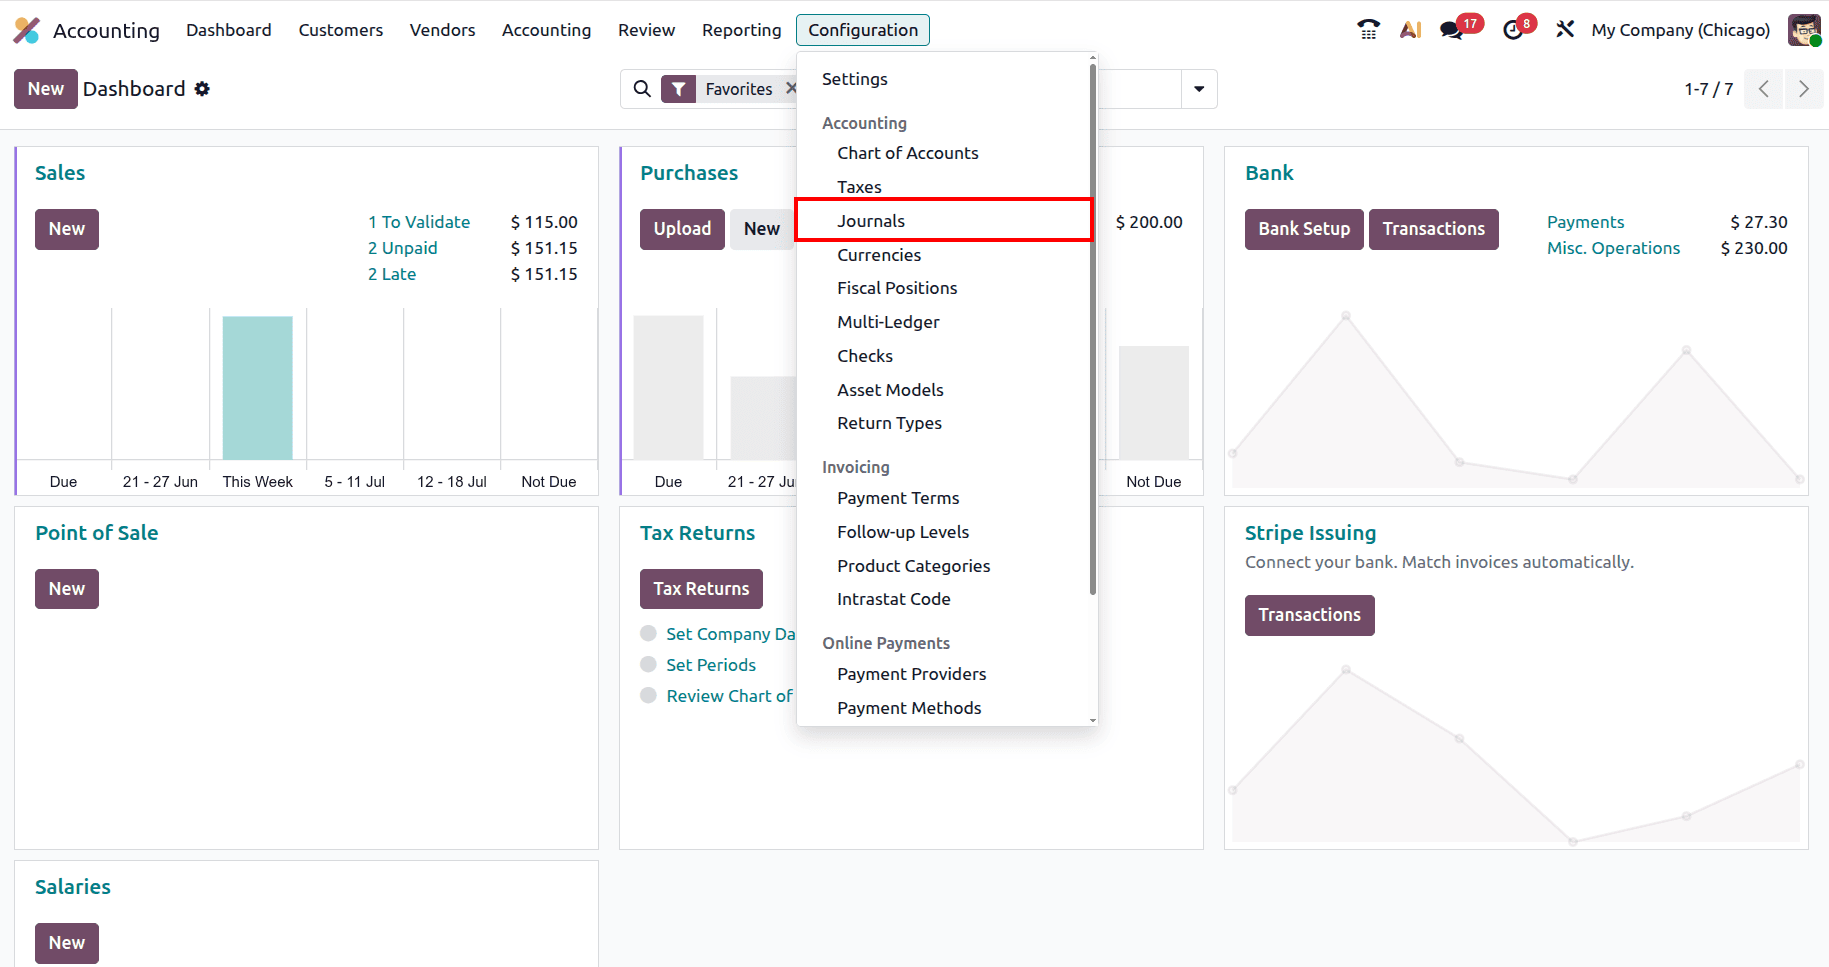
To get self-billing working in Odoo 19, the first thing you need to do is create a separate purchase journal specifically for self-billing. It is important to keep this separate from your regular purchase journal so that self-bills are clearly identified and handled correctly by the system. To do this, go to Accounting > Configuration > Journals and click the New button to create a new journal.
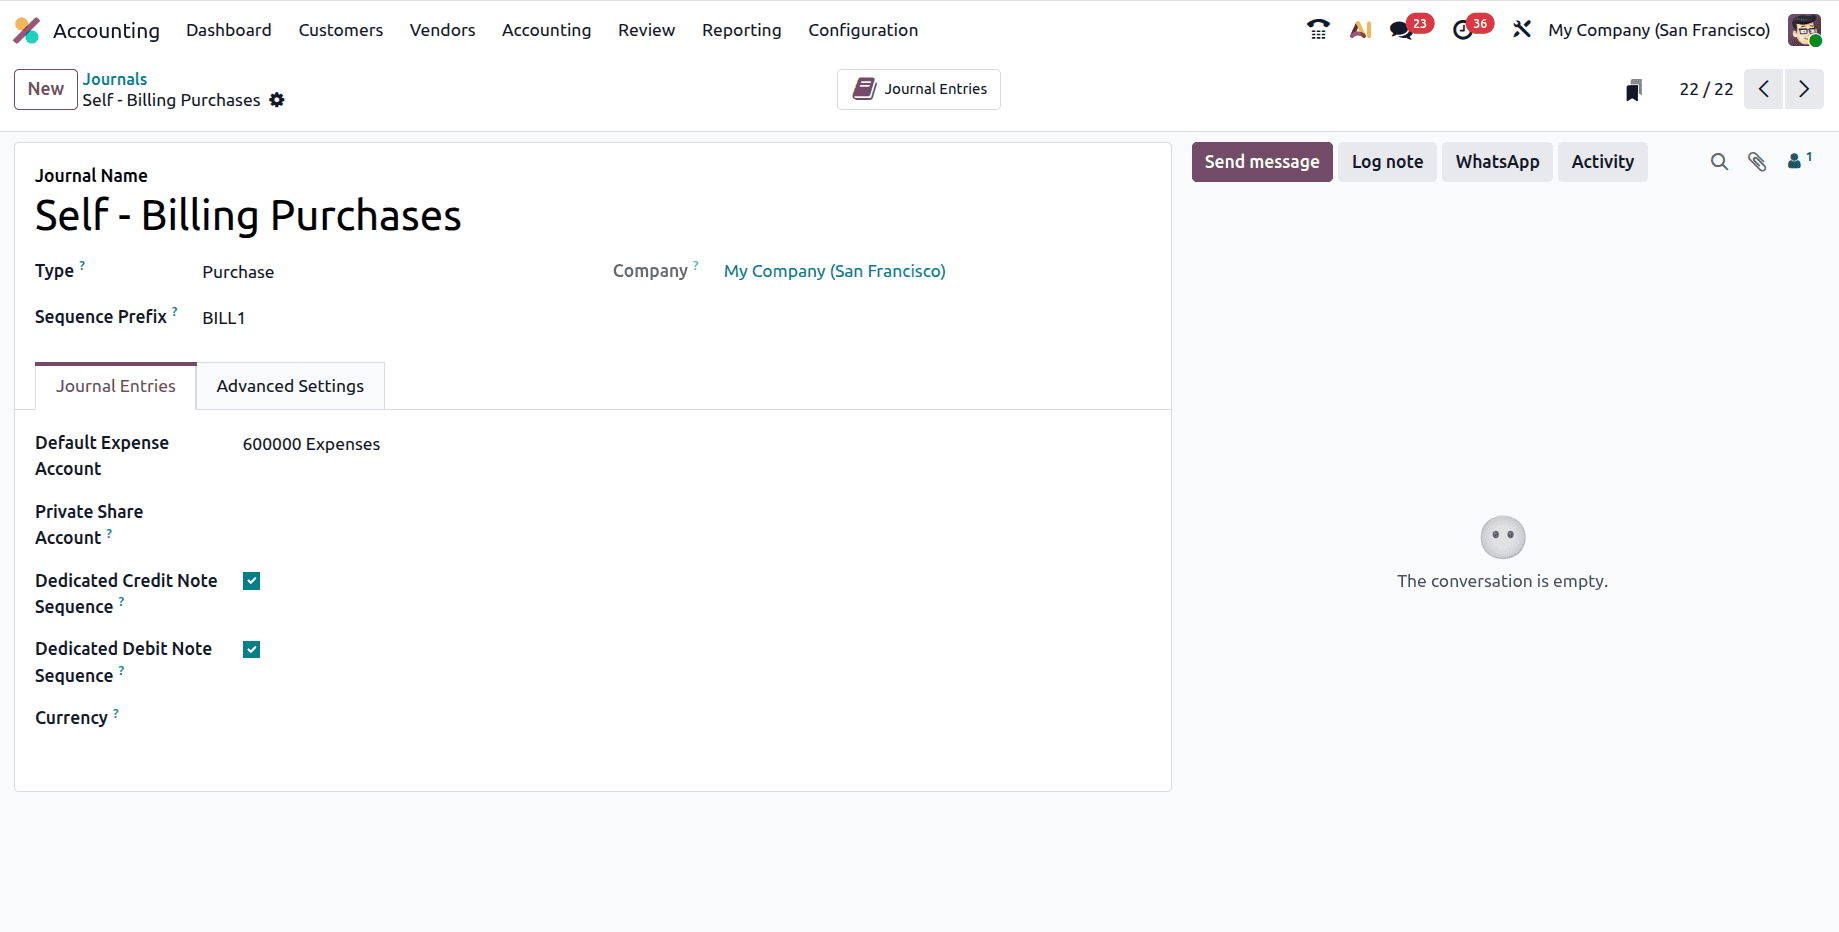
Give it a name that makes it easy to identify, such as "Self-Billing Purchases," and set the Type to Purchase. Then open the Advanced Settings tab and enable the Self Billing option. Once you save the journal, it is ready to use. From this point on, any bill that goes through this journal will be treated as a self-bill by Odoo. The setup is simple and only needs to be done once.
How to create a self-bill
Self-bills in Odoo 19 can be created both manually and automatically, giving you flexibility depending on how your business operates.
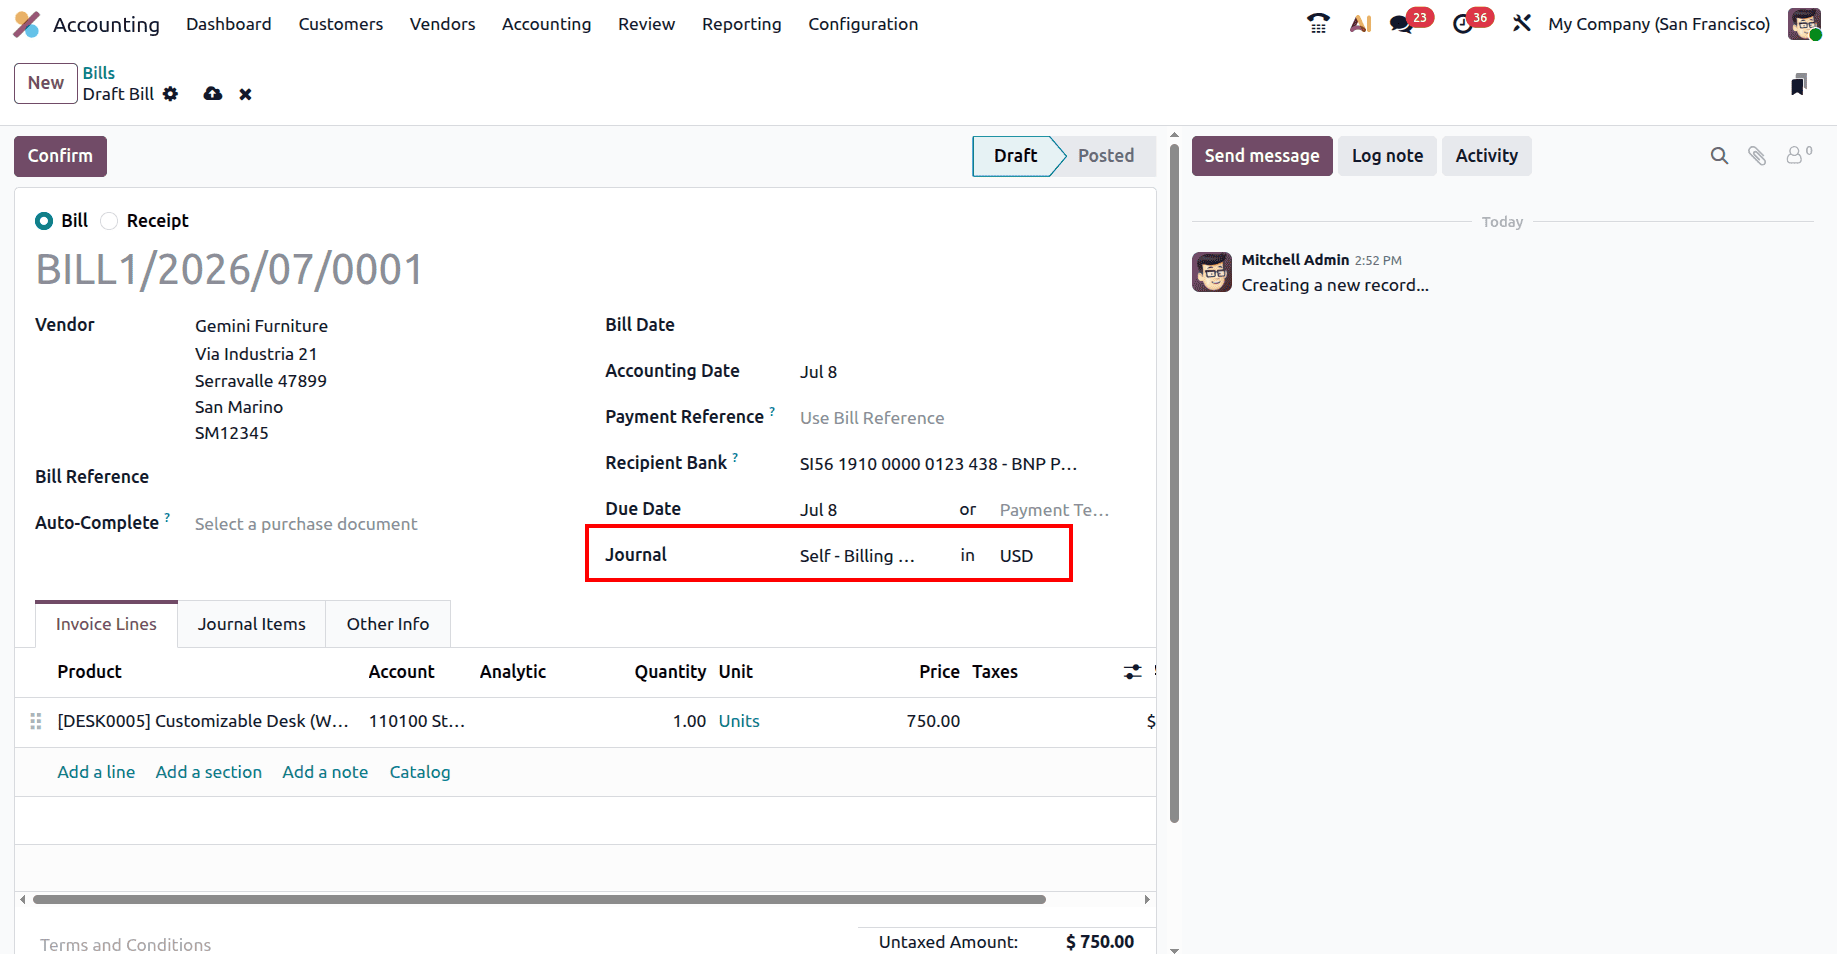
When creating a self-bill, there is one important thing to keep in mind: you must make sure the bill is linked to the self-billing purchase journal you set up. You can do this in two ways: either create the bill directly from the self-billing purchase journal on the Accounting Dashboard, or when creating the bill manually, set the Journal field on the bill to your self-billing purchase journal. If you use the wrong journal, Odoo will not treat it as a self-bill.
It is also worth knowing that the sequence of self-bills in Odoo contains the database ID of the vendor, which is also known as the internal ID of the partner. This makes the sequence unique per partner, so every vendor has their own distinct self-bill numbering. This makes it easy to track and manage bills by supplier, especially when you are working with multiple vendors on a self-billing arrangement.
How to send a self-bill
Once a self-bill has been created and confirmed, sending it to the supplier is very straightforward. On the confirmed bill, click the Send button. A pop-up window will appear, allowing you to choose how you want to send it. Odoo gives you three options: by Email, by Post, or by Peppol. Select the method that works for you and click the Send button.
If you are planning to send self-bills via Peppol, there are a few extra things to check before you do. First, you need to make sure your Peppol registration is configured. You also need to verify that the vendor you are sending to is registered with Peppol. You can do this by going to Accounting > Vendors > Vendors and going through the contact verification process for that vendor. It is also a good idea to check with your supplier whether their Peppol access point supports self-billing, since not every Peppol access point does. Confirming this beforehand saves you from running into issues when trying to send.
Self-billing in Odoo 19 is a well-built feature that makes life easier for businesses that regularly generate bills on behalf of their suppliers. The setup is simple, just a dedicated purchase journal with the Self Billing option enabled, and from there, the full process of creating, sending, and paying self-bills flows smoothly within the Accounting module.
Whether your business operates in an industry where self-billing is the standard practice, or you simply want more control over how and when vendor bills are raised, Odoo 19 gives you everything you need to handle it cleanly and efficiently. It removes the wait, reduces errors, and keeps your accounts payable moving at the pace your business needs.
To read more about How to Manage Bill to Receive and Billed Not Received in Odoo 19, refer to our blog How to Manage Bill to Receive and Billed Not Received in Odoo 19.