In the highly competitive online environment of today, timing and delivery of your message become paramount. With Odoo 19, the mass mailing features receive an overhaul, bringing together an easy-to-use interface design, advanced automation, and smooth integration throughout the business modules. Regardless of whether you are sending out promotional emails, notifications, or invitations for events, the mass mailing feature of Odoo 19 will help you deliver on your objectives successfully and effectively.
This blog post takes a comprehensive look at the entire process of integrating the mass mailing feature in Odoo 19.
1. What is Mass Mailing in Odoo 19?
Odoo 19 – Mass Mailing is a sophisticated email marketing solution that comes right out of the box within Odoo’s ERP suite. It allows you to send massive quantities of emails to specific mailing lists, your clients, prospects, or any other custom-created group, without ever having to leave the Odoo environment. Seamless integration with CRM, Sales, and Event apps makes for completely data-driven emailing!
Key capabilities include:
- Bulk email sending to segmented mailing lists
- Campaign tracking with real-time analytics
- A/B Testing for campaign optimisation
- Marketing automation flows
- GDPR-compliant blacklist management
- Drag-and-drop email body builder
2. Installing the Email Marketing Module
To get started with Mass Mailing in Odoo 19, the Email Marketing module needs to be installed first. Navigate to the Apps menu from the main Odoo dashboard, search for Email Marketing, and click Install.
STEP 1 — INSTALL MODULE
Go to: Main Menu > Apps > Search "Email Marketing" > Install
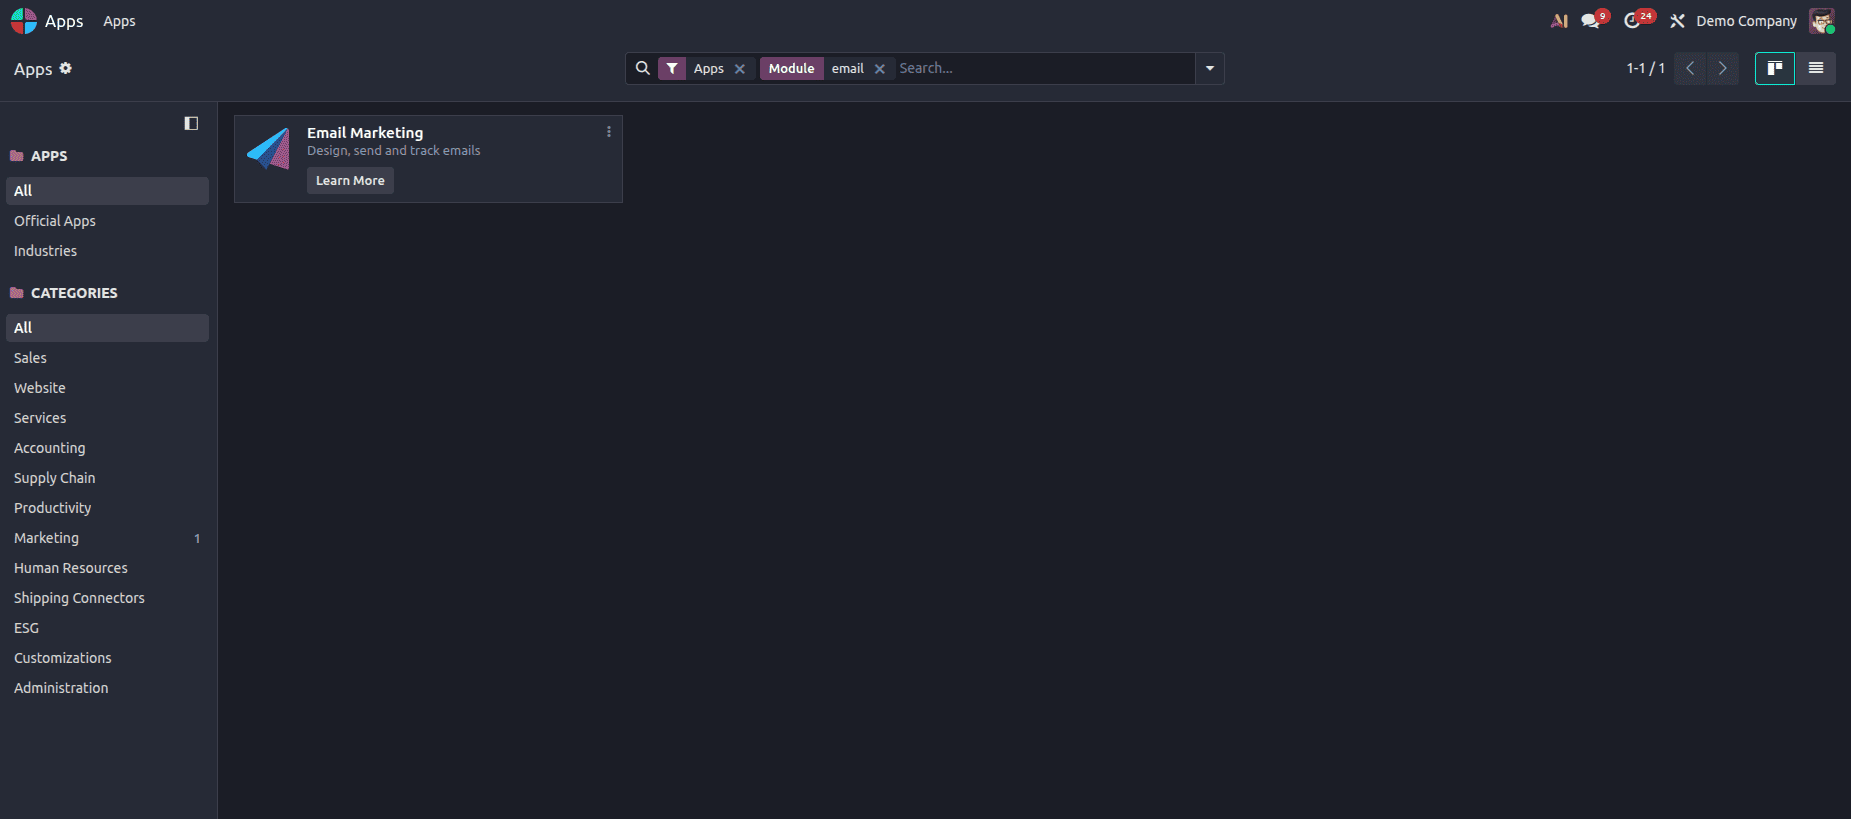
Once installed, the Email Marketing app appears in the main navigation menu. Click on it to open the mailing dashboard.
Note: In Odoo 19, the Email Marketing module automatically enables the mass_mailing and mass_mailing_sms sub-modules, giving you access to both email and SMS mass communication from one interface.
3. Configuring Mass Mailing Settings
Before creating your first campaign, it is important to configure the necessary settings. Navigate to Email Marketing > Configuration > Settings.
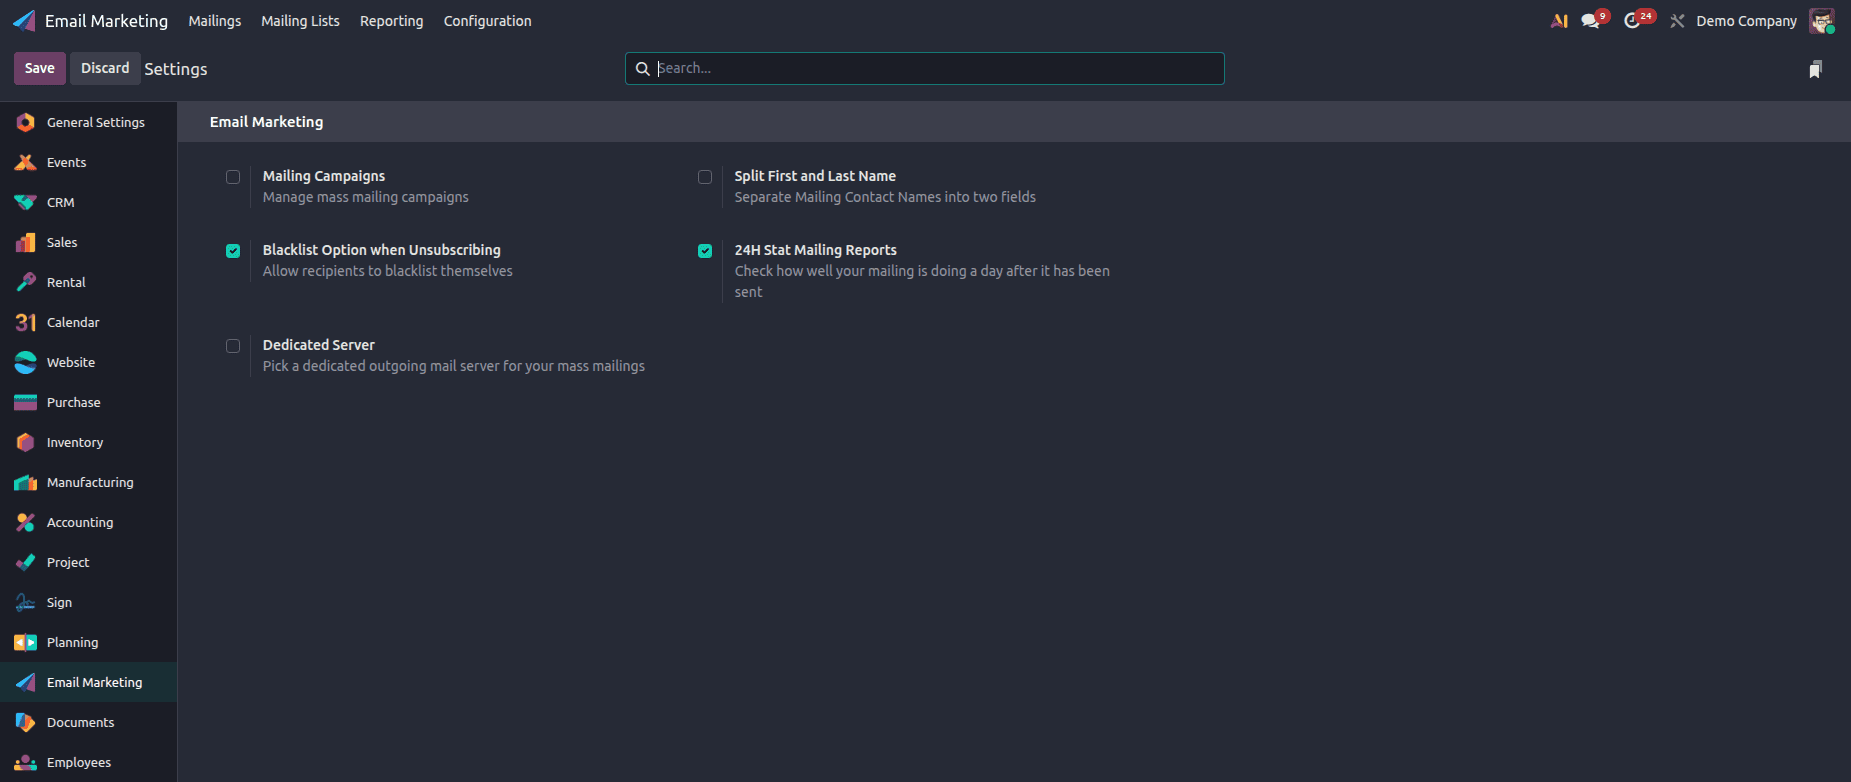
Key configuration options include:
- Dedicated Server: Optionally connect a dedicated outgoing mail server for mass emails, separate from your transactional email server.
- Unsubscribe Links: Enable automatic one-click unsubscribe links — now enforced by default in Odoo 19 for GDPR compliance.
- Daily Limit: Set the maximum number of emails per day to avoid being flagged as spam.
- Tracking: Enable open and click tracking to capture real-time engagement data.
- Blacklist Management: Activate the blacklist feature to automatically exclude opted-out email addresses from all campaigns.
STEP 2 — CONFIGURE SETTINGS
Navigate to Email Marketing > Configuration > Settings, enable required features, and click Save.
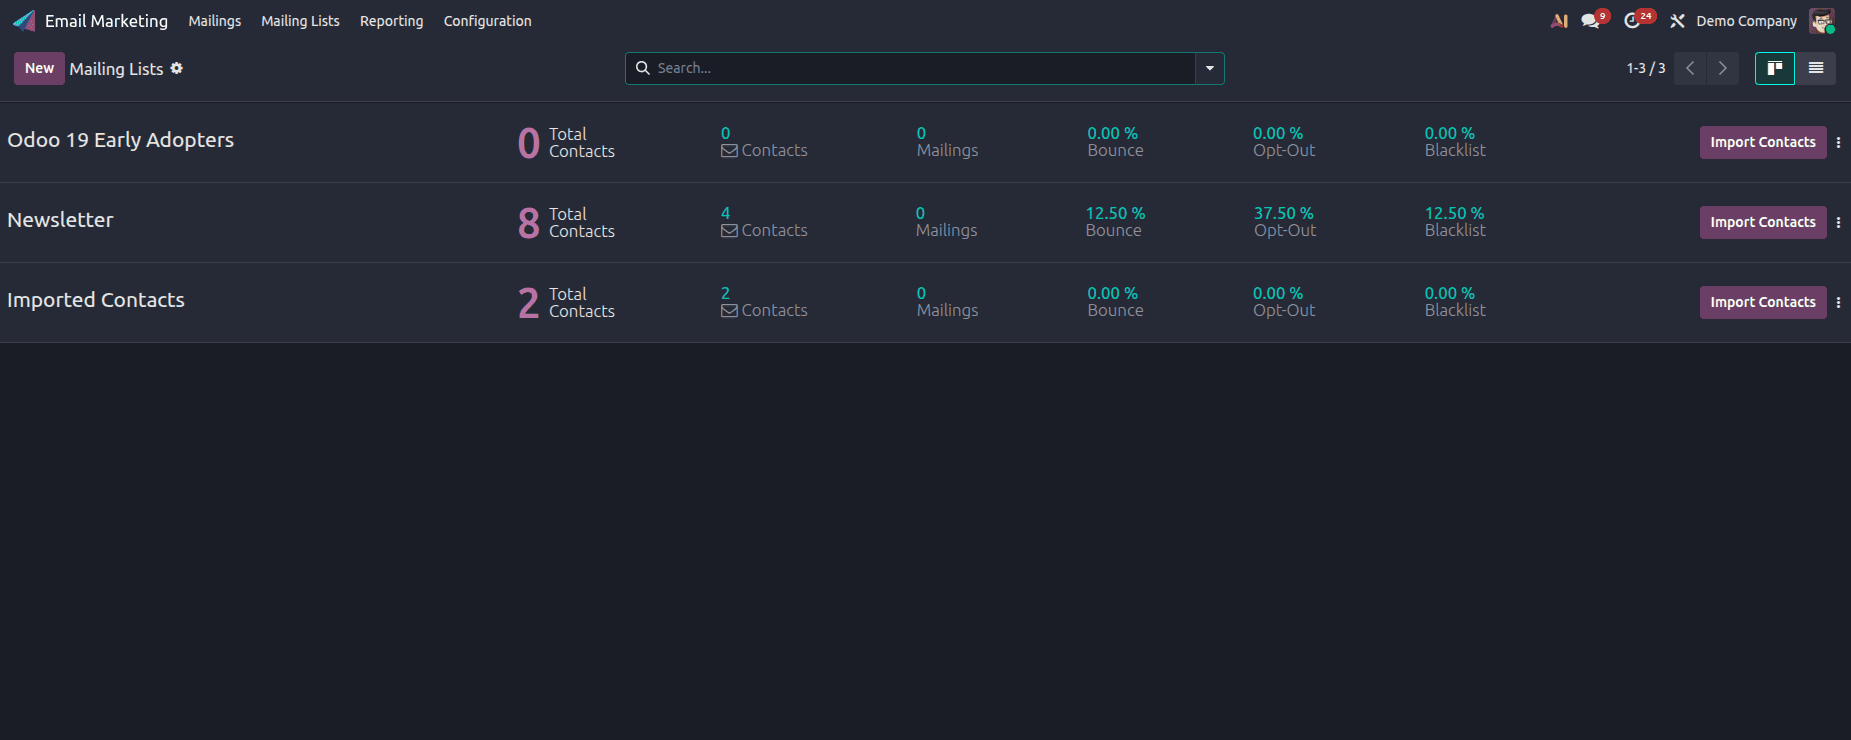
4. Creating and Managing Mailing Lists
Mailing Lists are the backbone of any mass mailing campaign. In Odoo 19, you can create segmented lists based on your audience type and populate them with contacts from across your Odoo database.
How to Create a Mailing List
STEP 3 — CREATE MAILING LIST
Navigate to: Email Marketing > Mailing Lists > Mailing Lists > New
- Mailing List Name: Enter a descriptive name (e.g., "Odoo 19 Early Adopters").
- Show in Preferences: Enable this to let subscribers manage their own subscriptions from the email footer.
- Save the record and click on Recipients to add or import contacts.
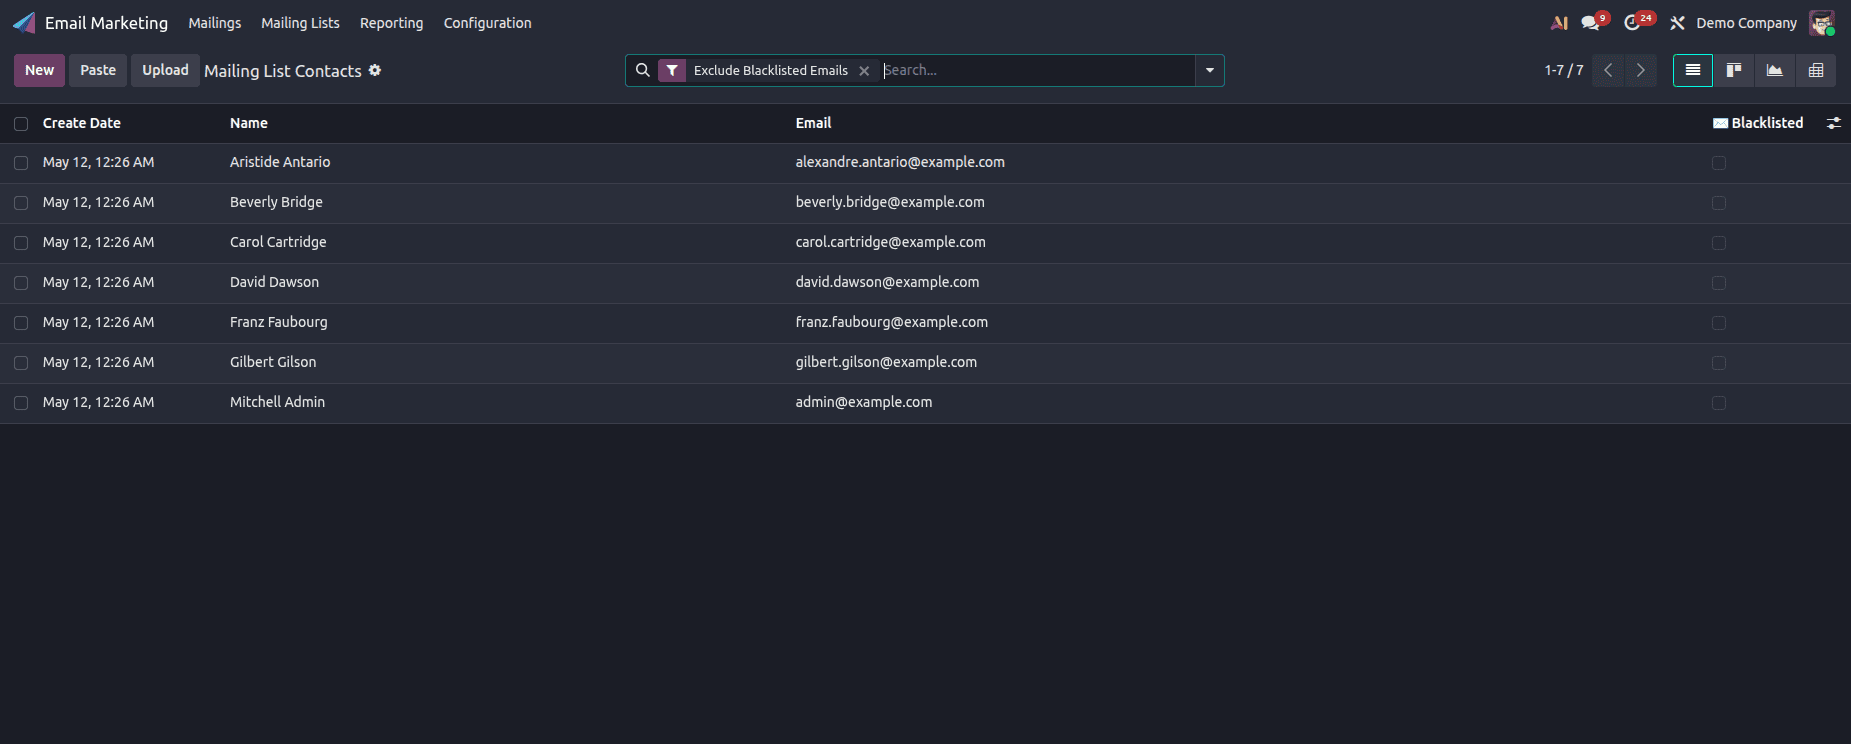
Managing Mailing List Contacts
Go to Mailing Lists > Mailing List Contacts to add individual contacts or bulk-import them via a CSV file. Each contact record includes:
- Contact Name and Email address
- Company Name and Country
- Tags for segmentation
- Subscription status per mailing list
5. Creating a New Mass Mailing Campaign
With your mailing list ready, you can now create your first mass mailing. Click on New from the Email Marketing dashboard.
STEP 4 — CREATE A NEW MAILING
Go to: Email Marketing > Mailings > New
Mailing Form Fields
| Field | Description |
| Subject | Email subject line — appears in the recipient's inbox |
| Recipients | Target audience: Mailing List, Contacts, Leads, Customers, etc. |
| Mailing List | Select one or more previously created mailing lists |
| Send From | The "From" email address displayed to recipients |
| Reply To | Email address where replies will be directed |
| Schedule | Send now or schedule for a future date and time |
| Campaign | Assign to a marketing campaign for group analytics |
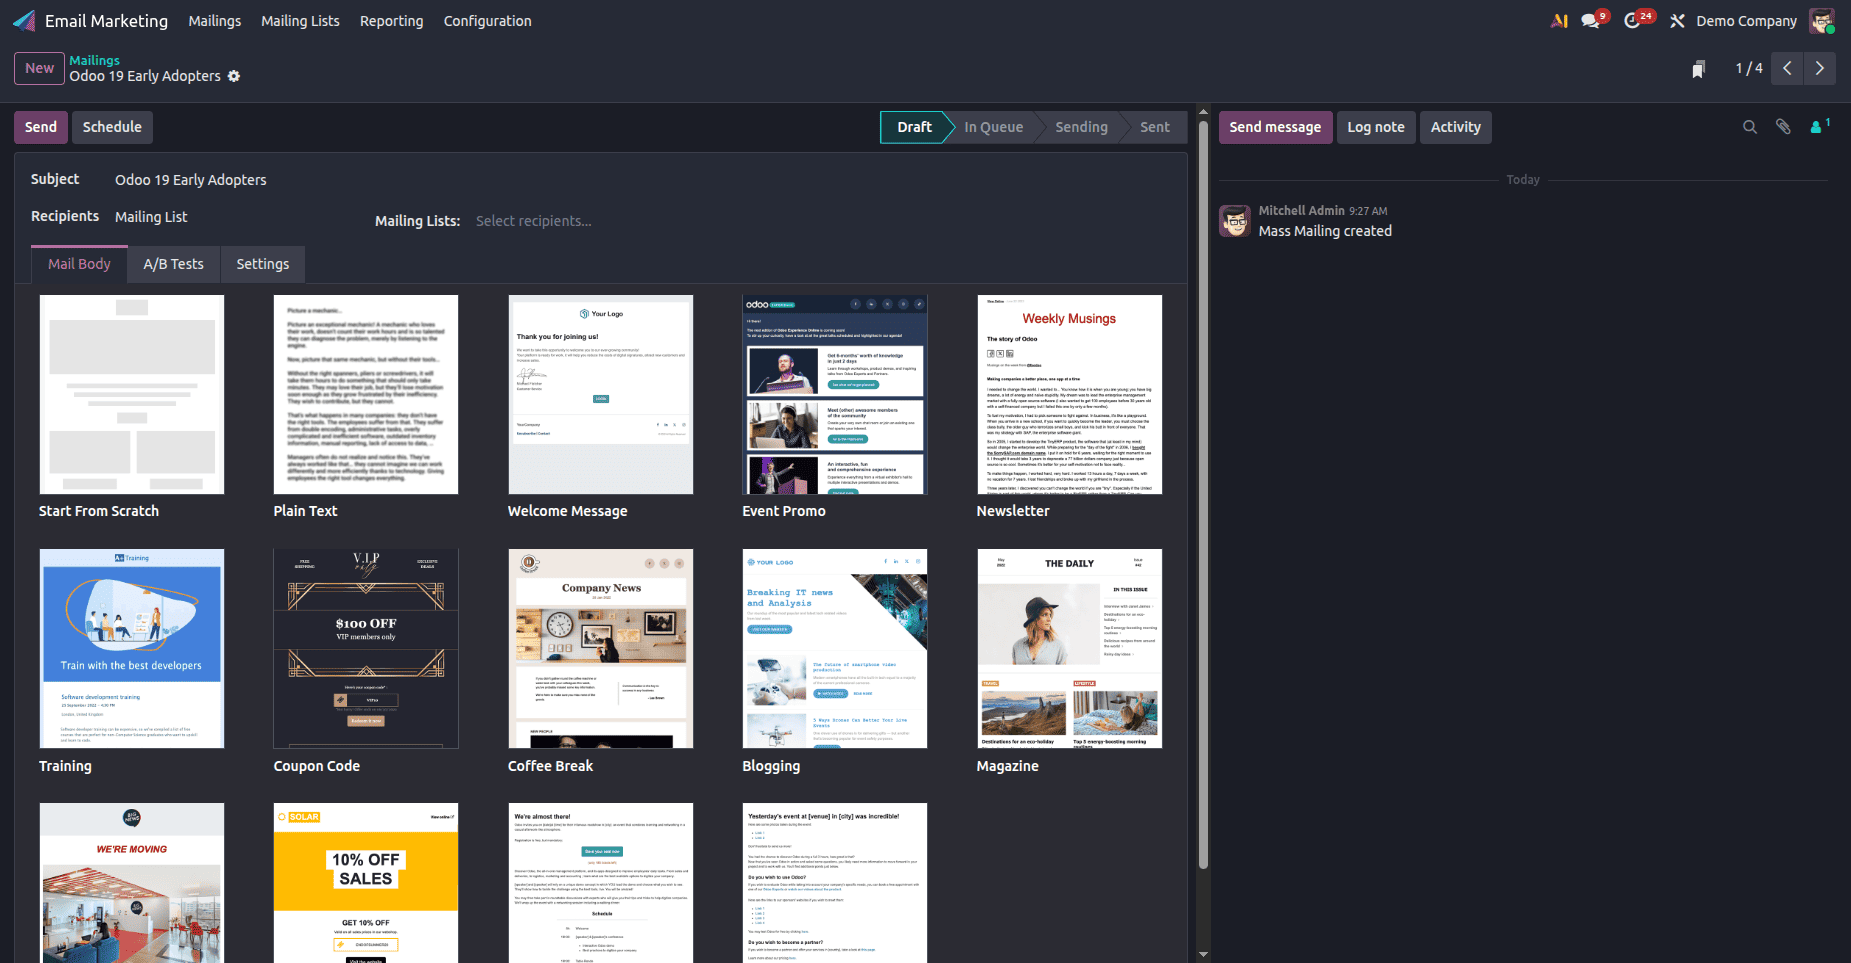
6. Designing the Email Body
Odoo 19's drag-and-drop email builder has been significantly enhanced. You can design stunning, responsive emails without any coding knowledge.
Available Design Options
- Drag & Drop Builder: Compose email layouts visually using text blocks, image placeholders, buttons, dividers, and social icons.
- Pre-built Templates: Odoo 19 ships with a refreshed library of modern, responsive email templates sorted by use case (Promotions, Events, Newsletters, etc.).
- HTML Editor: Advanced users can switch to raw HTML mode for full control over the email markup.
- Dynamic Variables: Personalise emails using merge tags like {{object.name}}, {{object.company}}, etc.
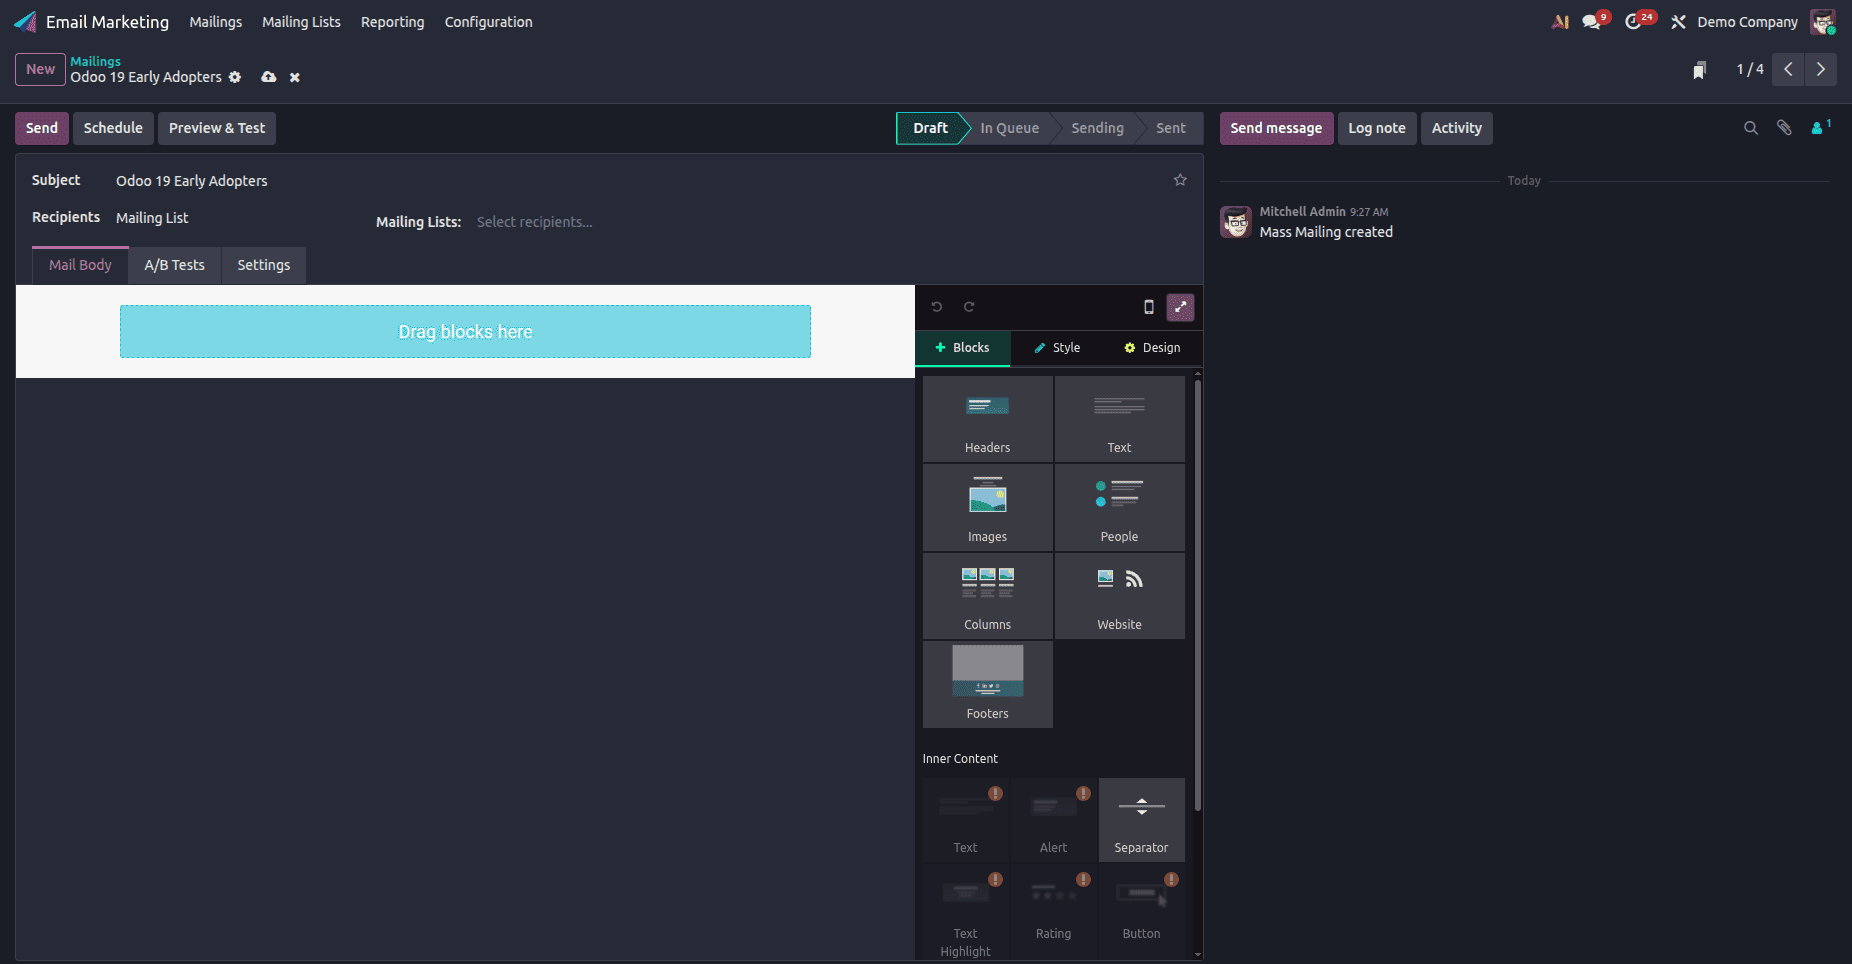
Note: Use the Preview button in Odoo 19 to visualise how your email will appear on different devices (desktop, tablet, mobile) before sending.
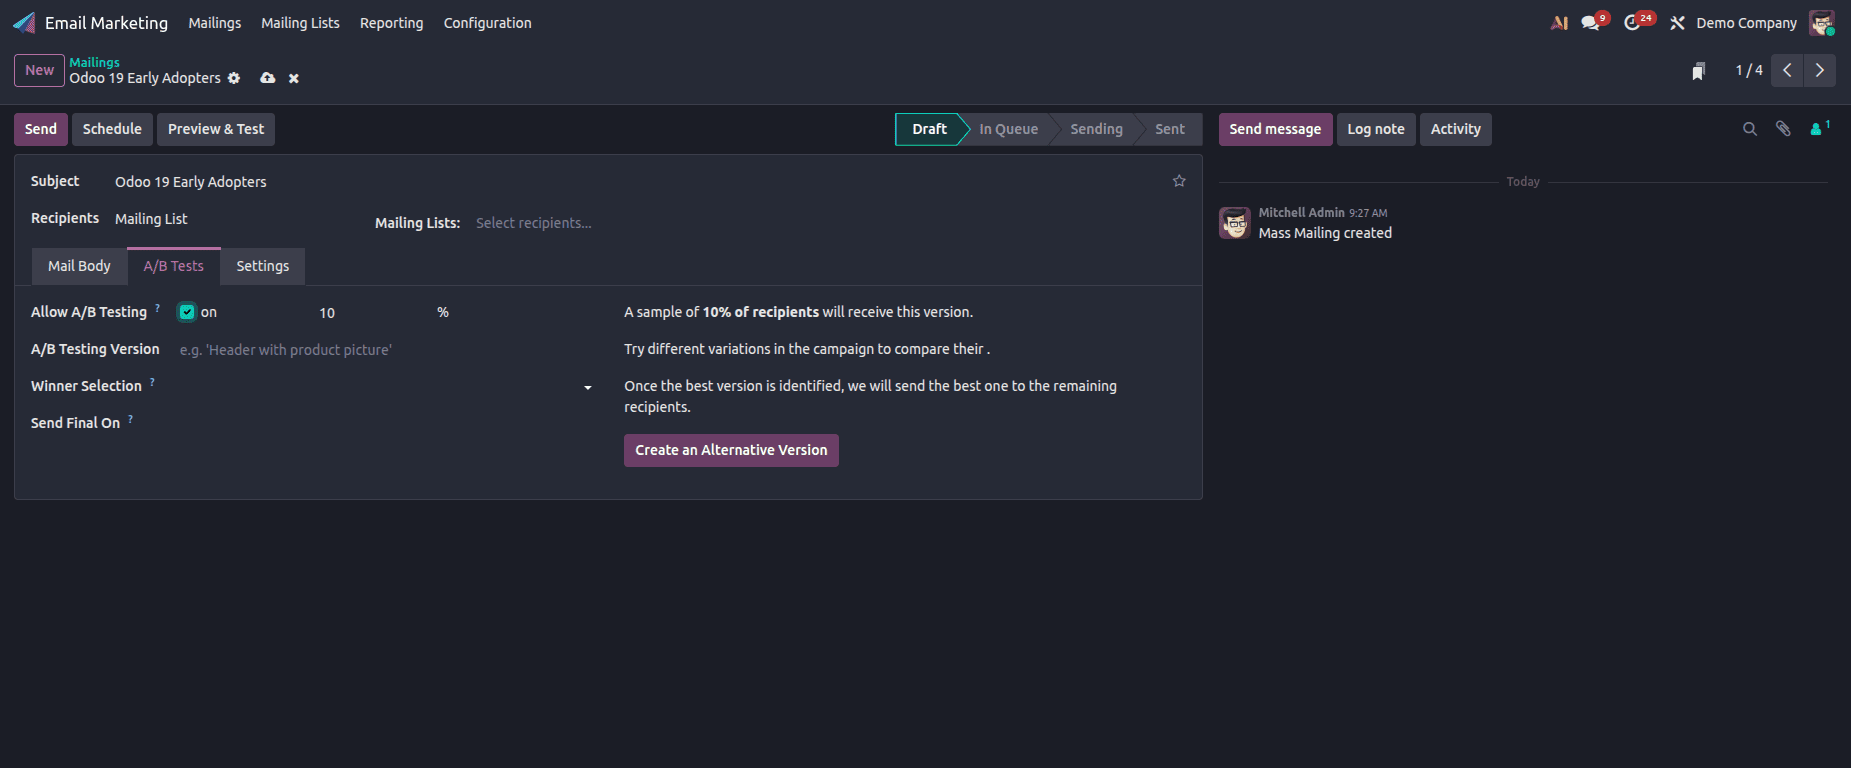
7. A/B Testing in Mass Mailing
Odoo 19 includes a built-in A/B Testing feature that lets you compare two different email versions to determine which one performs better before sending the winning version to the entire audience.
Setting Up an A/B Test
STEP 5 — ENABLE A/B TESTING
In the new mailing form, toggle A/B Test to ON. Set the percentage of recipients for each variant, define the winning criteria (Open Rate, Click Rate, or Reply Rate), and choose when the winner is selected (after 24h, 48h, or a custom period).
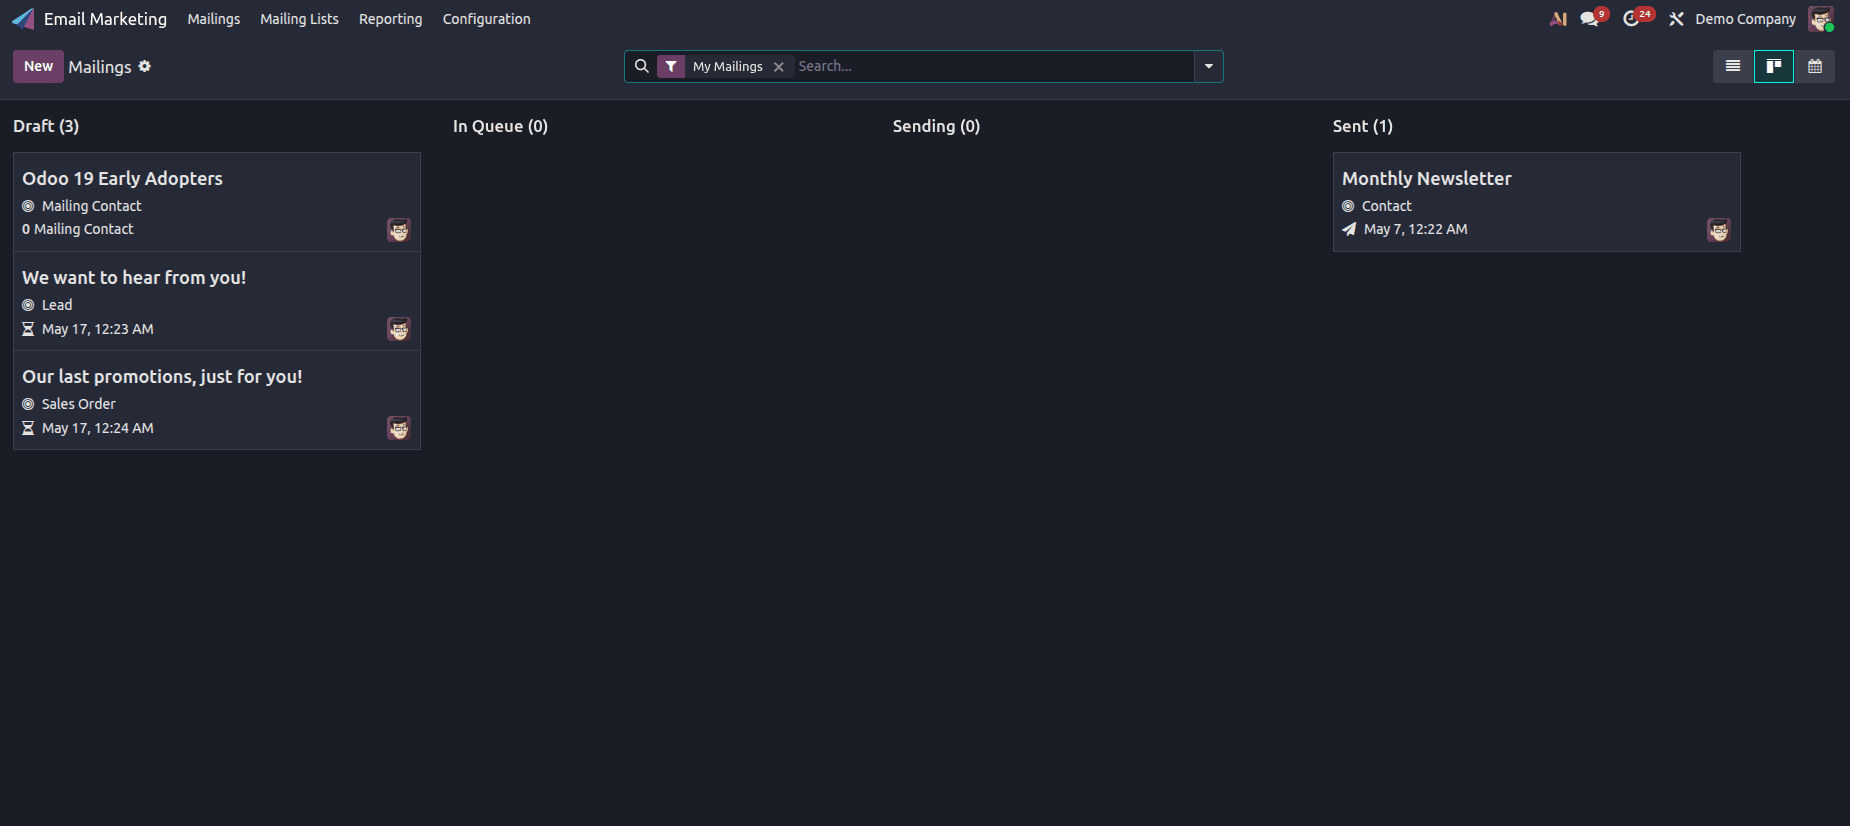
8. Dashboard Views and Tracking
The Odoo 19 Email Marketing dashboard offers three views to manage and monitor your campaigns:
1. List View
The default view displays all mailings in a tabular format with real-time statistics including Date, Subject, Responsible, Sent, Delivered %, Opened %, Clicked %, Replied %, and Status.
2. Kanban View
Organizes mailings across pipeline stages: Draft > In Queue > Sending > Sent. Ideal for visualizing campaign progress at a glance.
3. Calendar View
Displays scheduled mailings on a calendar. Useful for planning campaign timelines and avoiding communication overlap across different mailing lists.
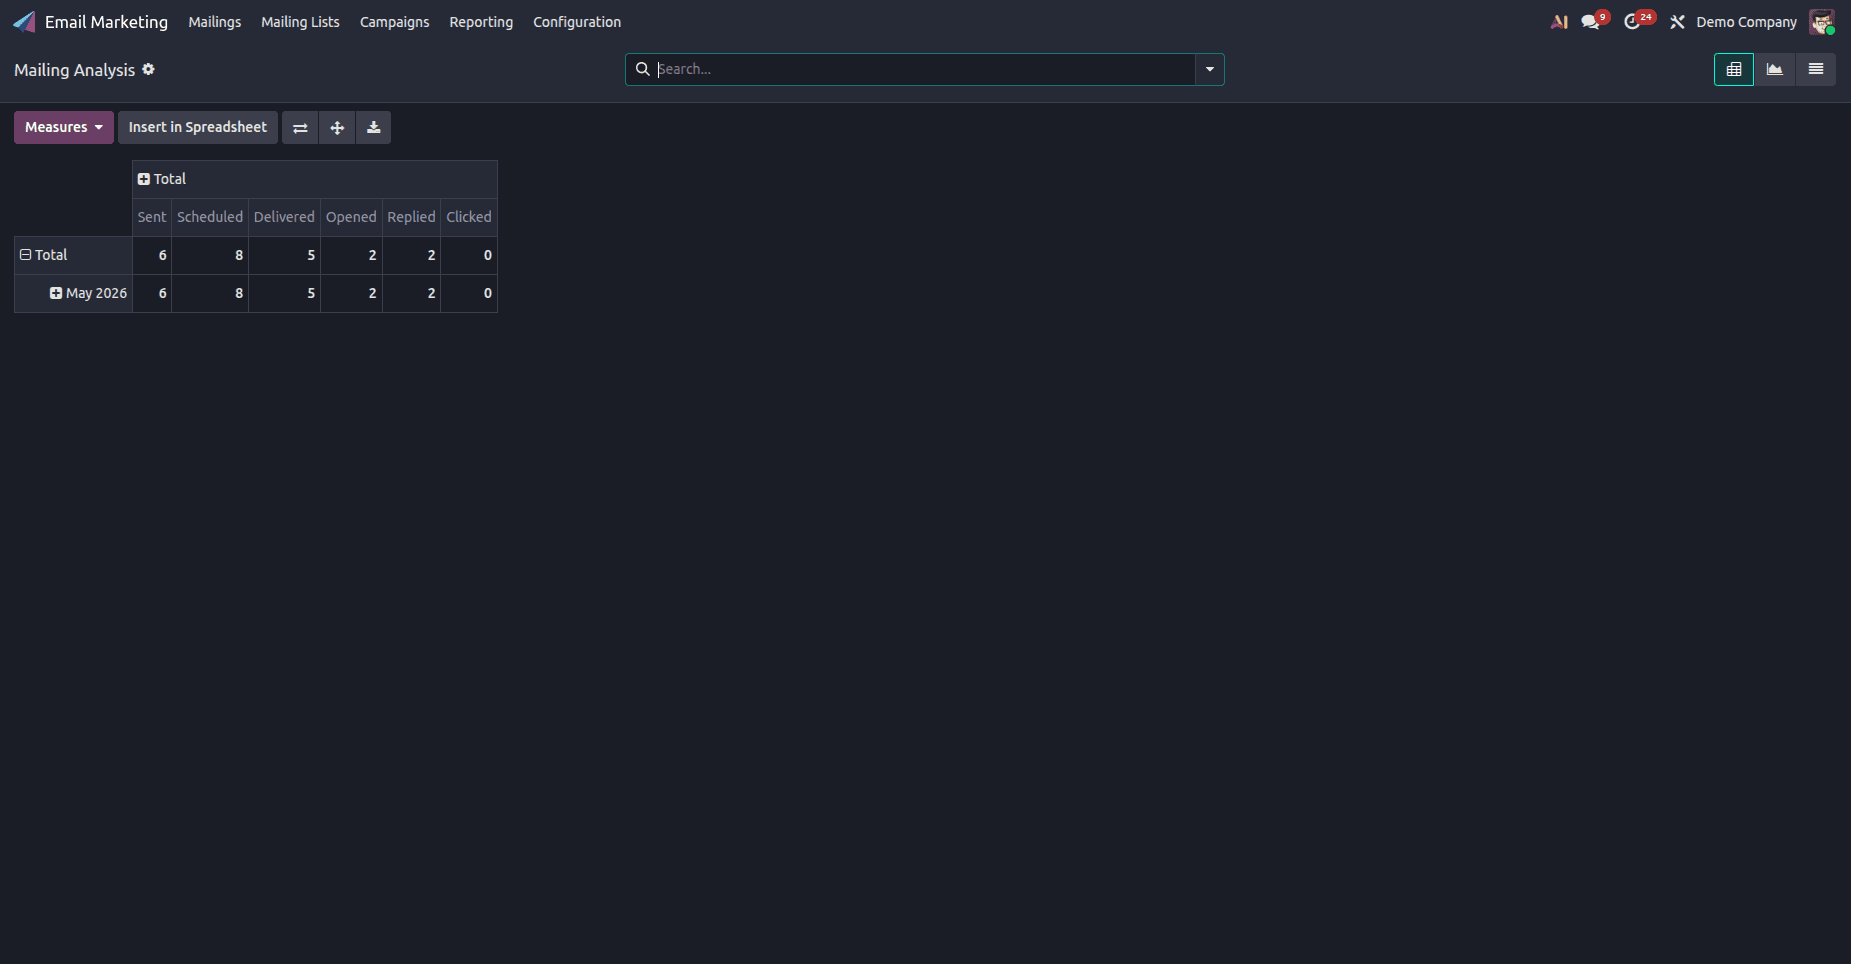
9. Analysing Campaign Performance
After the mailing is sent, Odoo 19 provides detailed analytics directly on the mailing record. Key metrics tracked include:
| Metric | What it Measures |
| Sent | Total number of emails dispatched |
| Delivered | % of emails that reached the recipient inbox |
| Opened | % of recipients who opened the email |
| Clicked | % of recipients who clicked at least one link |
| Replied | % of recipients who replied to the email |
| Bounced | Emails that could not be delivered |
| Unsubscribed | Contacts who opted out after this campaign |
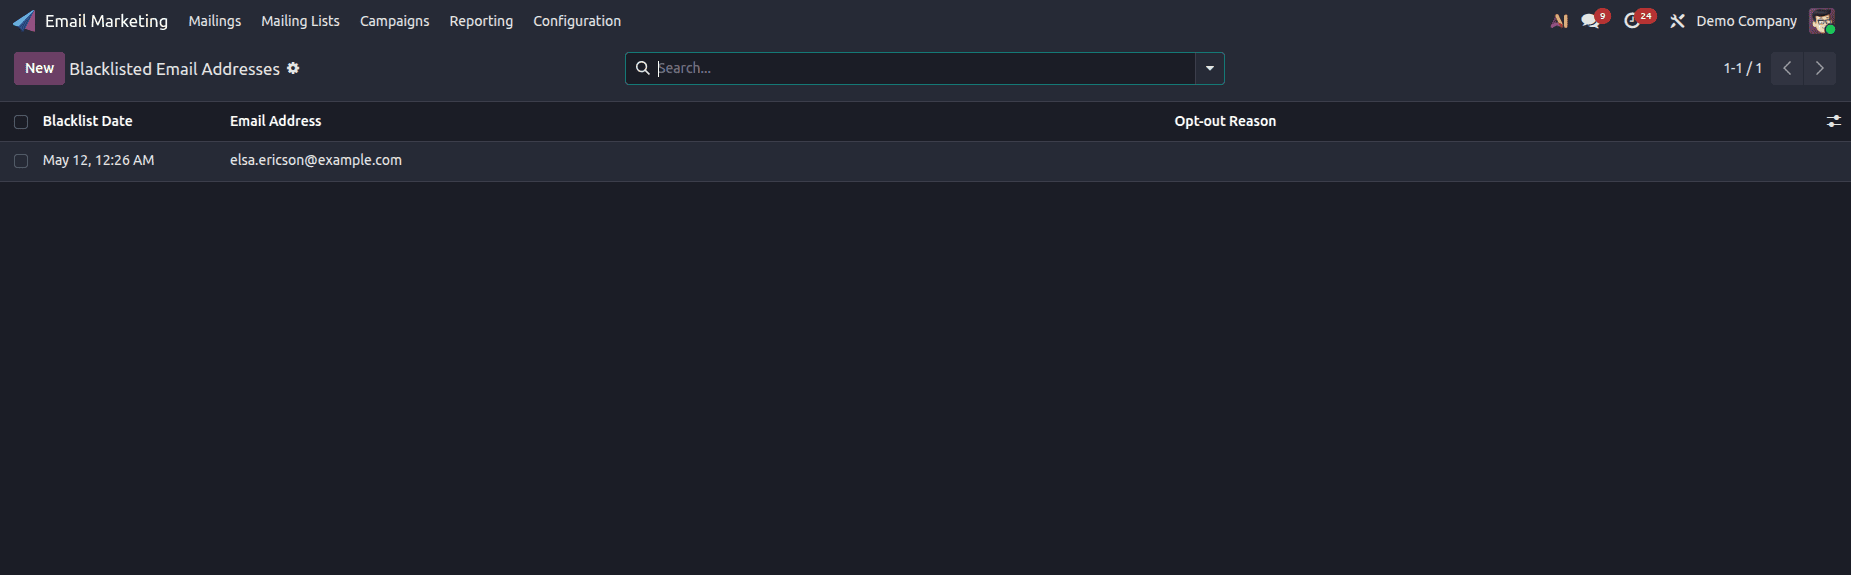
10. Blacklist Management
Odoo 19 enforces robust blacklist management to ensure compliance with GDPR and anti-spam regulations. Any contact who unsubscribes is automatically added to the Blacklist and excluded from all future campaigns.
Navigate to Email Marketing > Configuration > Blacklist to view, add, or remove email addresses from the blacklist. You can also import a blacklist CSV file from a previous platform during migration.
Odoo 19 - Mass Mailing is an advanced mass emailing application designed to help businesses run their email marketing campaigns professionally. From creating attractive templates for the email and managing segmented mailing list, to performing A/B testing and monitoring analytics - Odoo 19 makes available to users all the tools required for conducting a successful email marketing campaign.
It goes without saying that using Mass Mailing in Odoo 19 would enable organizations, especially those with a growing scale of operations to improve customer engagement and achieve better conversion rates in the process of running their marketing campaigns.
To read more about Overview of Odoo 18 Email Marketing Module, refer to our blog Overview of Odoo 18 Email Marketing Module.